
Remember me


GMKtec is back with the AD-GP1 External GPU Docking Station; this is actually a follow-up to my review of the GMKtec M7 Ultra Mini PC that I did exactly a month ago.
Before we get underway, here is a disclaimer: GMKtec provided a free sample without any review pre-approval. Below are its full specifications.
GMKtec AD-GP1Dimensions
6.45"L x 4.35"W x 1.57"H (16.4 x 11.1 x 4.0 cm)
Weight
0.7kg (1.54 lbs)VRAM
8 GBdGPU
AMD Radeon RX 7600M XT (Navi 33, 6nm, 32 CUs)MSRP
$569.99If you can find a 7600 XT PC graphics card to purchase, this eGPU actually falls below the current pricing that I found of $599.99 on Amazon and Newegg. It's currently about $90 cheaper, and you can even get it for less on the GMKtec website. Unfortunately, it is sold out in every region as of writing.
Also, please note that I completed this review in January, but made the decision to wait until the AD-GP1 was back in stock on Amazon U.S. and U.K.
IntroductionThe AD-GP1 is powered by the in Q1 2023-released Radeon RX 7600M XT featuring 8GB of GDDR6 memory. It is a mobile graphics chip built on the 6 nm process, and based on the Navi 33 graphics processor. In addition, its Navi 33 XTM variant supports DirectX 12 Ultimate.
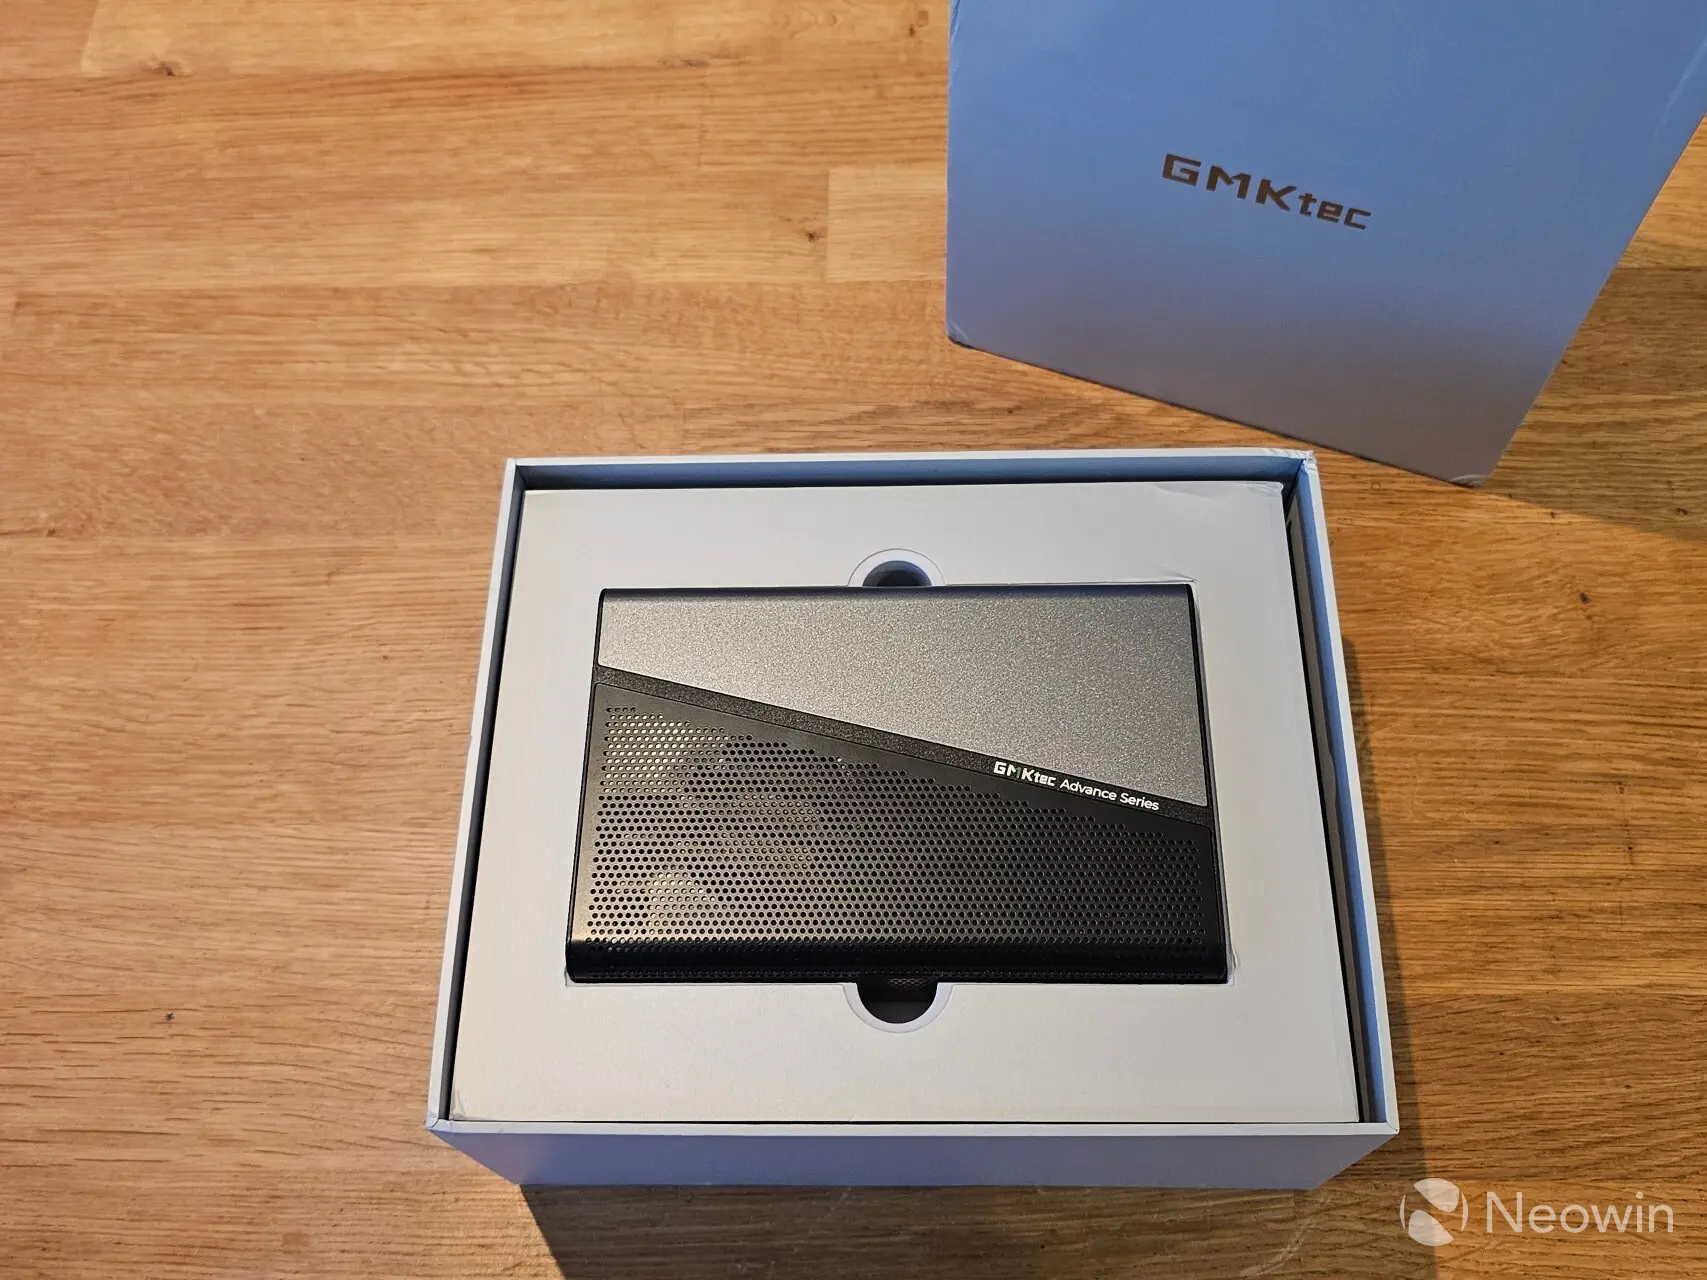
The packaging is very similar to what we're used to seeing with Mini PCs. Once the box top is lifted off it reveals the AD-GP1 sitting in a foam cushion wrapped in a protective plastic sleeve, below that is an envelope full of documentation. On the bottom, there are two cardboard boxes with the other components such as the power brick and lead, Type-C cable (1M), and Oculink cable.
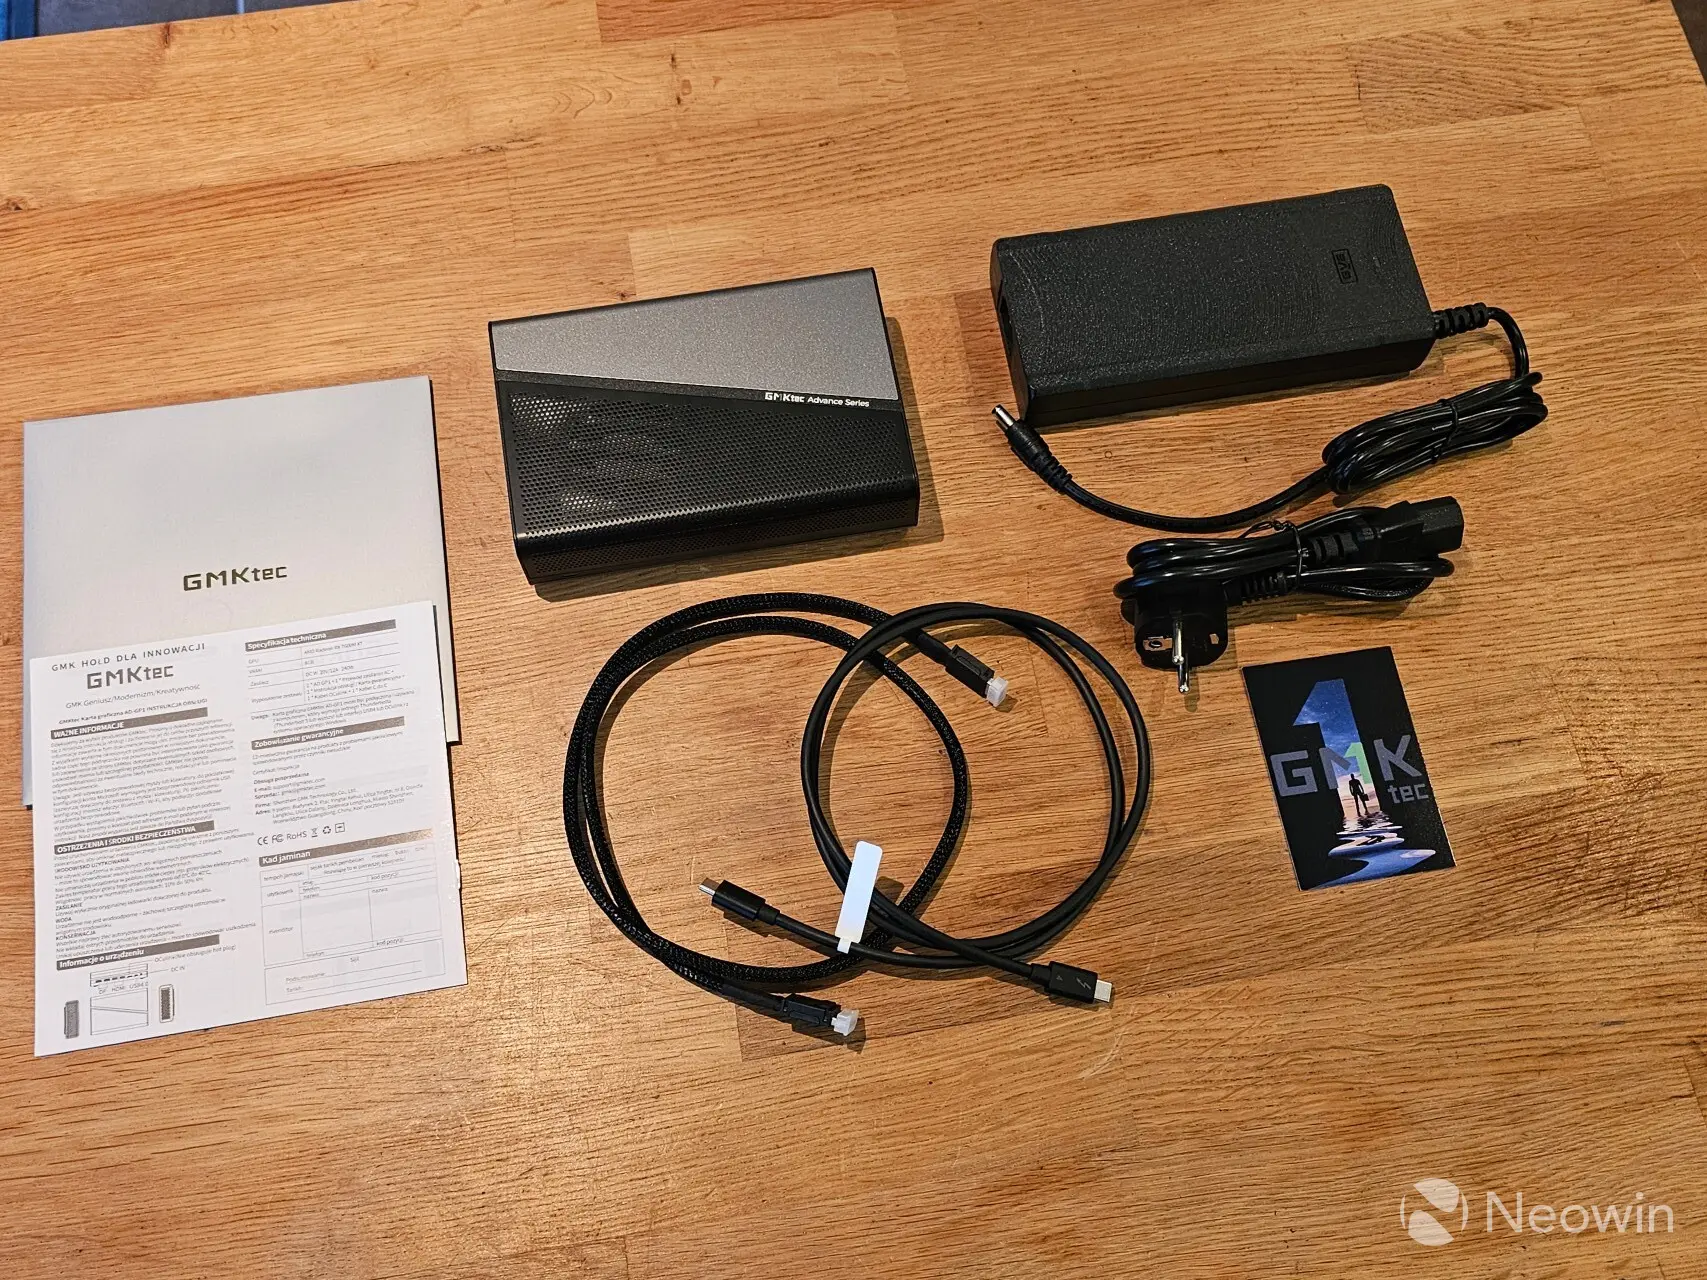
What’s In The BoxGMKtec AD-GP1 eGPU Dock
Power Supply Adapter (20V 12A 240W) Oculink Cable Type-C Cable (1M)Instead of providing a link to the online user manual on the product page, GMKtec has a web page with a couple of "how to" videos on setting up the AD-GP1. Anyway, I could only find a user manual on an external website that even offers a few more specifications than the official website, so yeah... thanks manuals.plus!
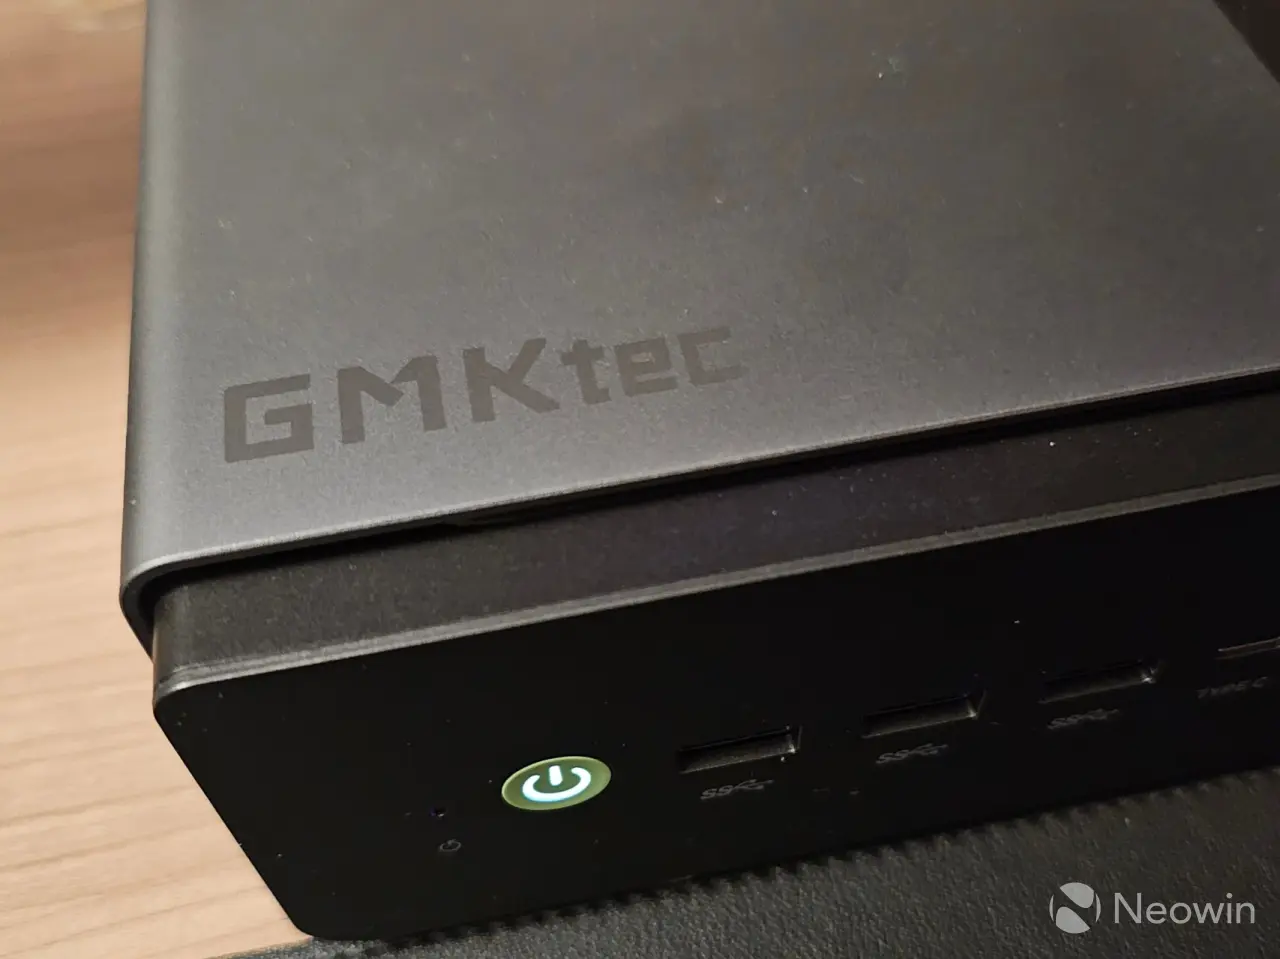
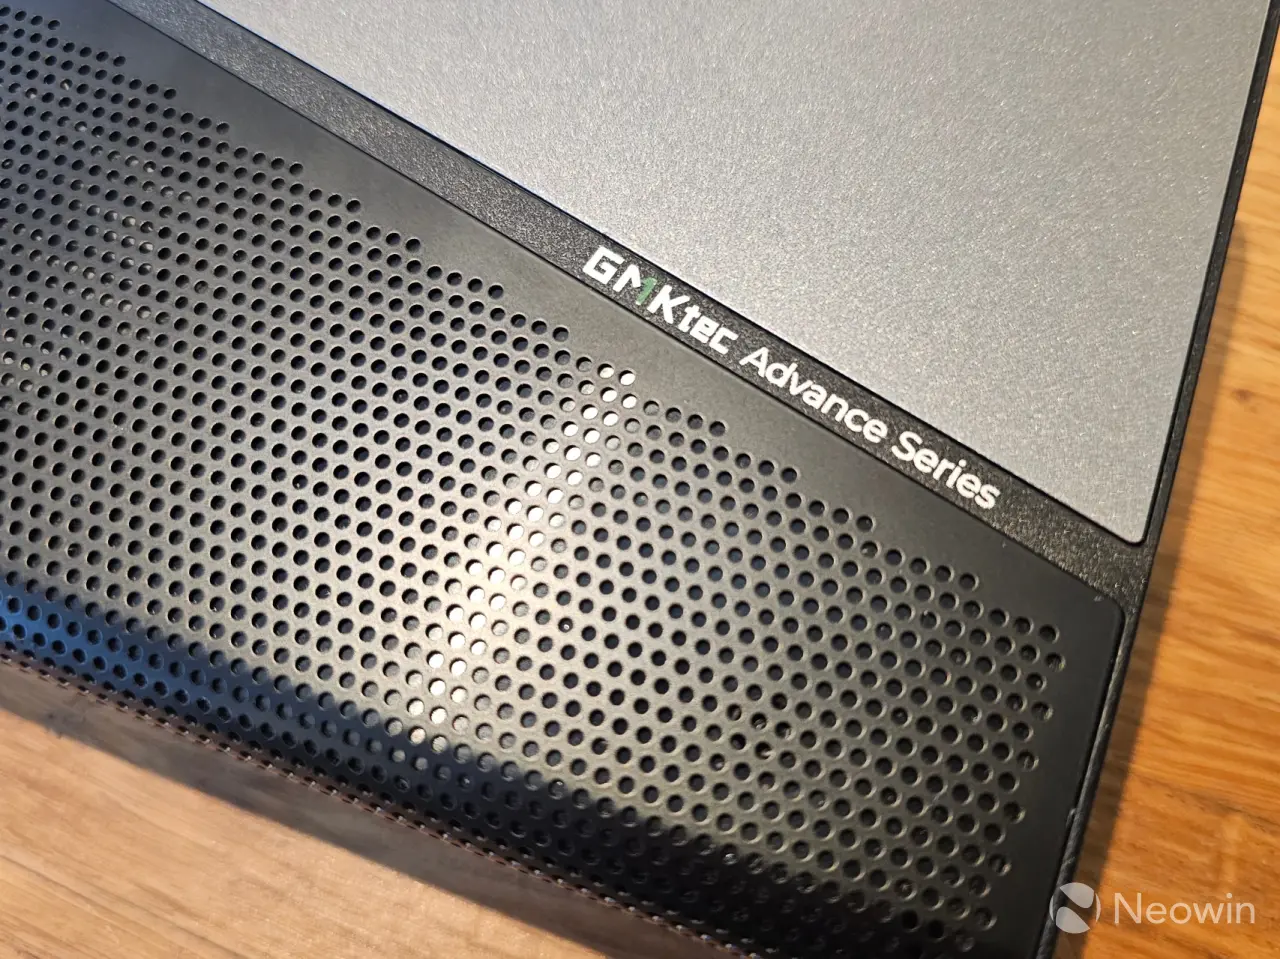
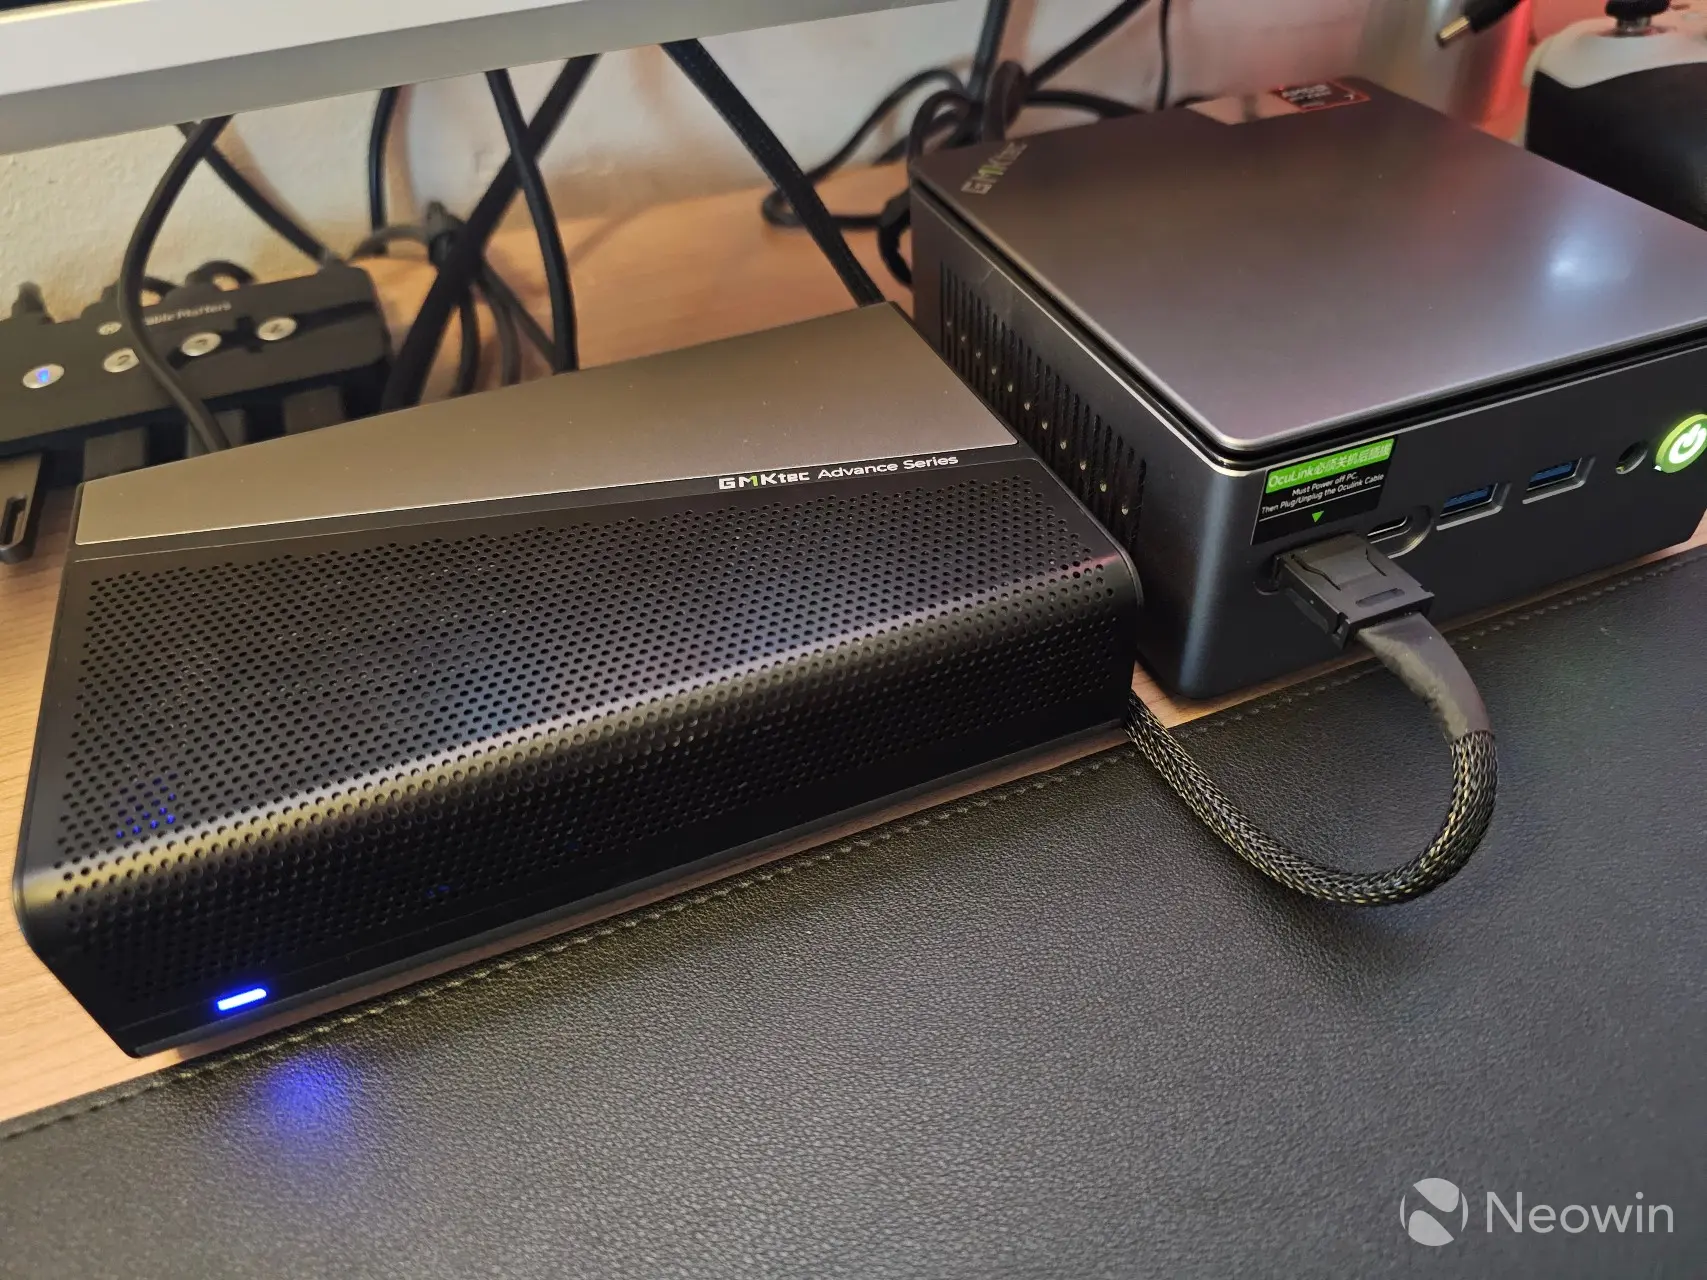
The AD-GP1 looks pretty sleek; it's wider than the M7 Ultra, but not as tall or long in depth. The housing is made up of a metal interior and a plastic exterior.
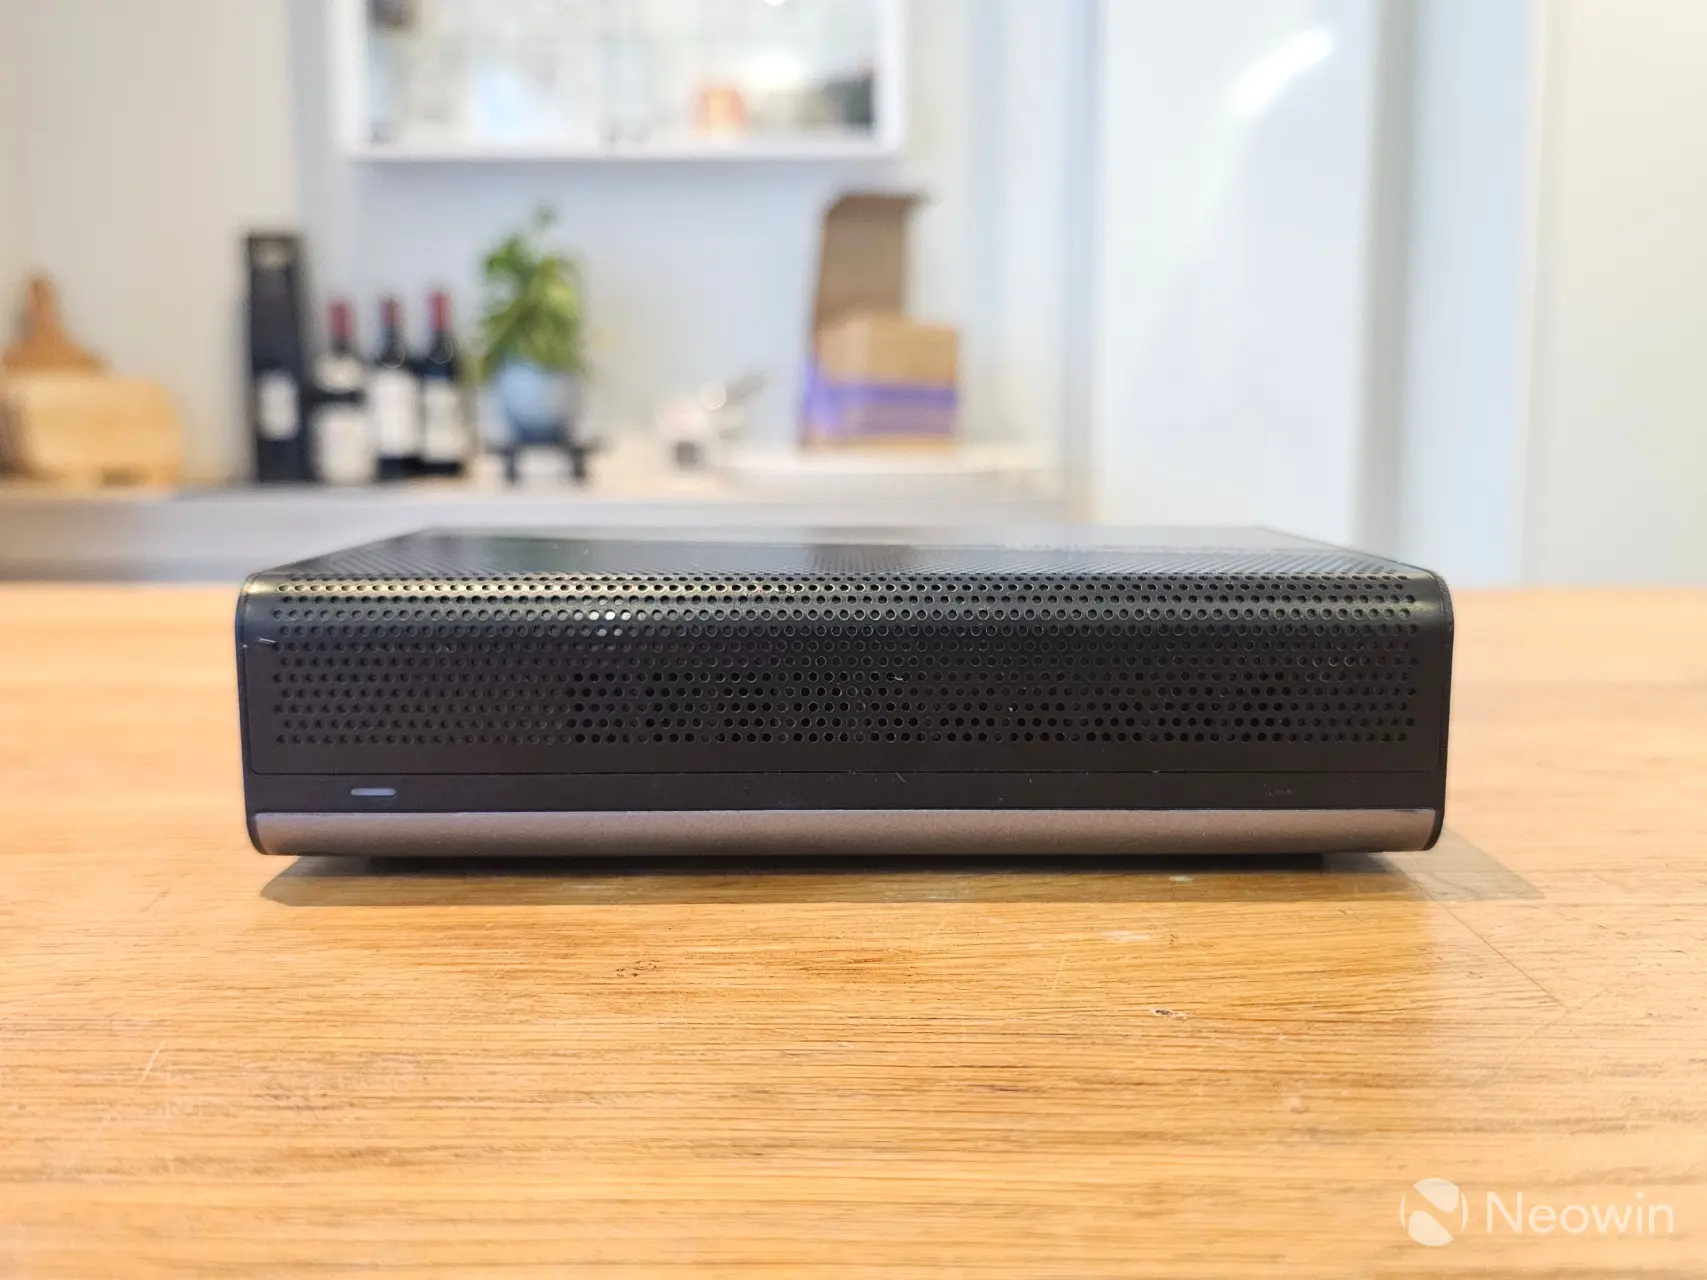
On the front, there is just the blue power LED.
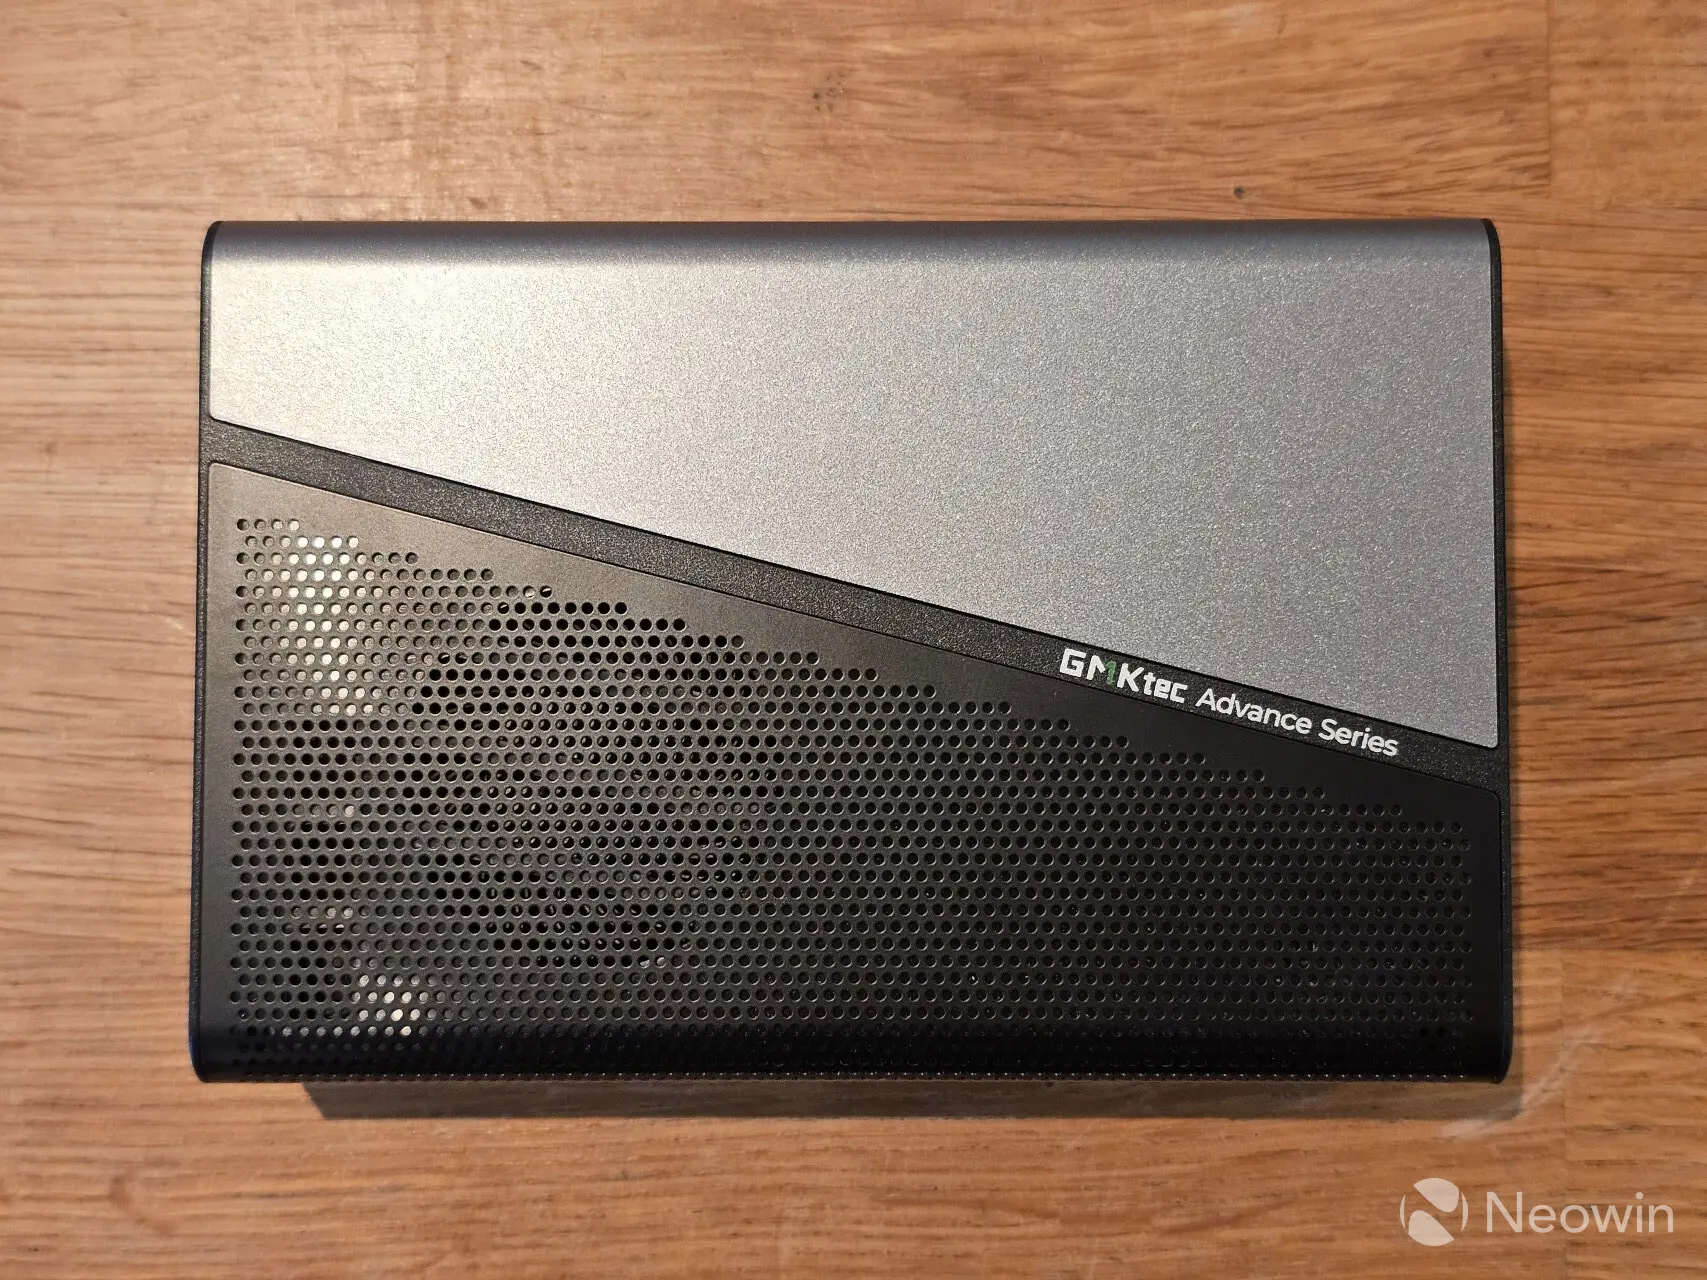
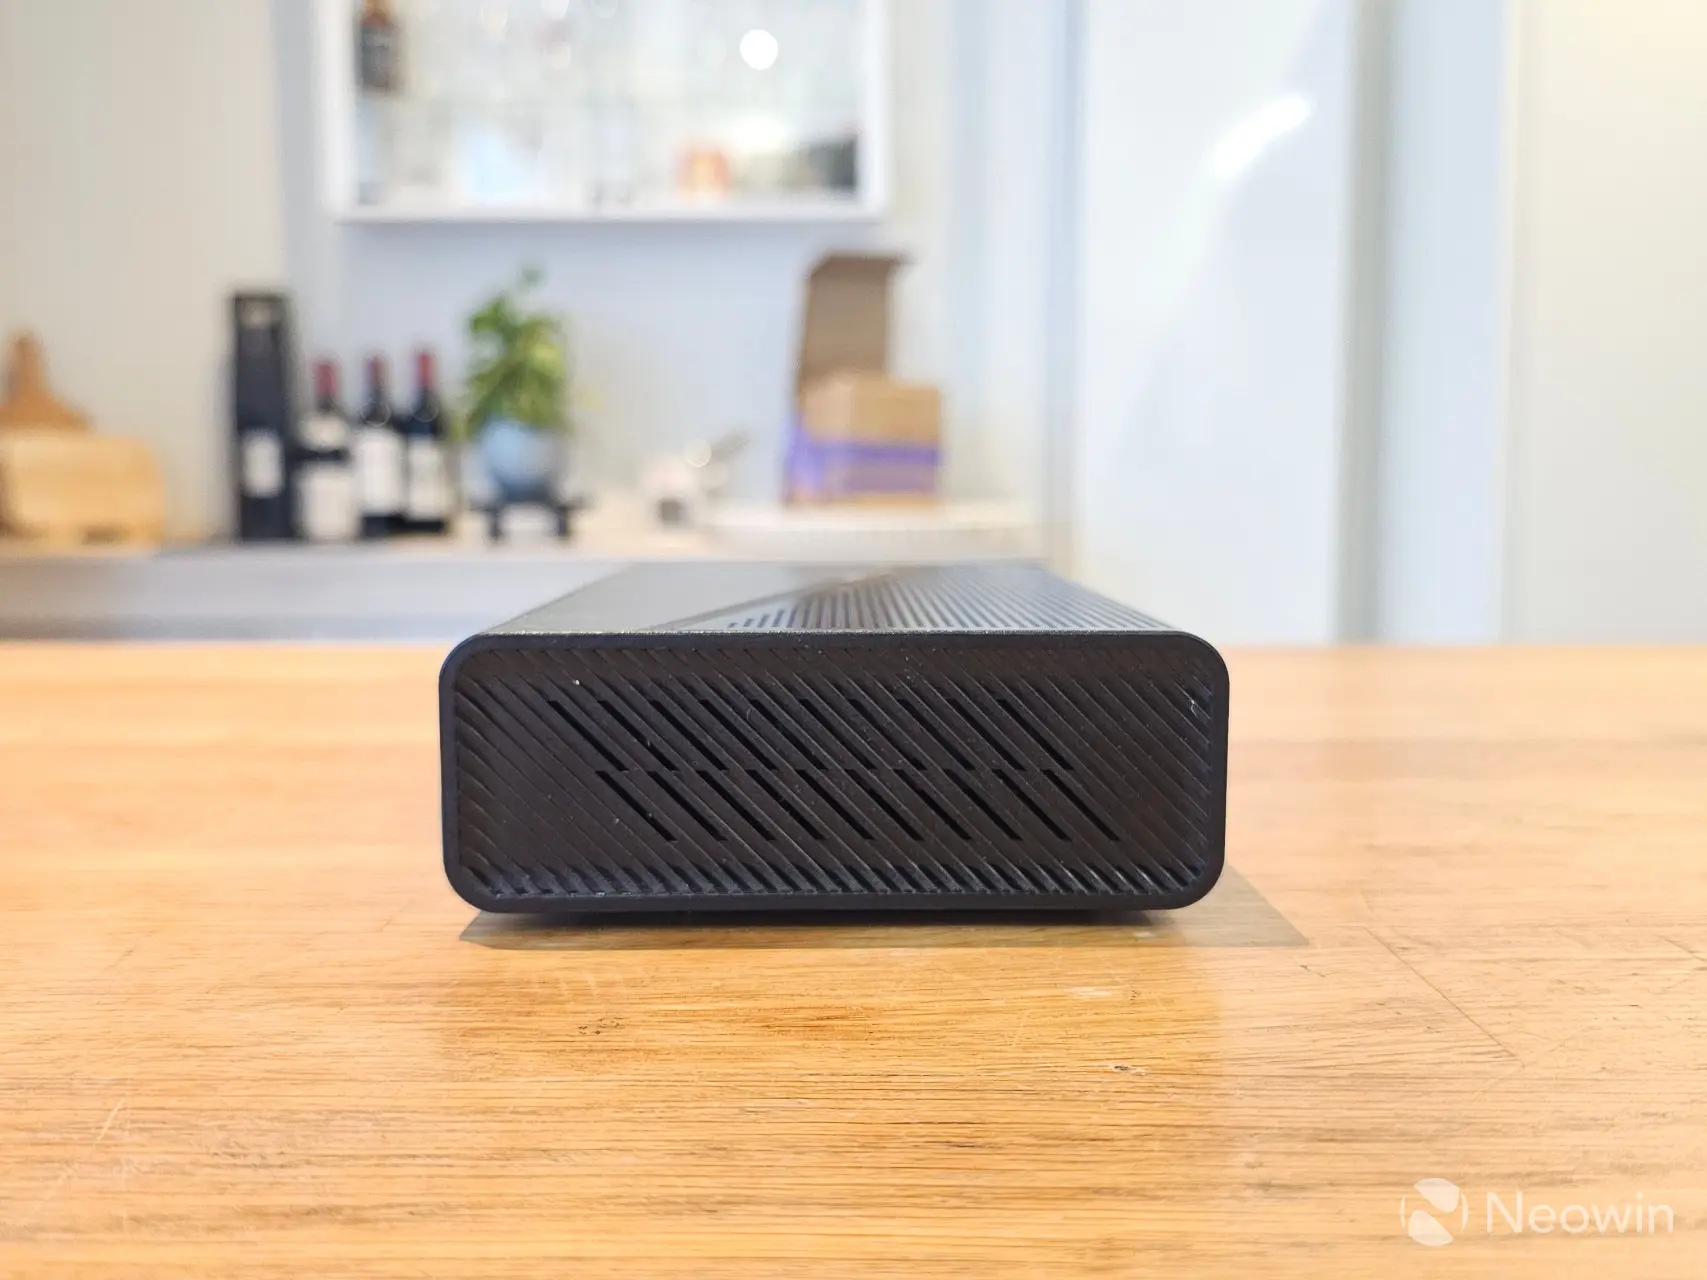
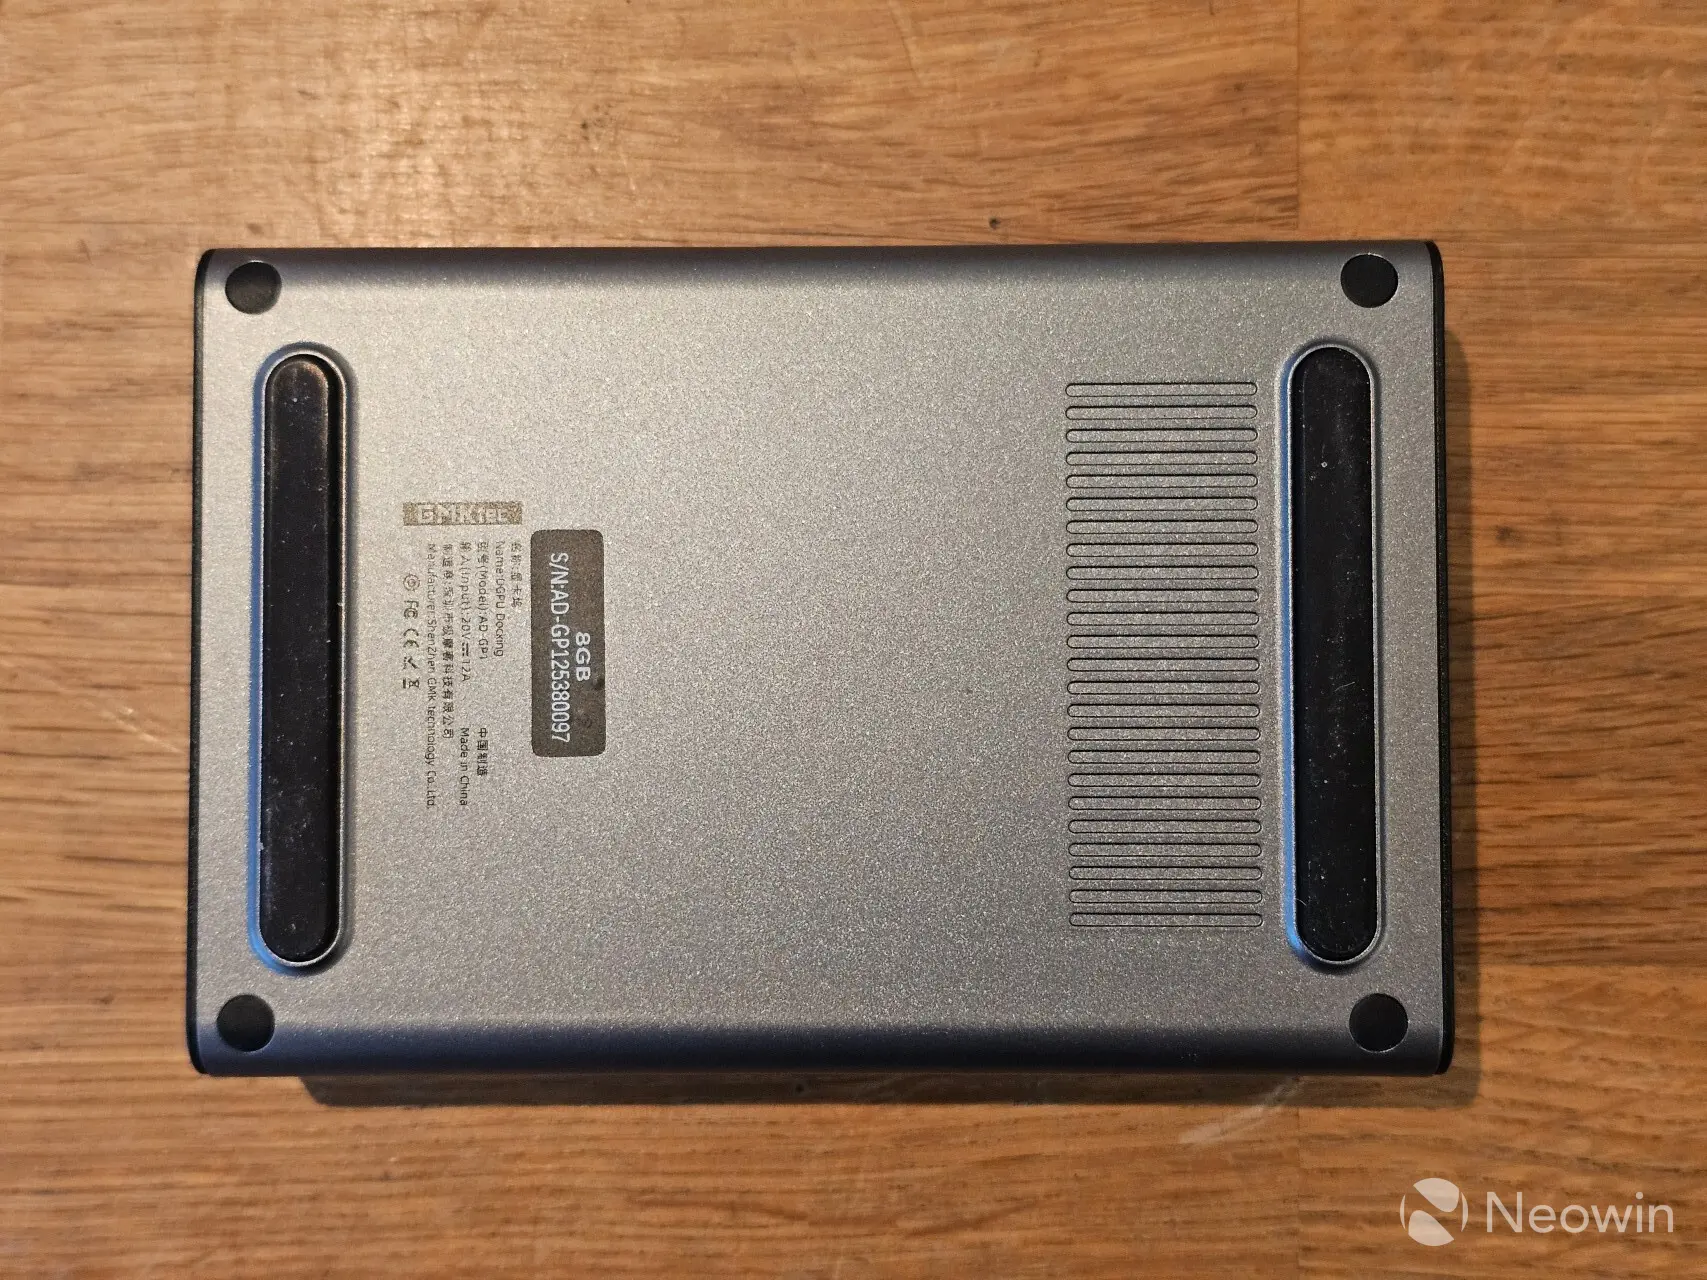
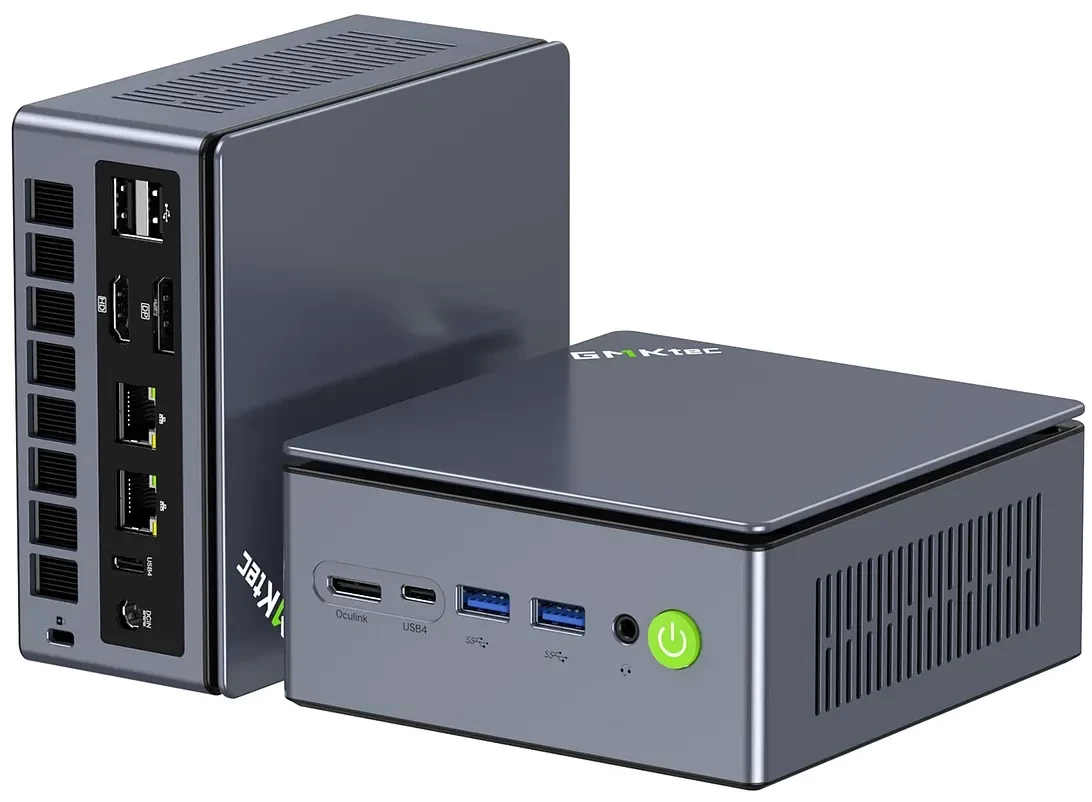
As far as looks go, it has a two-tone light and dark grey exterior, and it's not a fingerprint magnet. GMKTec says it is made up of a combination of "plastic and metal". Like most Mini PCs I have tested, it's physically possible to directly attach four screens to the AD-GP1 using the dual HDMI (2.1) and dual DisplayPort (2.0) ports. There's also a single USB4 port with Power Delivery to power an external monitor.
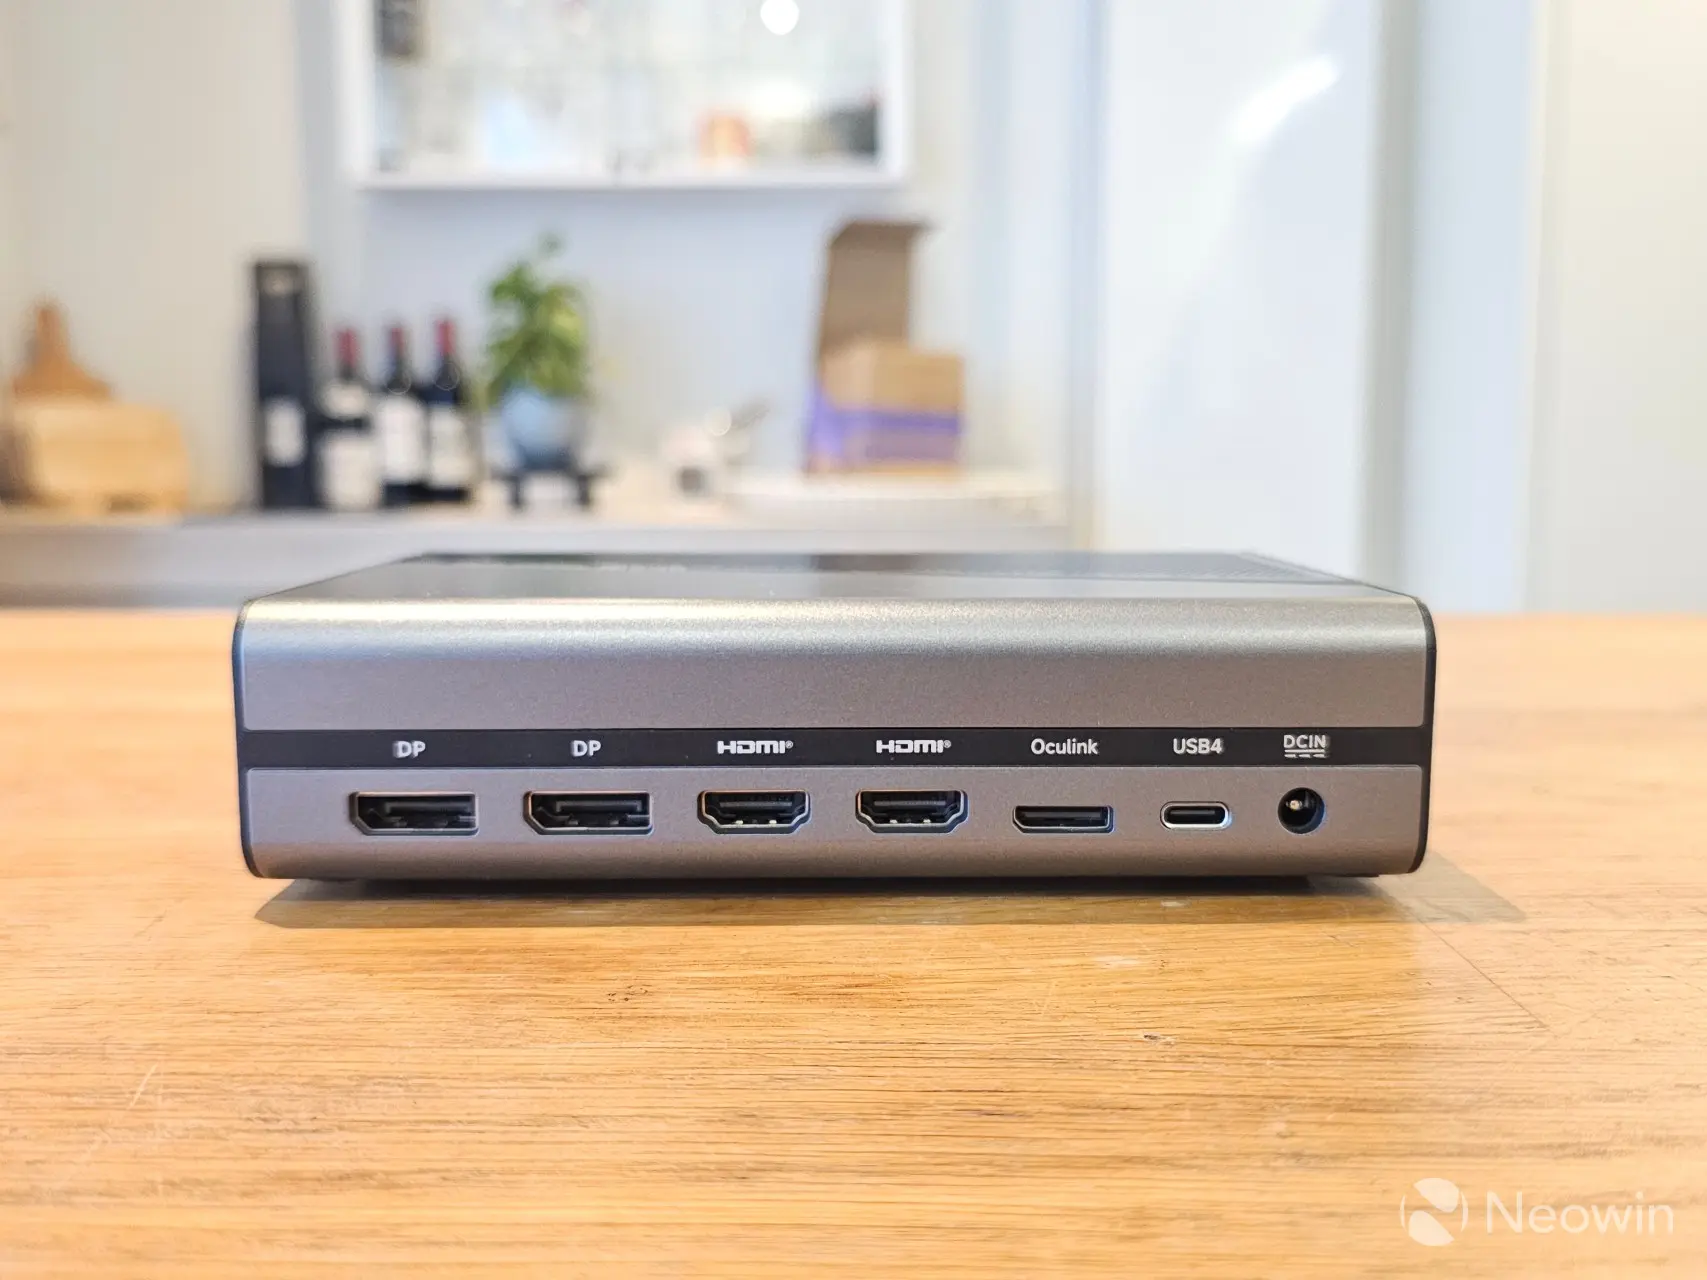
Regarding connectivity, around the back, from left to right, there are two DisplayPort 2.0 ports, two HDMI 2.1 ports, an Oculink port, a USB 4.0 port (PD up to 100W), and a barrel port for power.
TeardownNeedless to say, this isn't a product that requires a teardown, so we won't be doing it.
SetupSadly, the instructions are not included in the box, or on the official website, but thankfully manuals.plus has them listed, and it is imperative you follow them exactly, otherwise you risk damaging the motherboard of the device you are connecting it to.
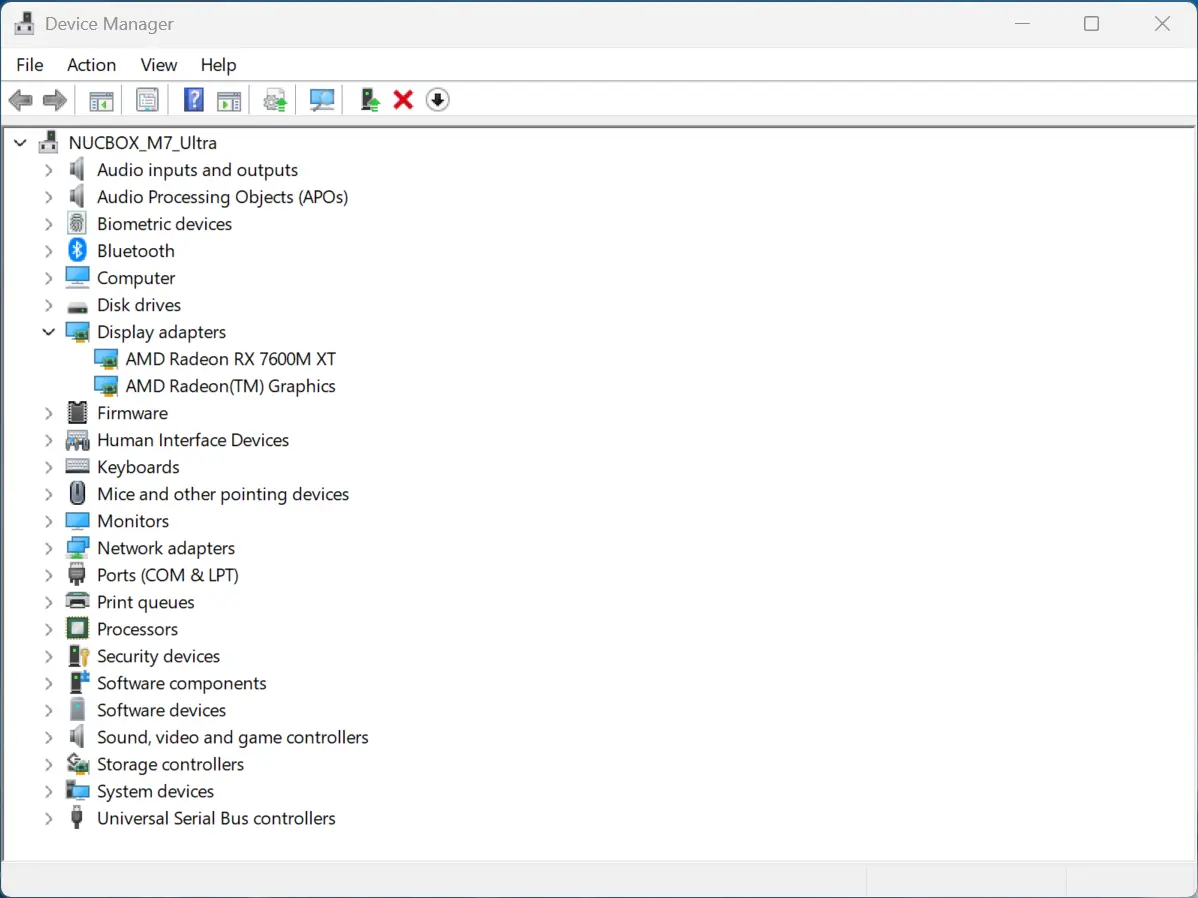
Power Off Devices: Ensure both the AD-GP1 eGPU dock and your host device (Mini PC, laptop, gaming console) are completely powered off before connecting any cables. (Important: The Oculink interface does not support hot-plugging. Plugging or unplugging while powered on may damage the motherboard.) Connect Oculink or USB4 Cable: Connect the provided Oculink cable to the Oculink port on the AD-GP1 and your host device. Alternatively, if your device supports USB4 (Thunderbolt 3 & 4 compatible), use the provided Type-C cable to connect to the USB4 port. Connect Power Adapter: Plug the 240W power supply adapter into the DC IN port on the AD-GP1, then connect it to a power outlet. Connect Display(s): Connect your monitor(s) to the AD-GP1 using the HDMI 2.1 or DisplayPort 2.0 outputs. The dock supports up to four displays simultaneously (2x HDMI2.1 for 8K@60Hz, 2x DP2.0 for 8K@60Hz). Power On: First, power on the AD-GP1, then power on your host device. This ensures the host device recognizes the eGPU during boot.Upon booting up with the AD-GP1 connected, it is recognized as a Microsoft Basic Display Adapter, even though the AMD Adrenaline drivers are already installed for the Radeon 780M, it is still required to install the Adrenaline driver again in order for Windows to recognize the external dGPU. For this, I went with the latest 25.12.1 since the ones provided on the GMKtec Download Center are quite out of date (24.7.1 and 24.8.1 in one zip.)
Even more oddly, the instructions suggest:
Disabling your laptop's internal display when using an external monitor connected to the eGPU can prevent performance degradation.
But we wouldn't recommend that, in case something happens to the dock or you want to quickly use your laptop somewhere else and find that you can't see anything on the screen because you disabled the iGPU.
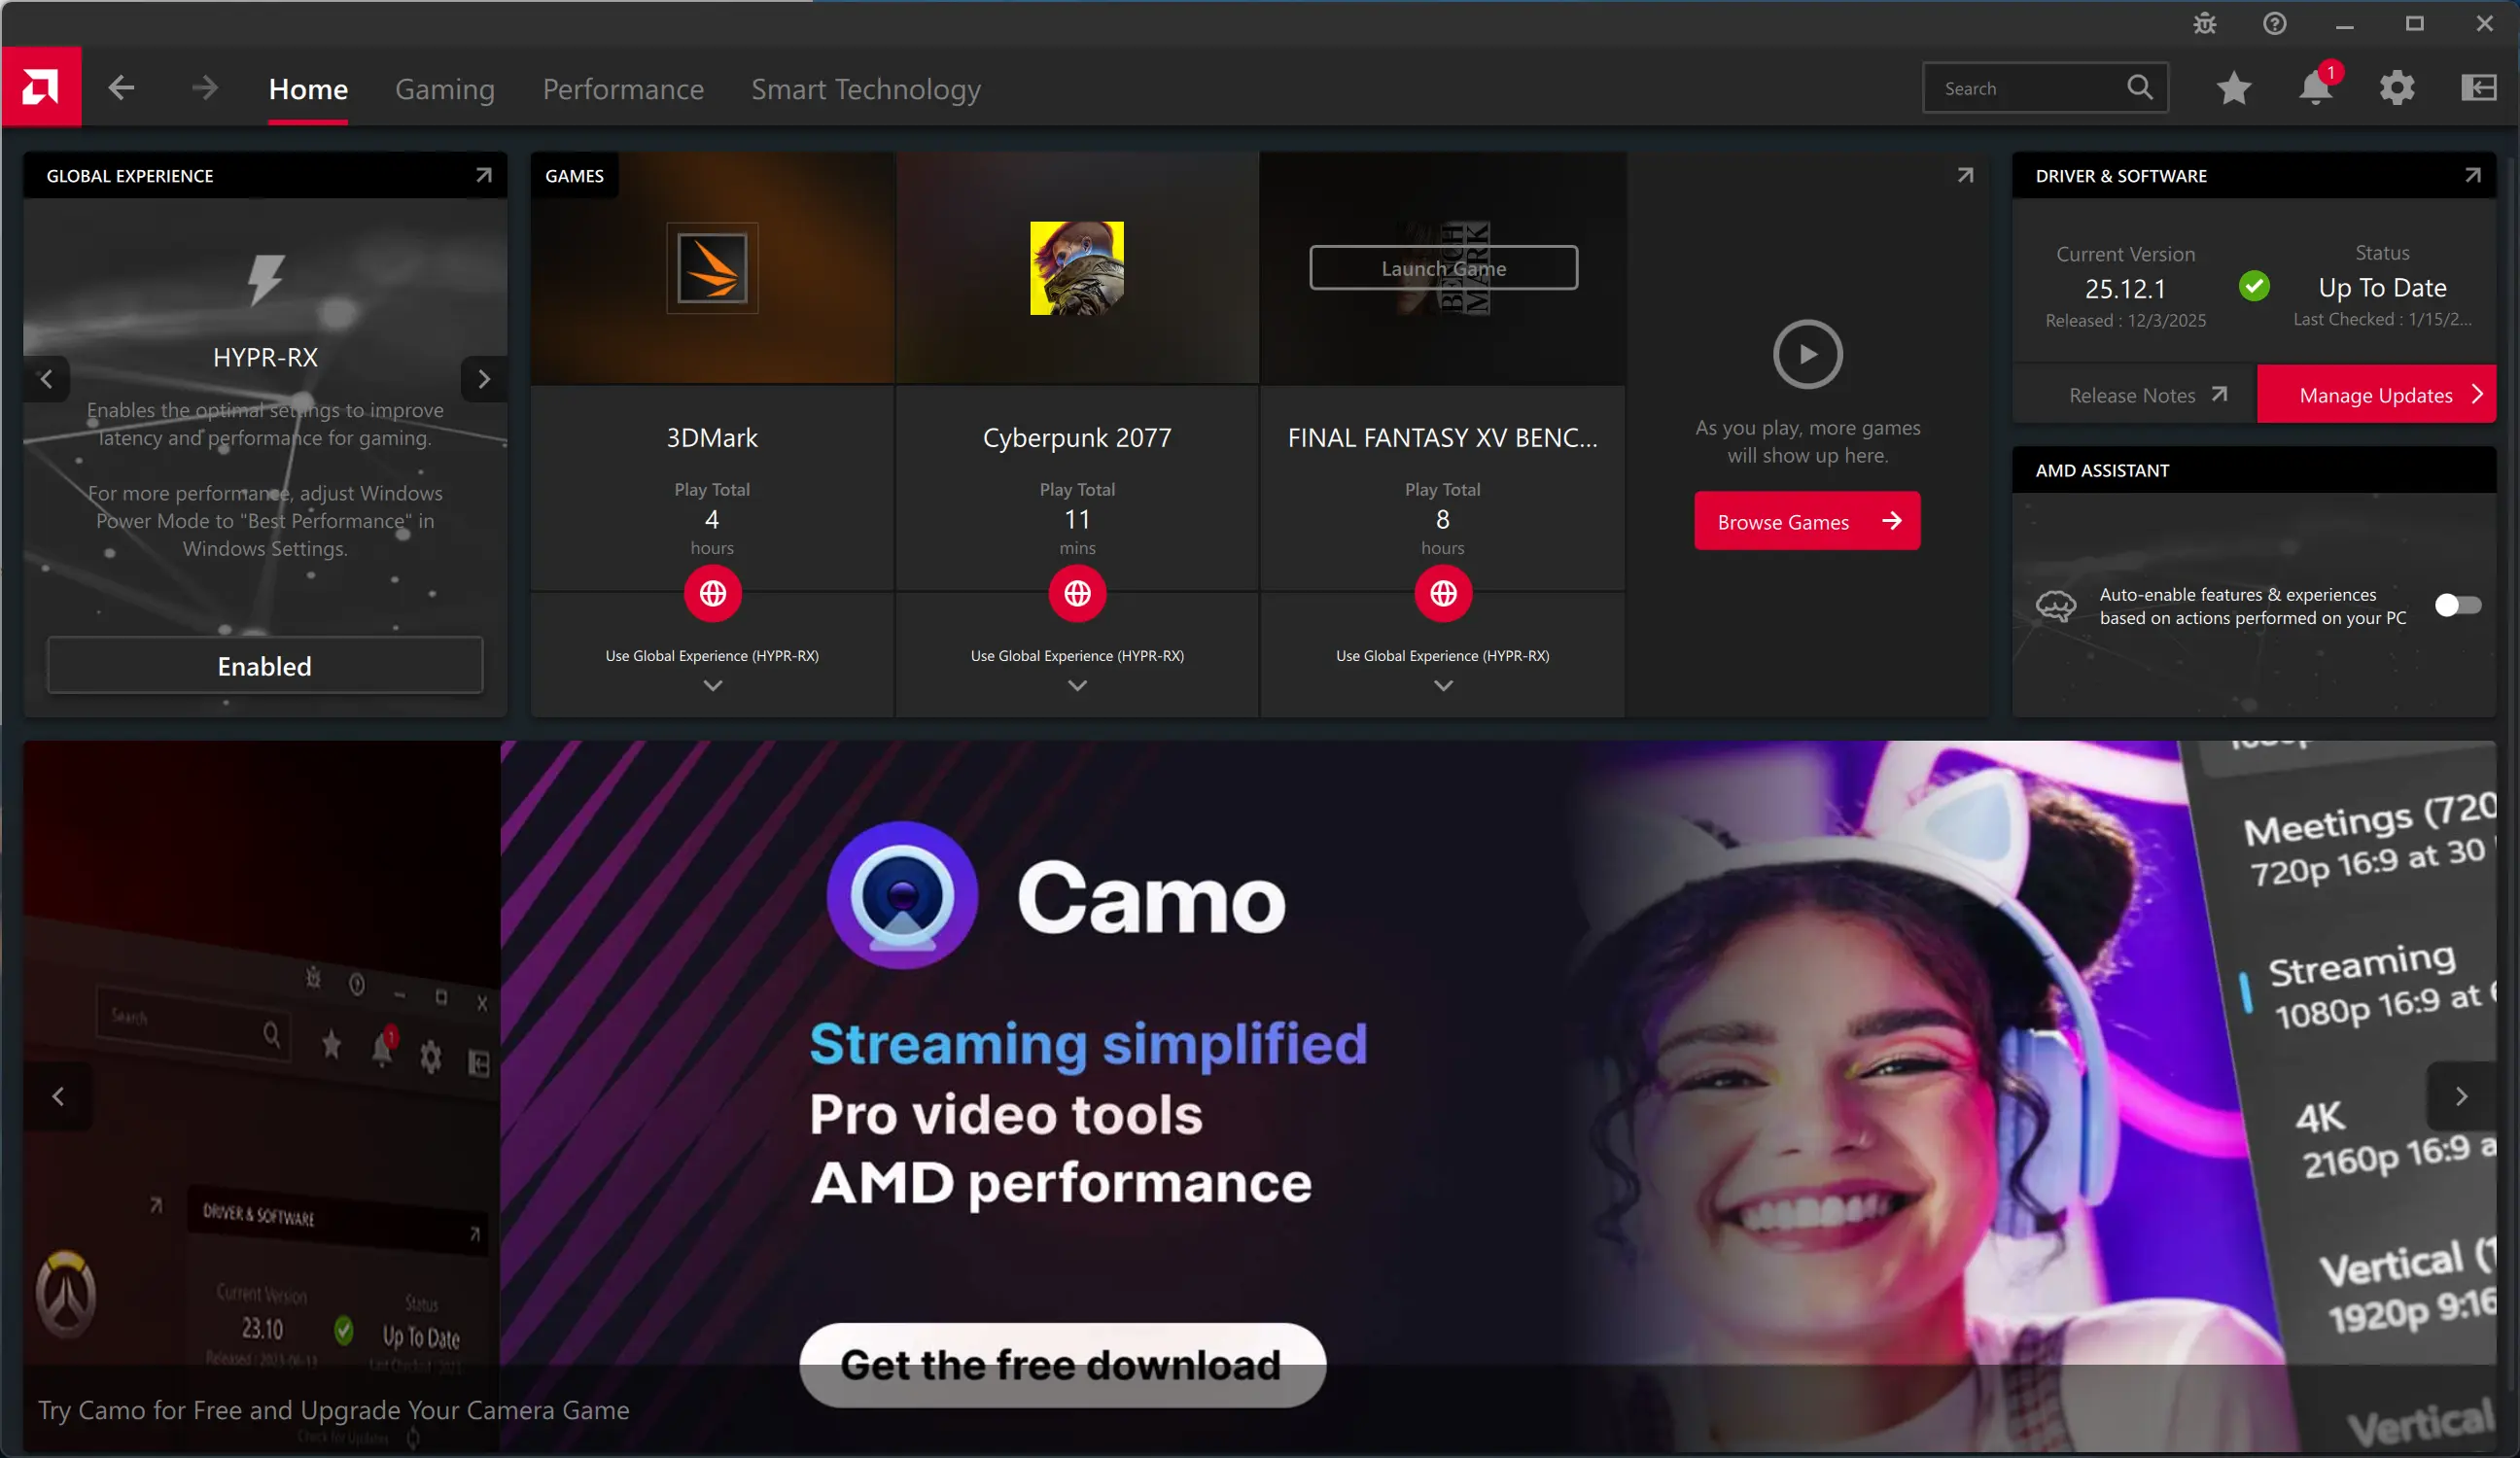
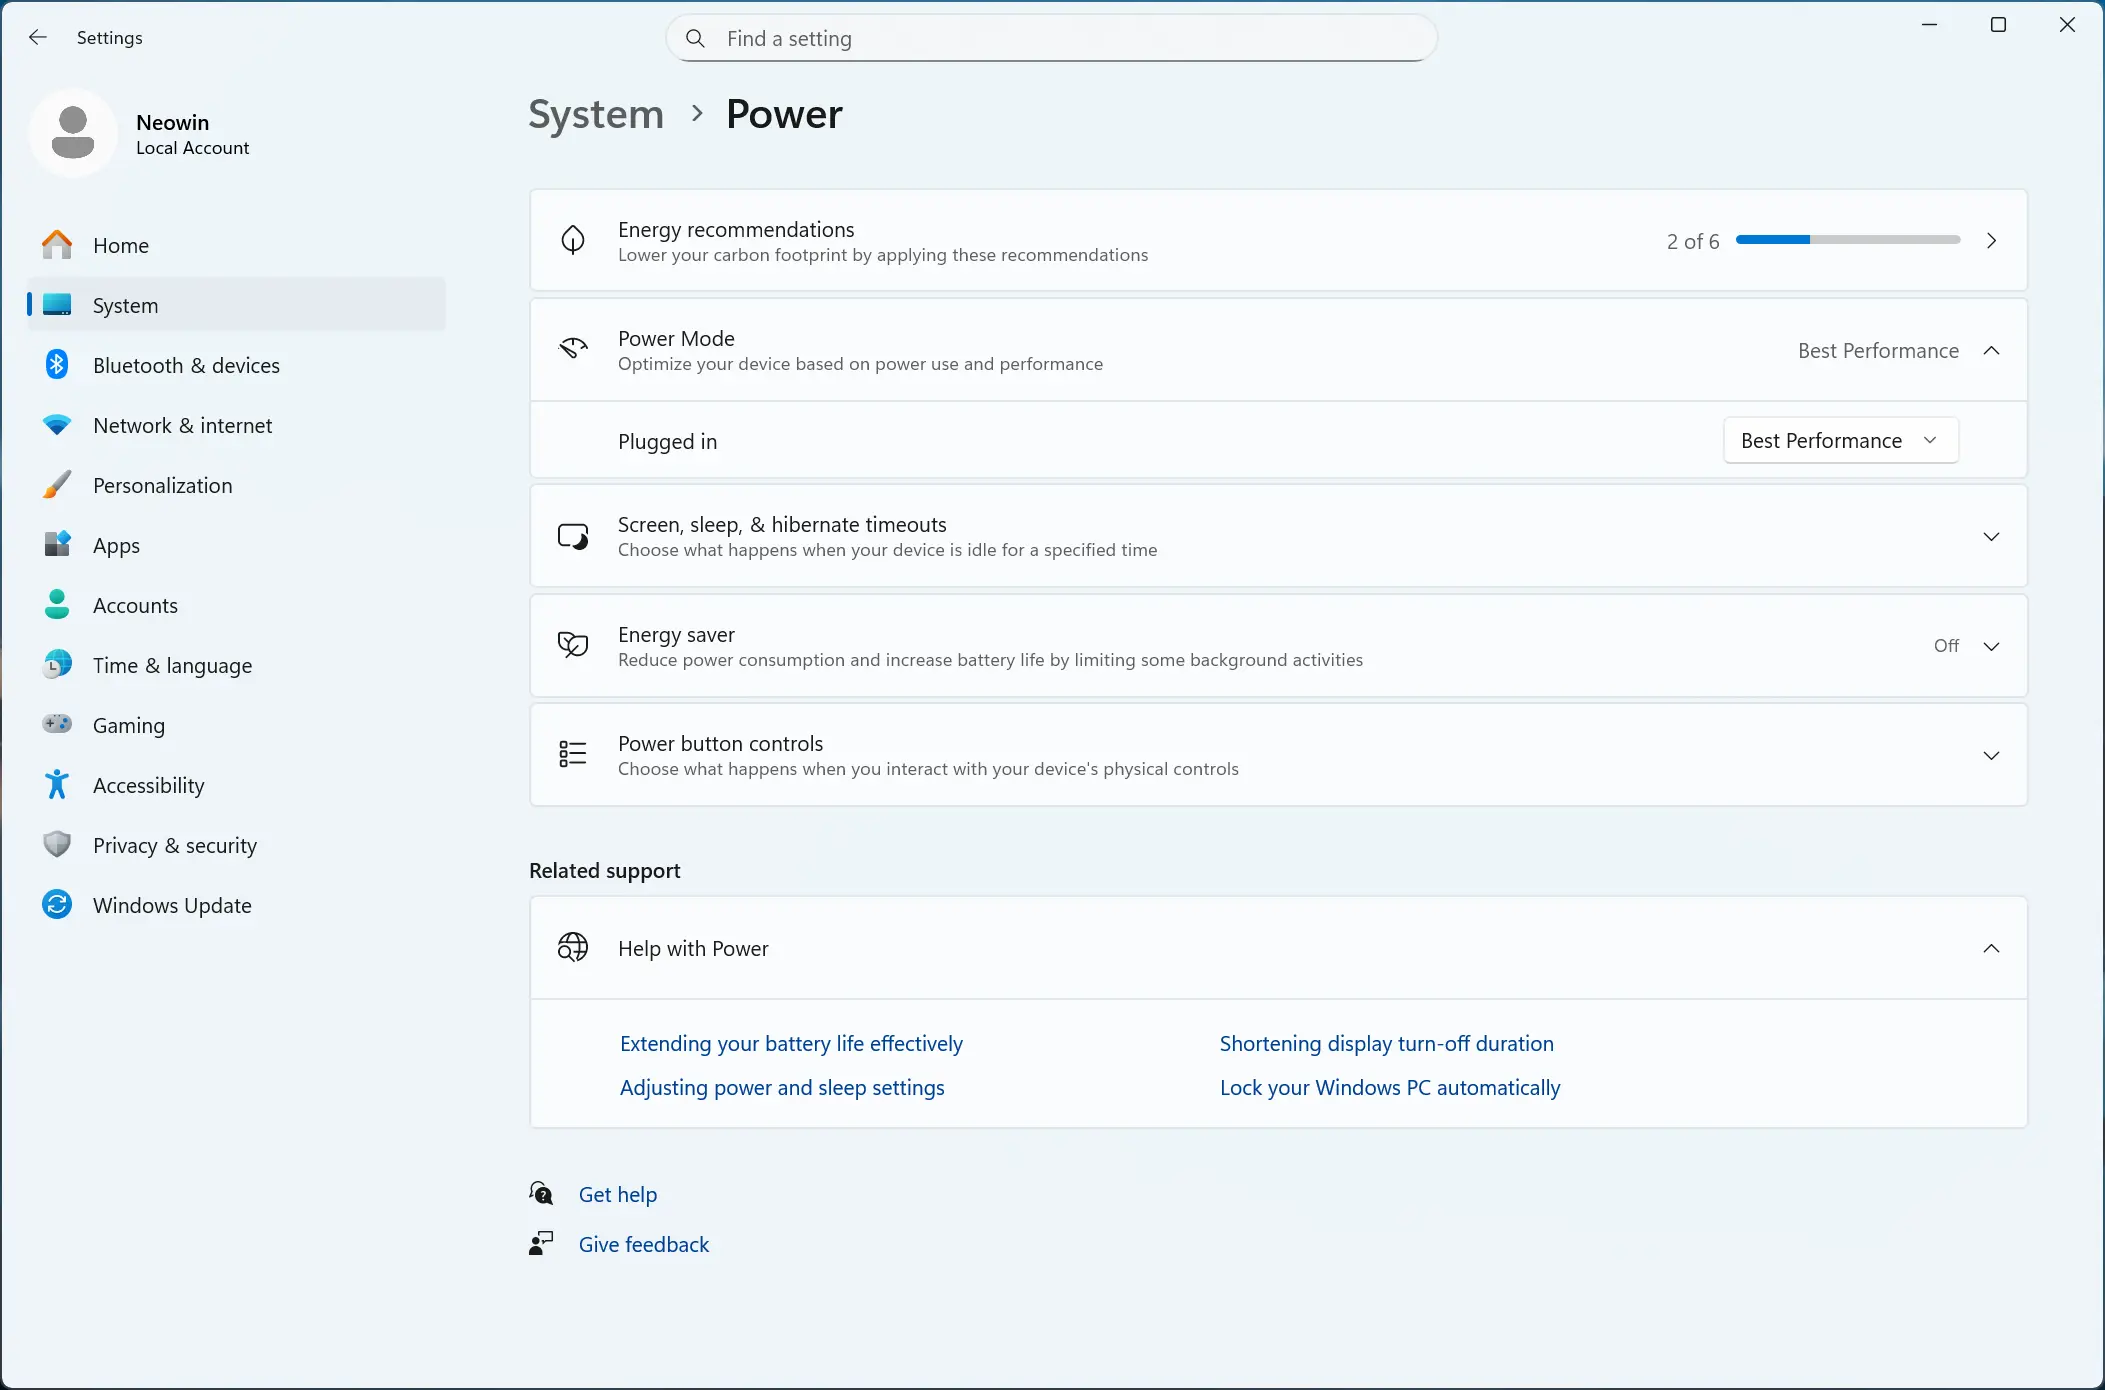
Before starting with benchmarks, I followed the suggestion to put the M7 Ultra in Best Performance mode, in addition I also enabled HYPR-RX, which supposedly "Enables optimal settings to improve latency and performance in gaming." Is it a placebo? Who knows, I enabled it anyway.
Prerecorded temps
I also recorded the idle temperature of the AD-GP1 before stressing it with benchmarks and observed that it generally stayed around 48-50 C with ambient room temperature of 22 C, which is actually a little higher than I prefer.
BenchmarksI ran the same benchmarks as the ones completed for the M7 Ultra review. In addition, the M7 Ultra was still running Windows 11 Professional 25H2 build with the November 2025 Patch Tuesday update, and the latest AMD Graphics and Chipset drivers (25.12.1 and 7.11.26.2142).
GMKtec AD-GP1 benchmarks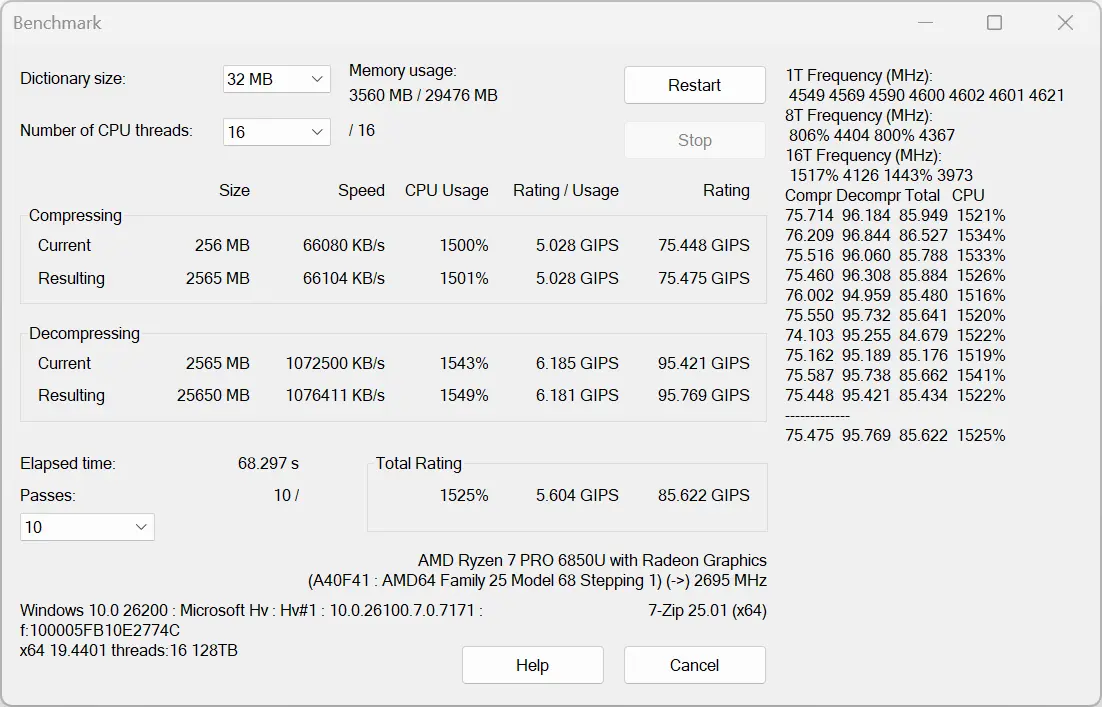
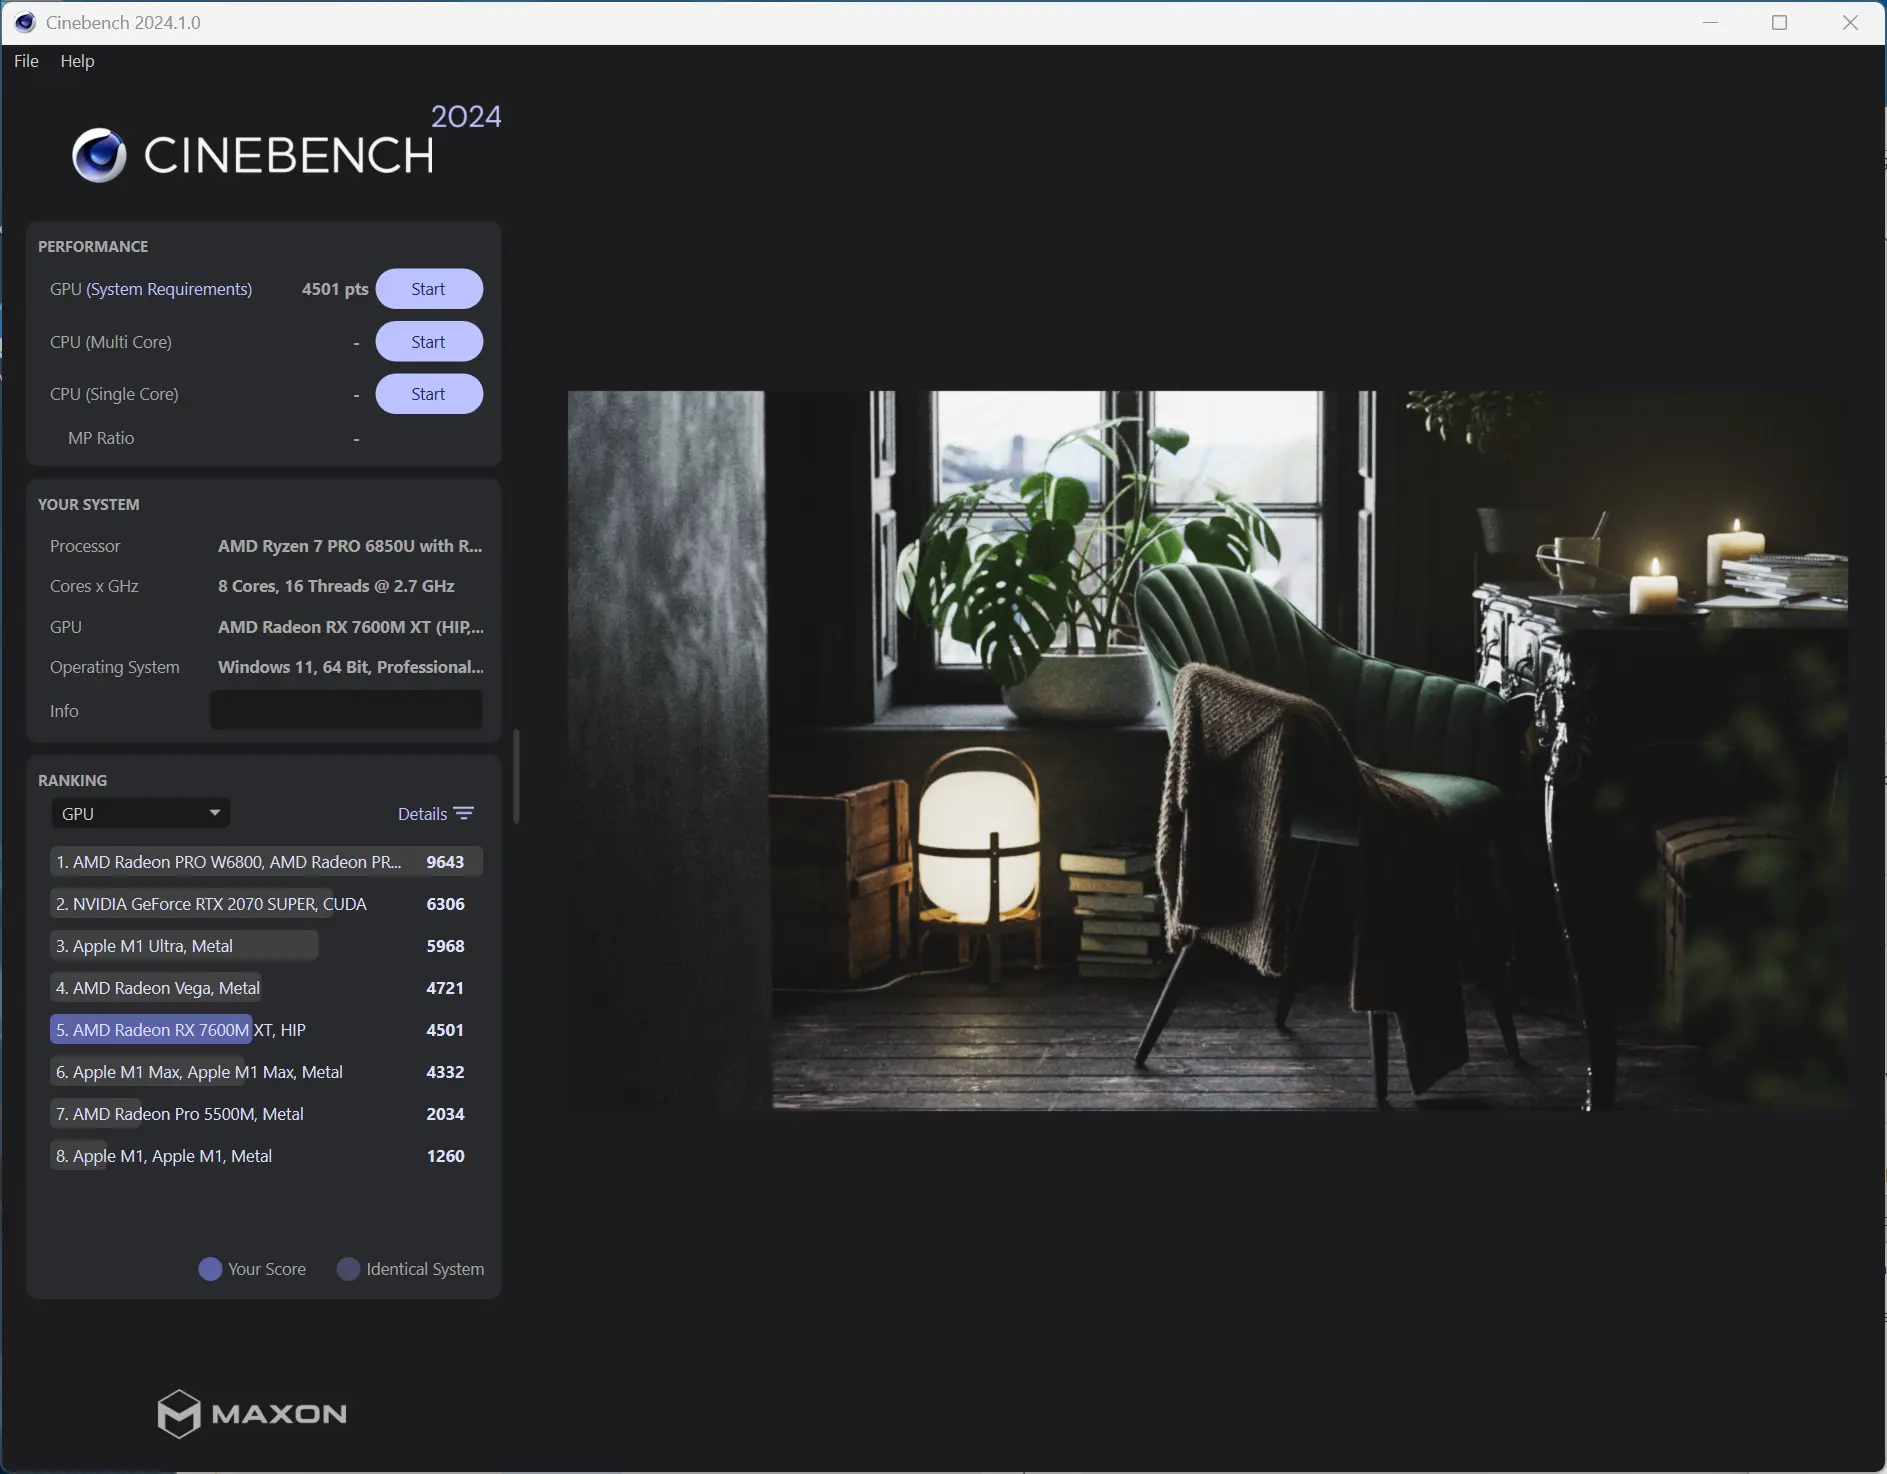
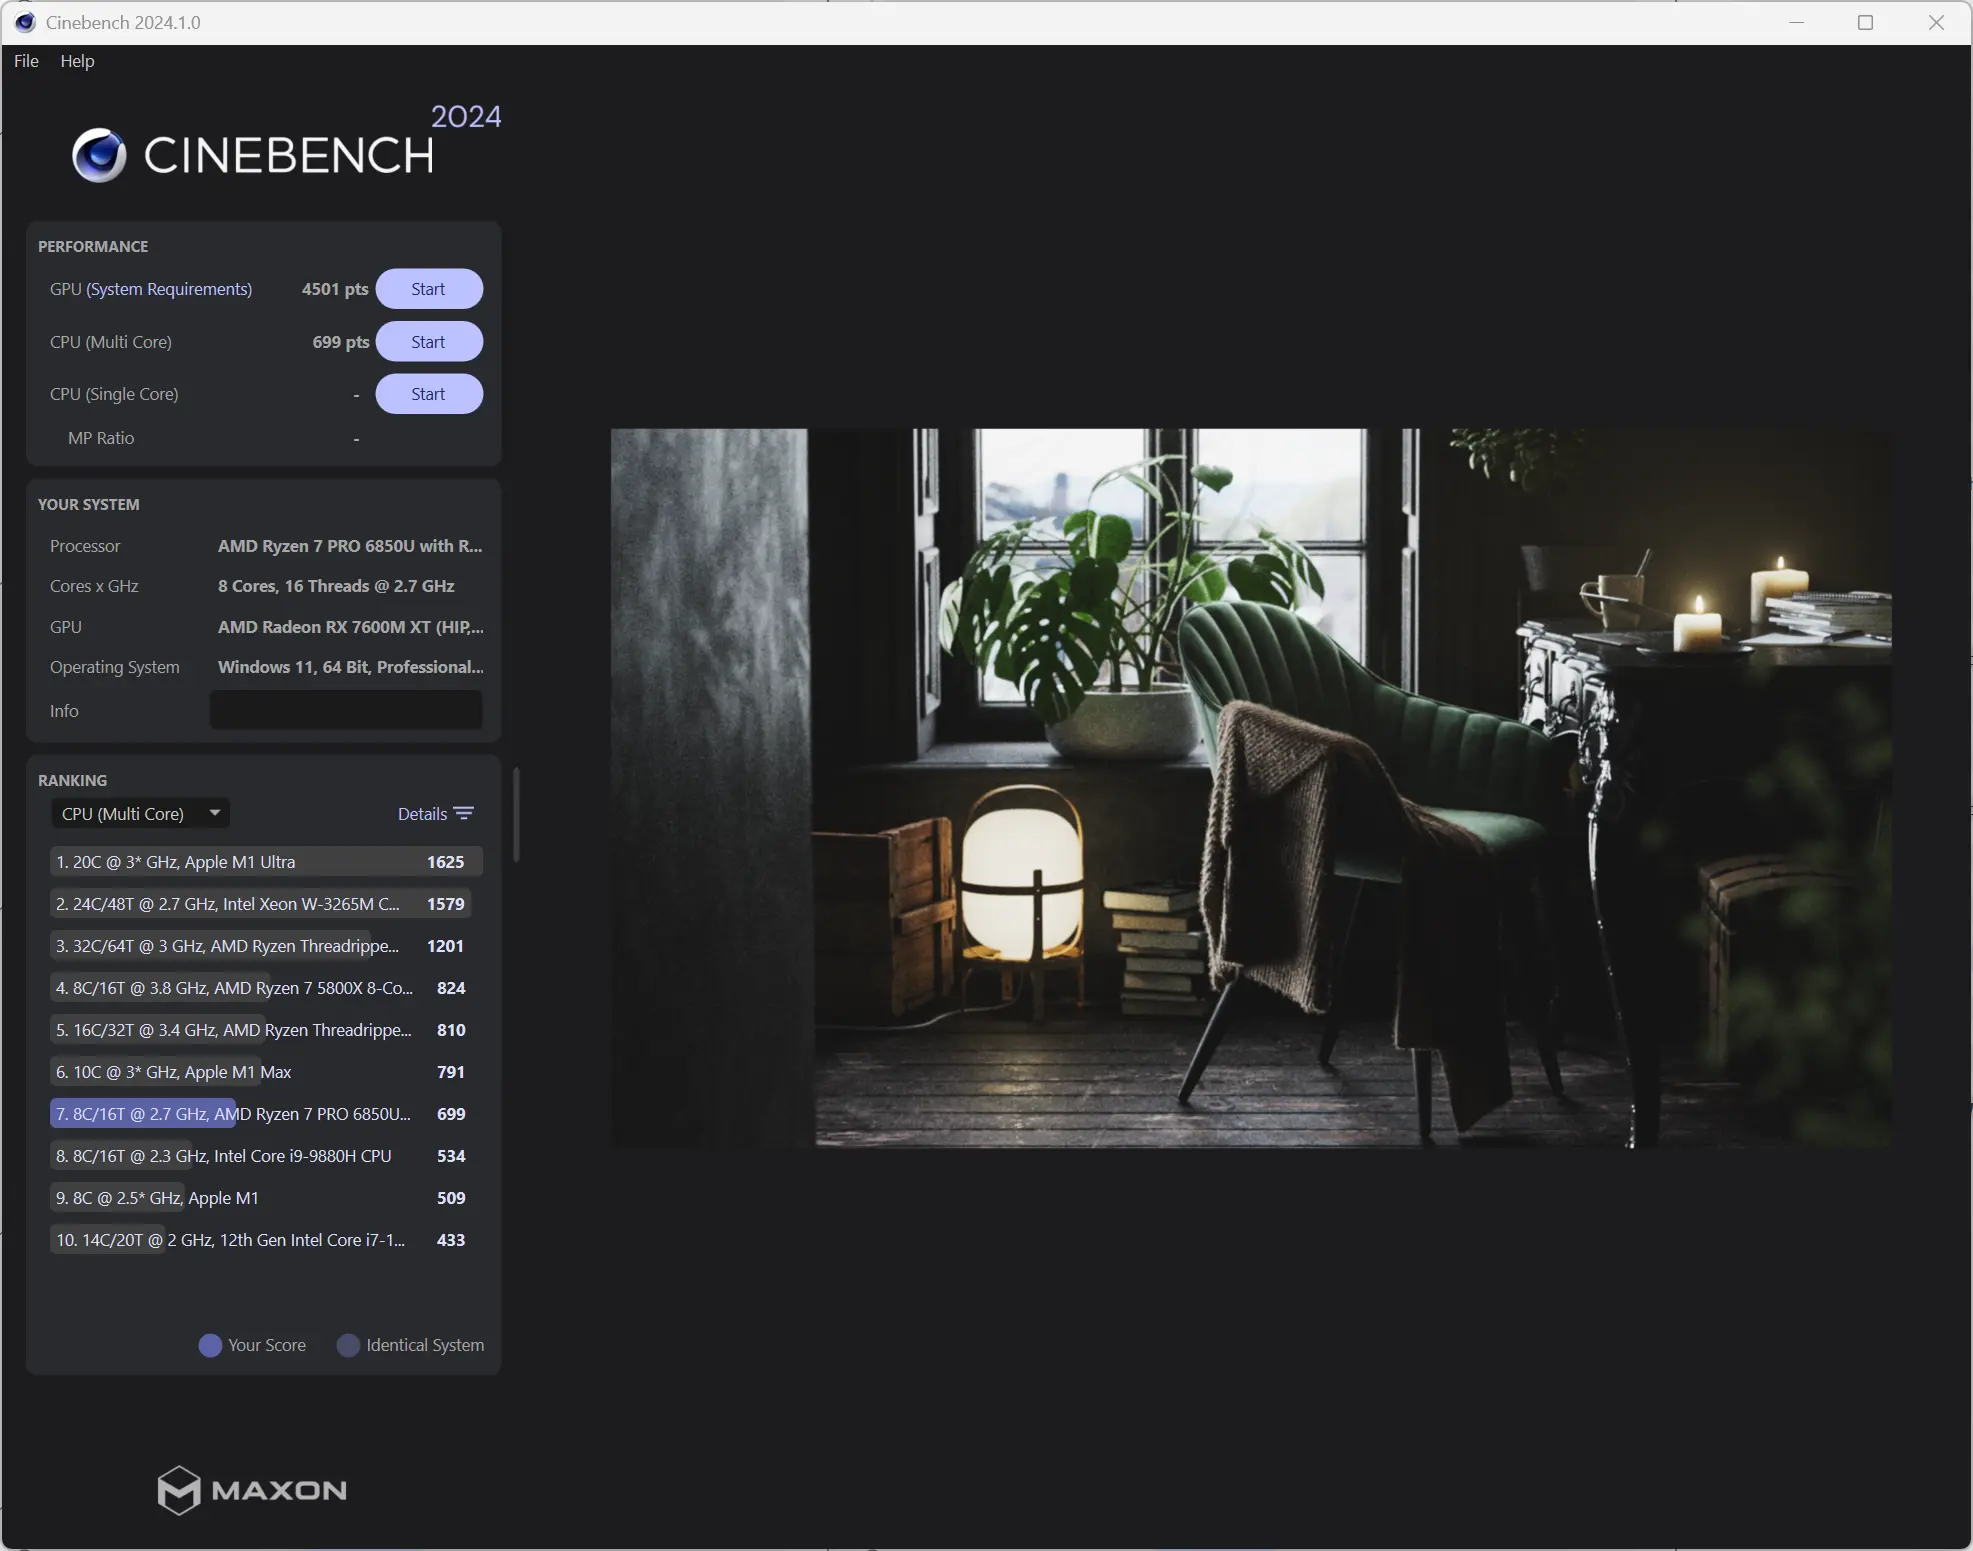
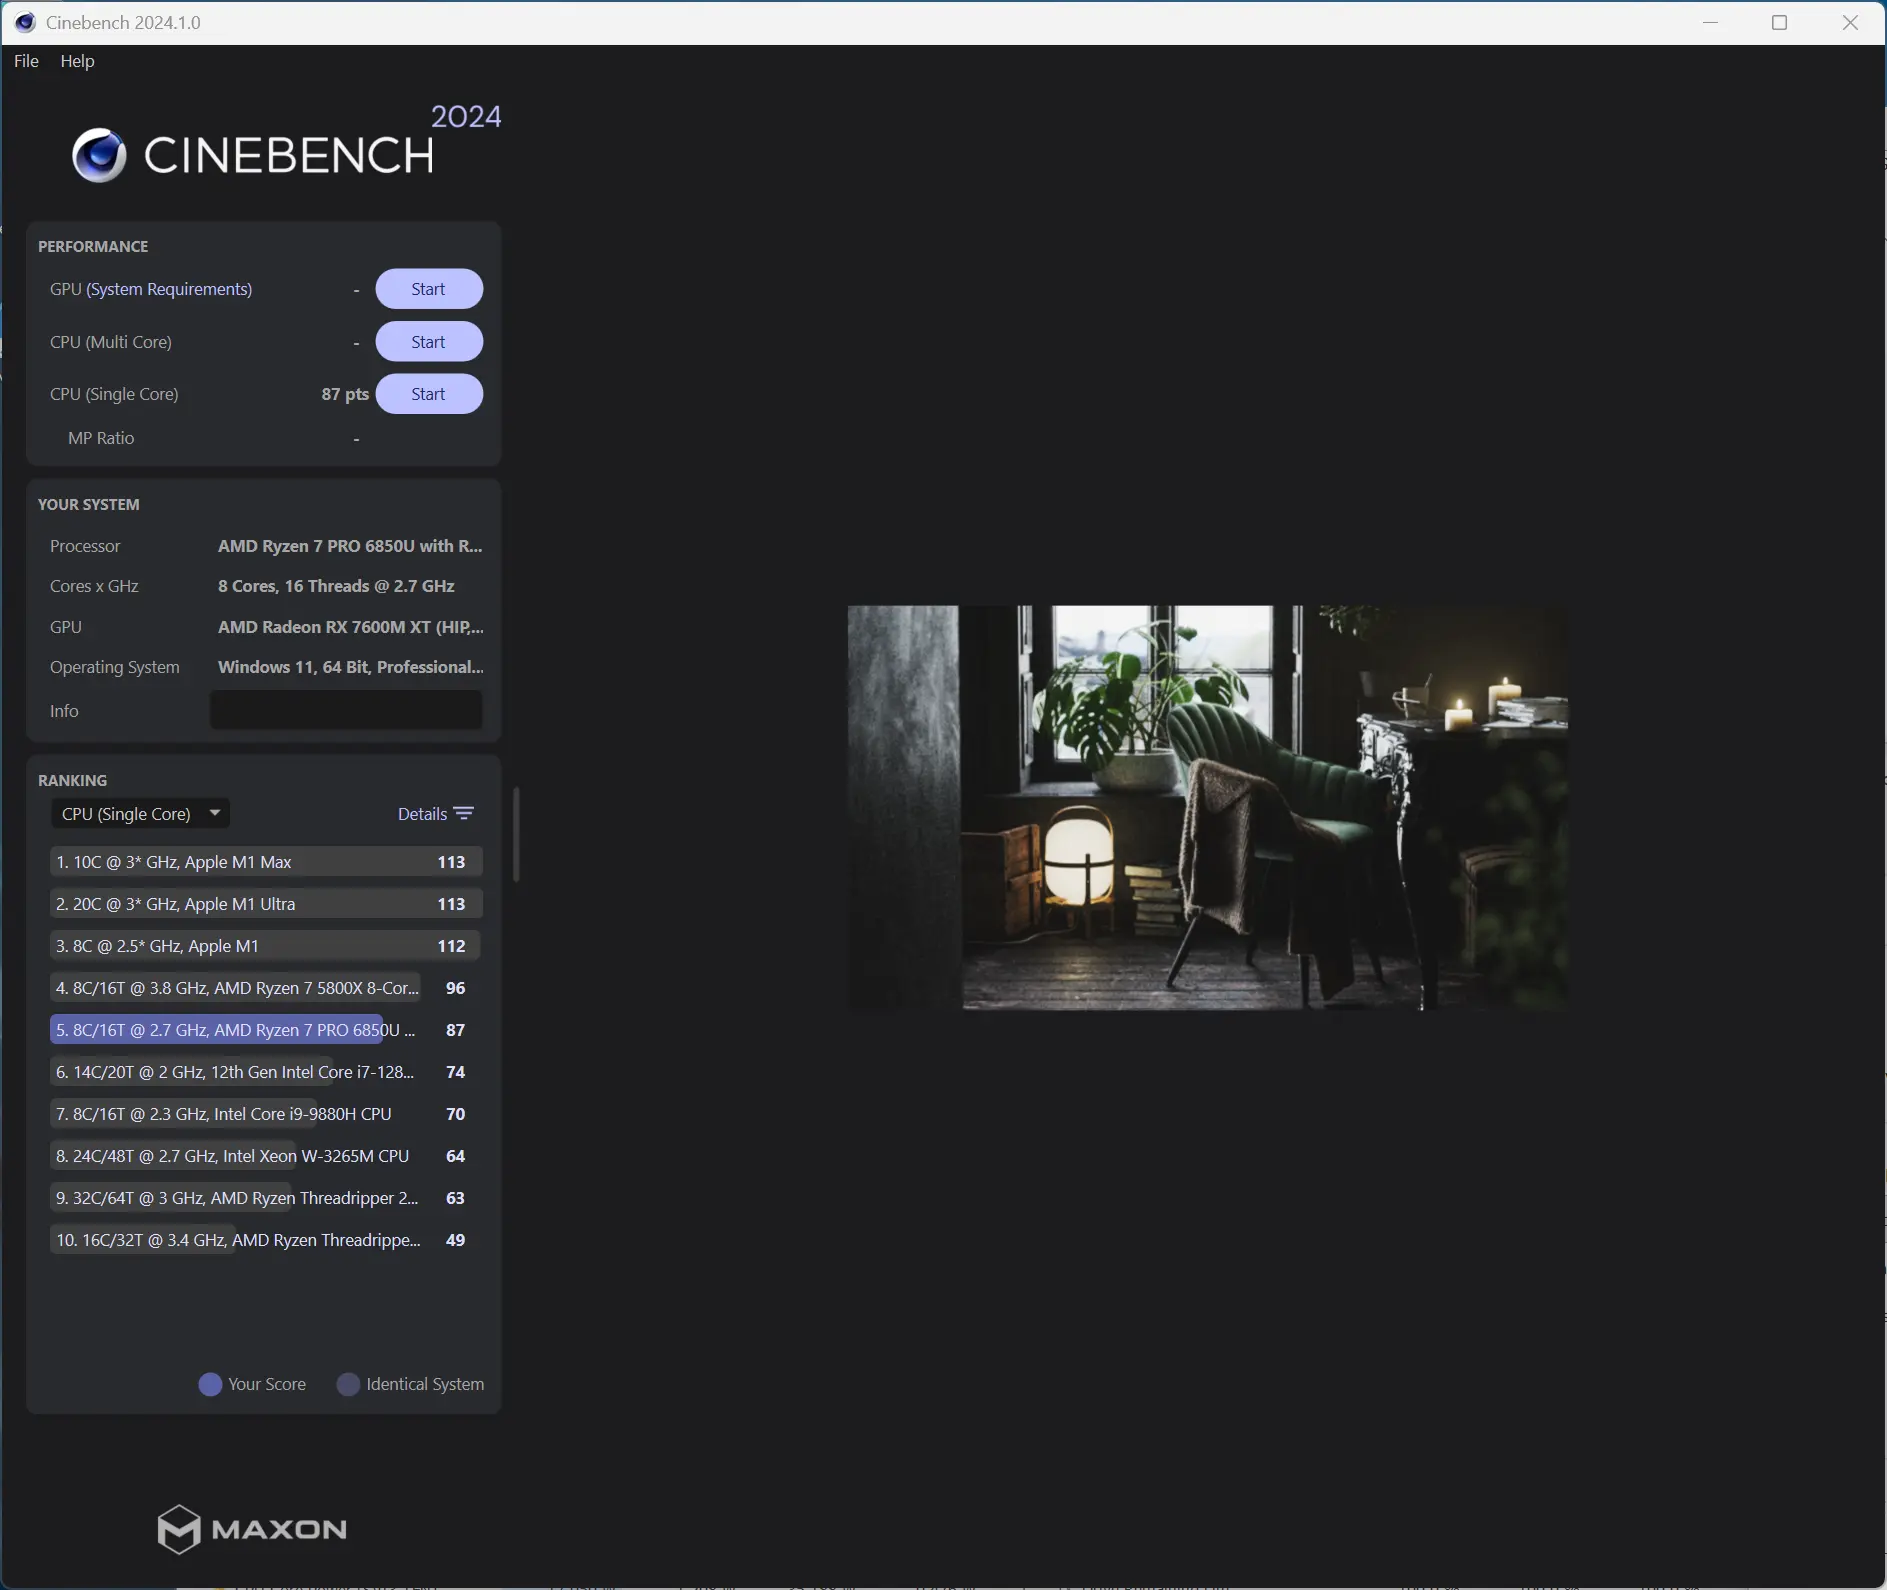


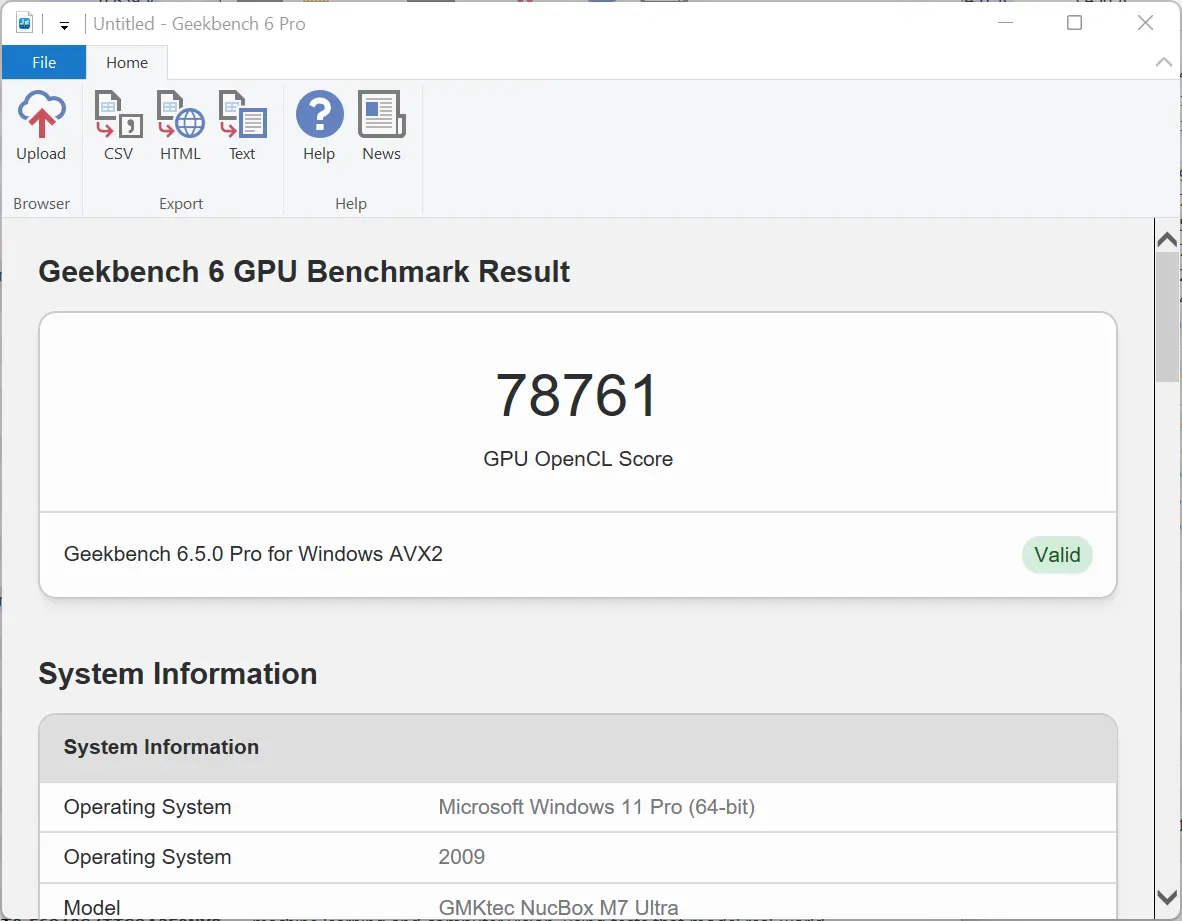
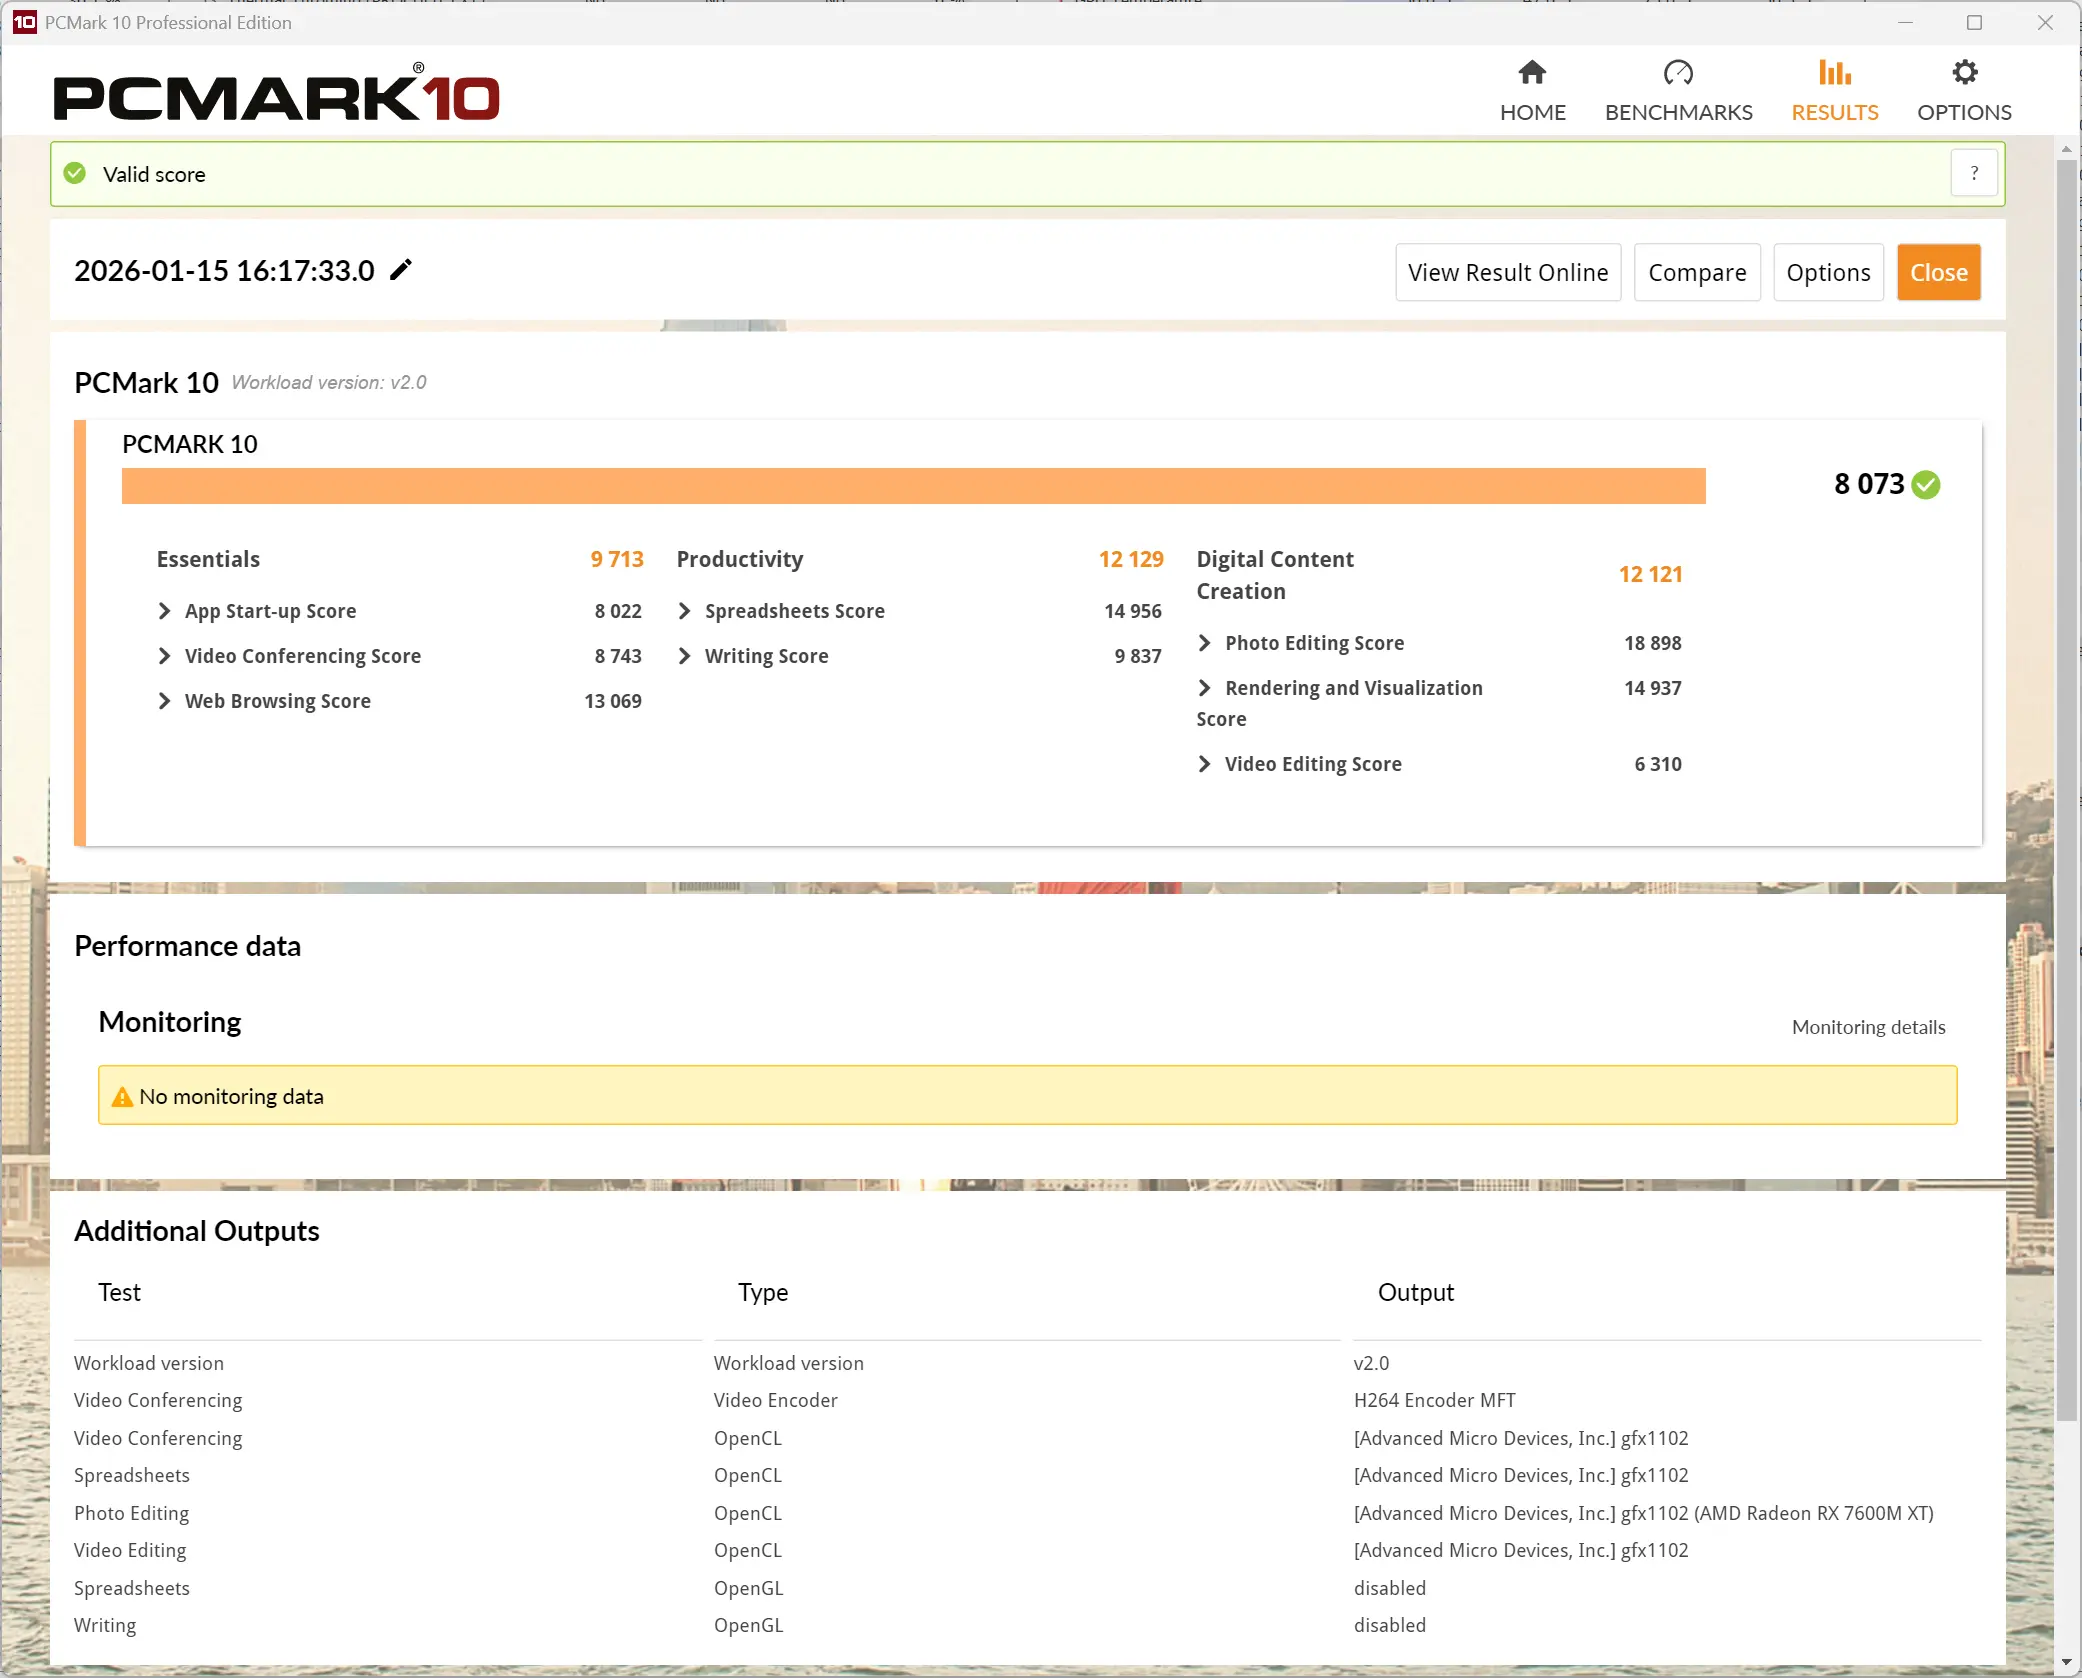
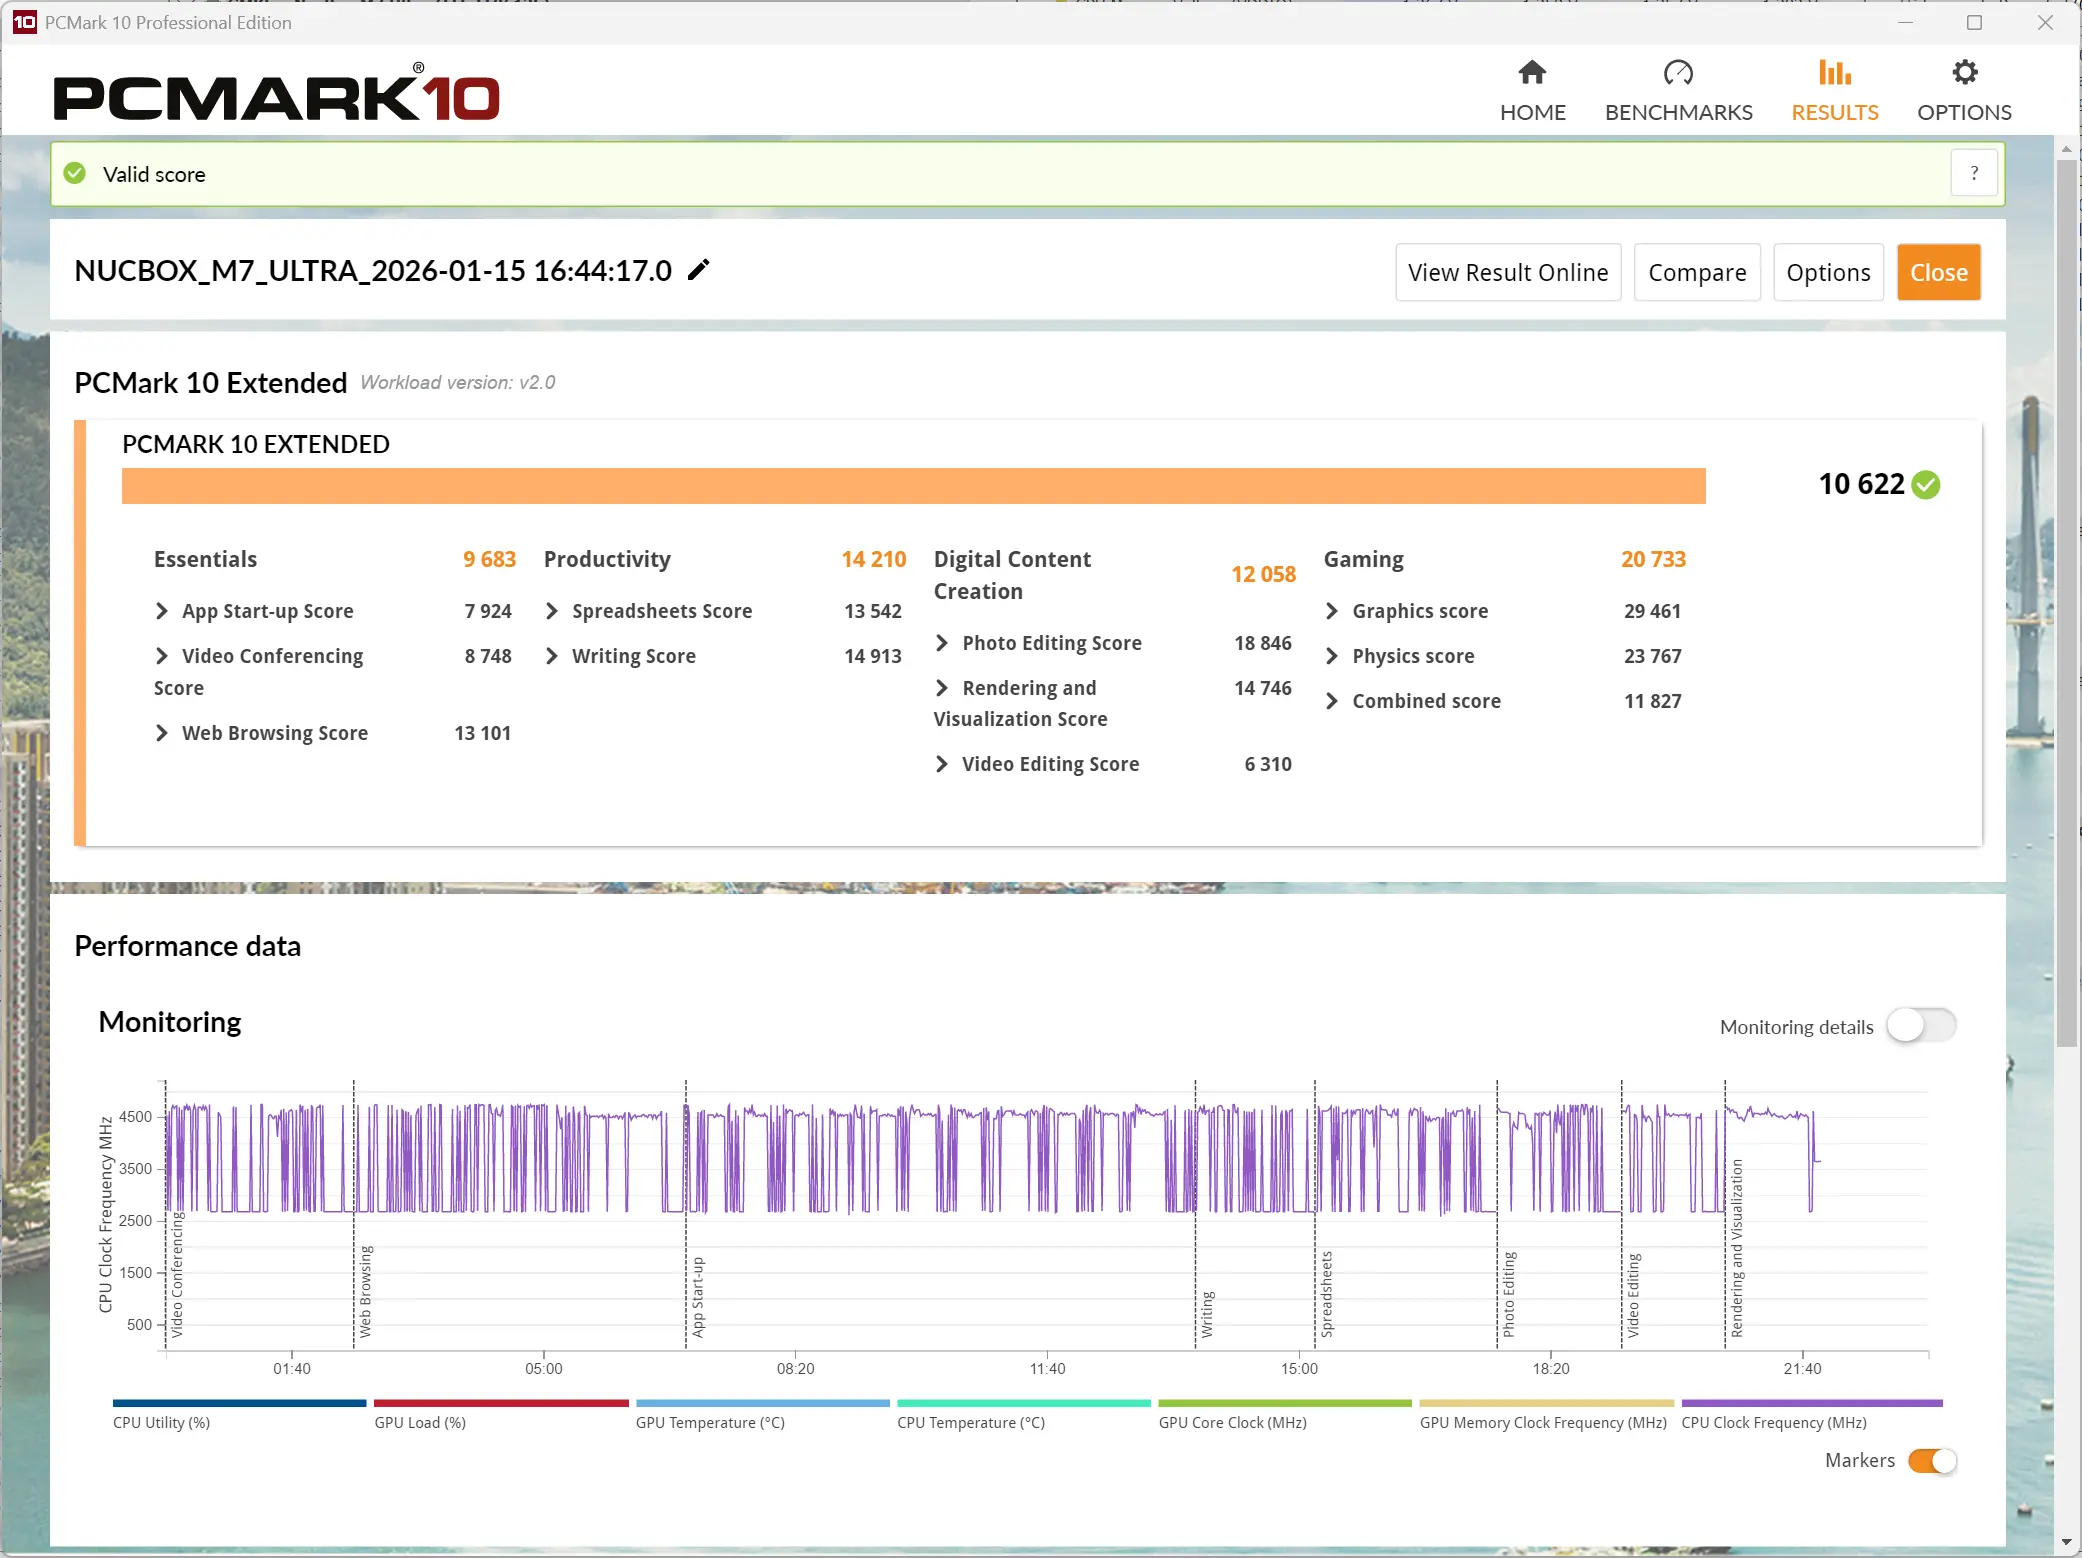

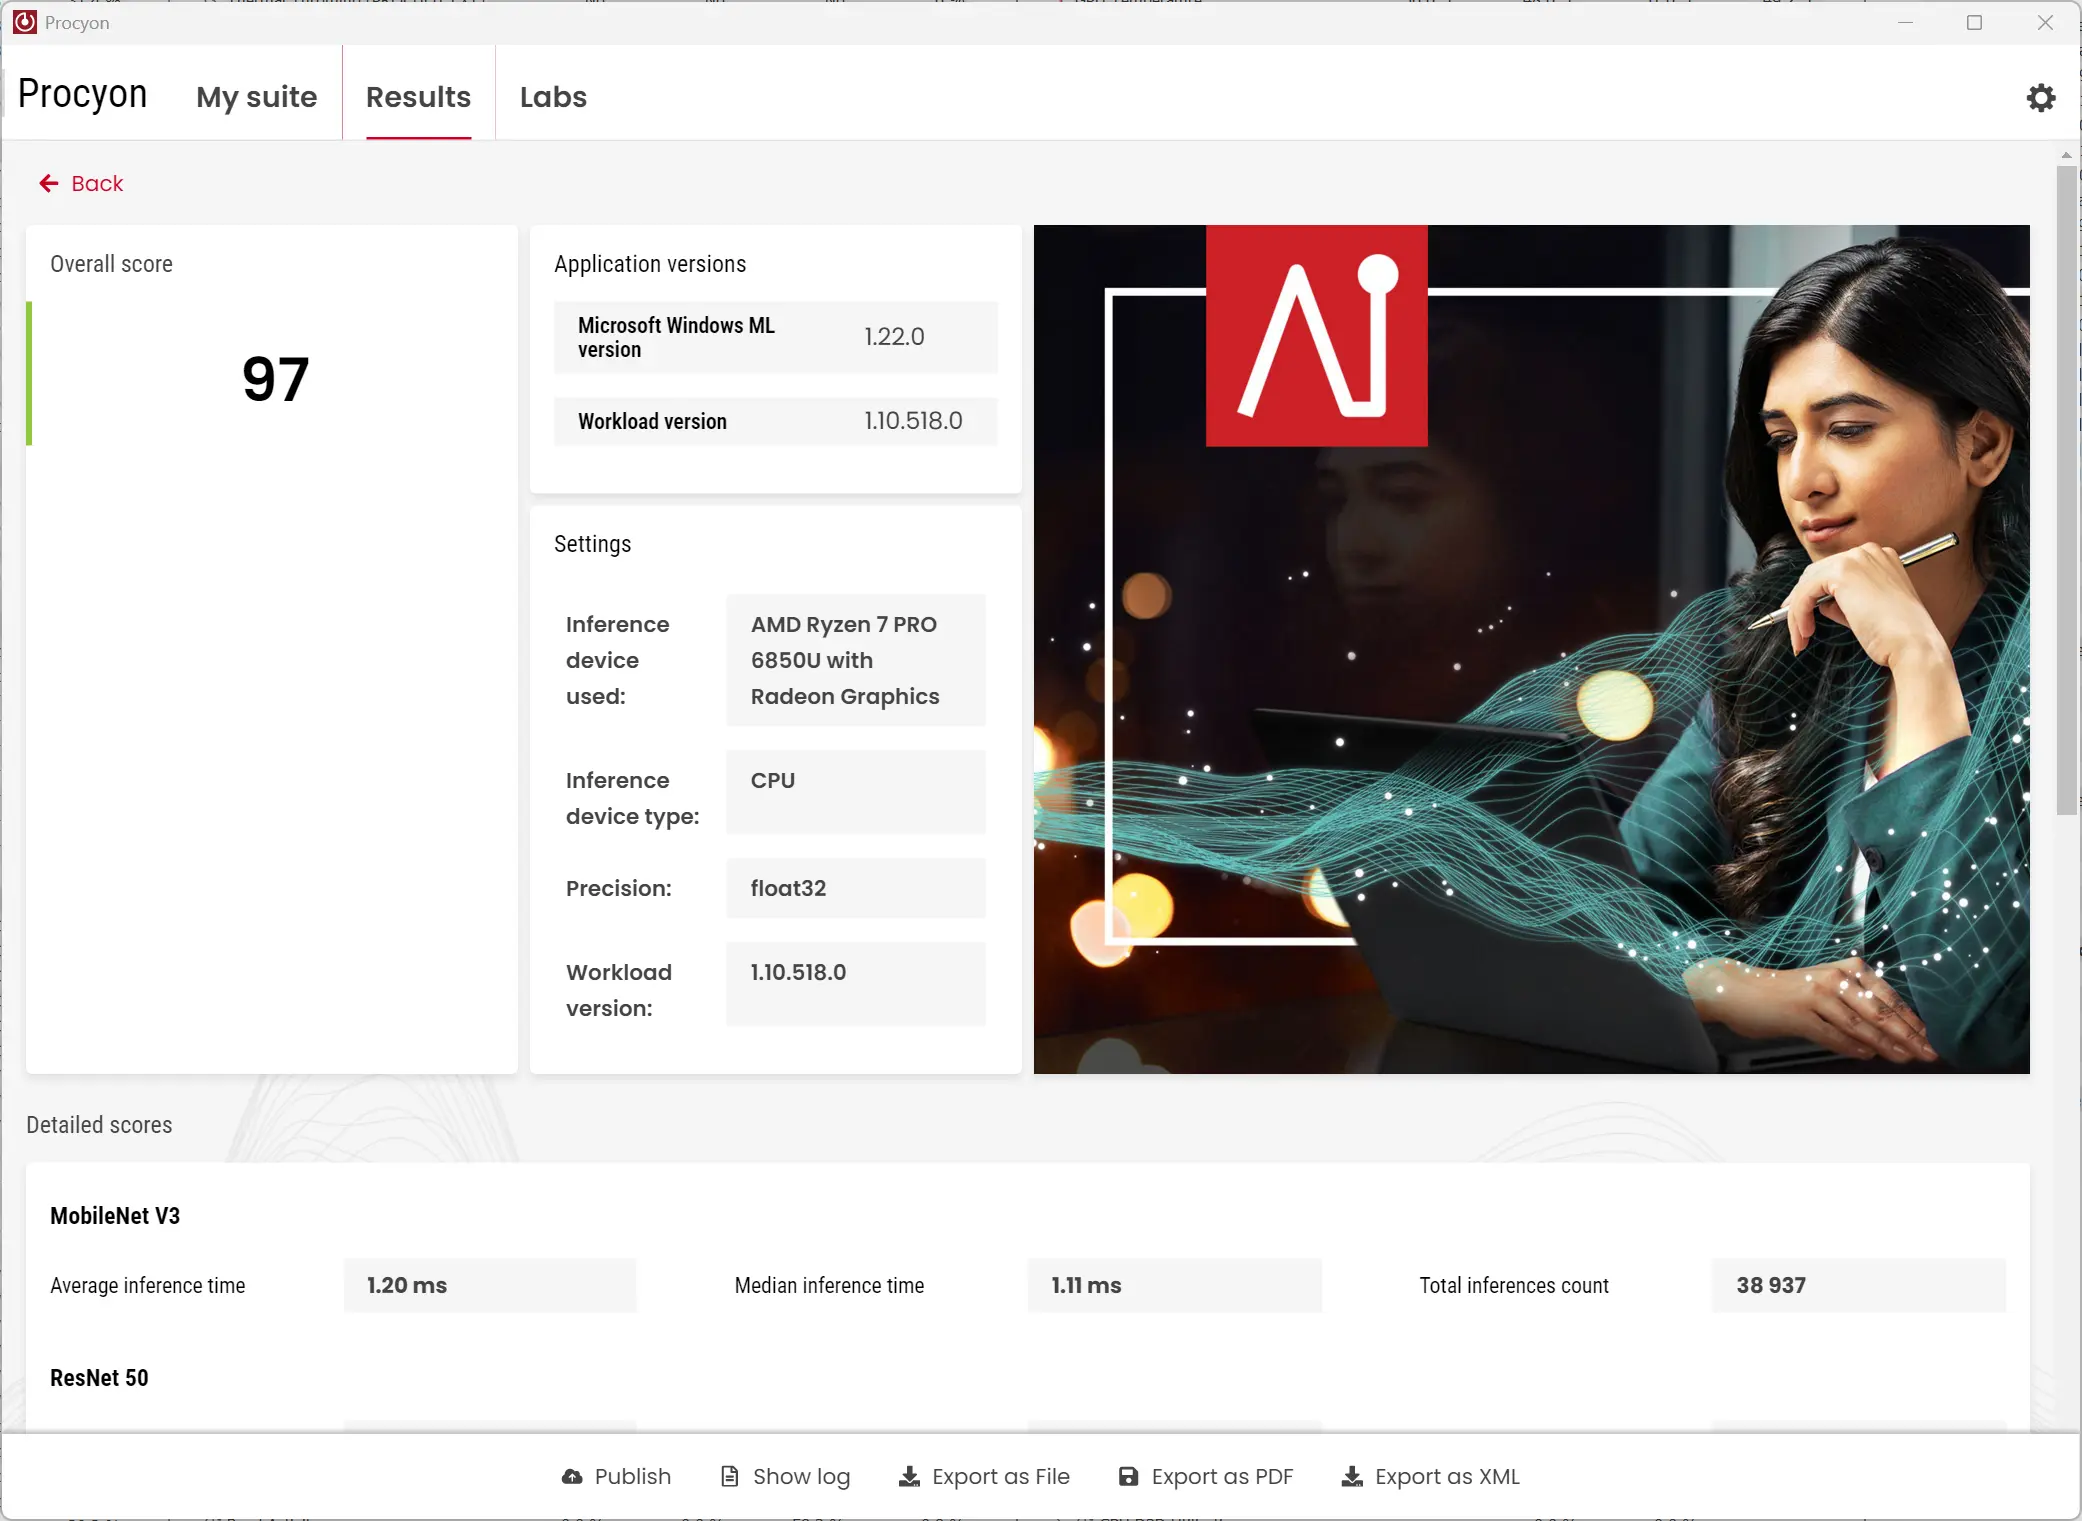
For the benchmarks, I used Cinebench 2024, 7-Zip, AS SSD, and CrystalDiskMark. 3DMark, PCMark 10, and Procyon (Windows ML for CPU and GPU) were provided to Neowin by UL Solutions; Primate Labs Inc. provided us with commercial versions of Geekbench 6 and Geekbench AI.
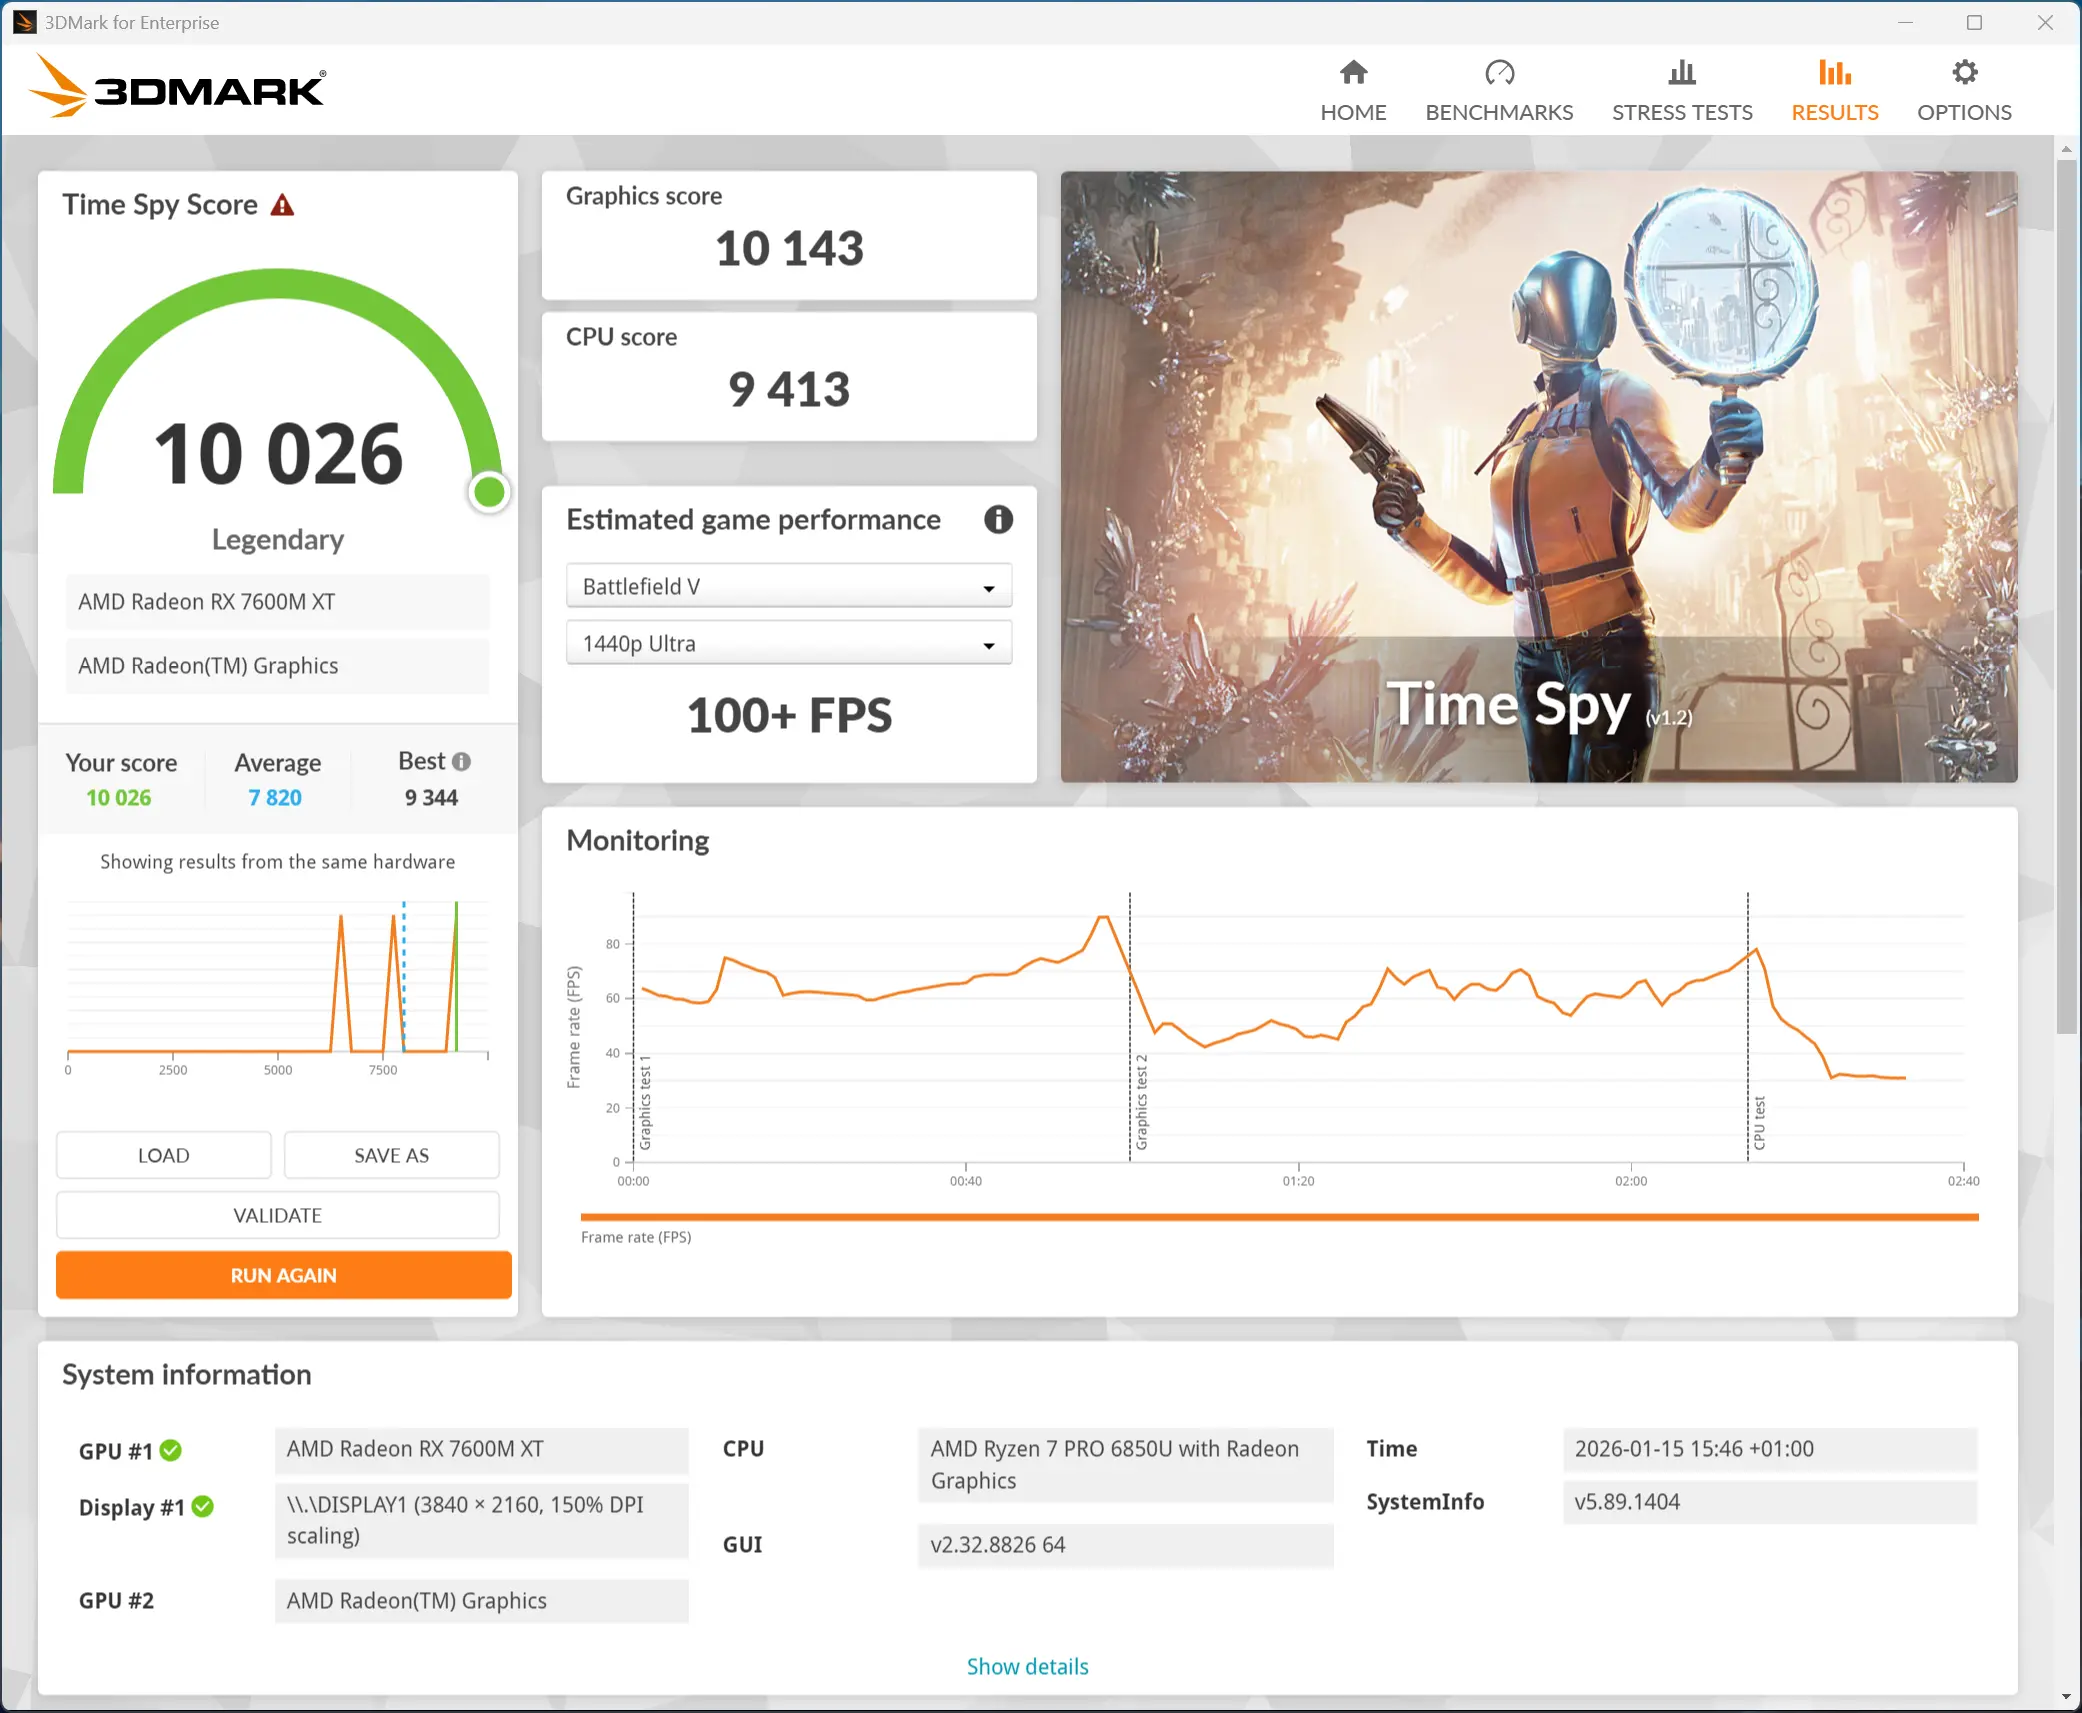
3DMark Time Spy tests gaming capability with DX12 graphics performance. PCMark tests are a mix of CPU and real-world productivity tests, such as using an office suite, web browsing, light photo/video editing, and making conference calls. Cinebench stresses the entire CPU as it is a multi-threaded rendering test. Geekbench is a synthetic benchmark that is great for a quick look at the potential performance across a wide range of workloads.
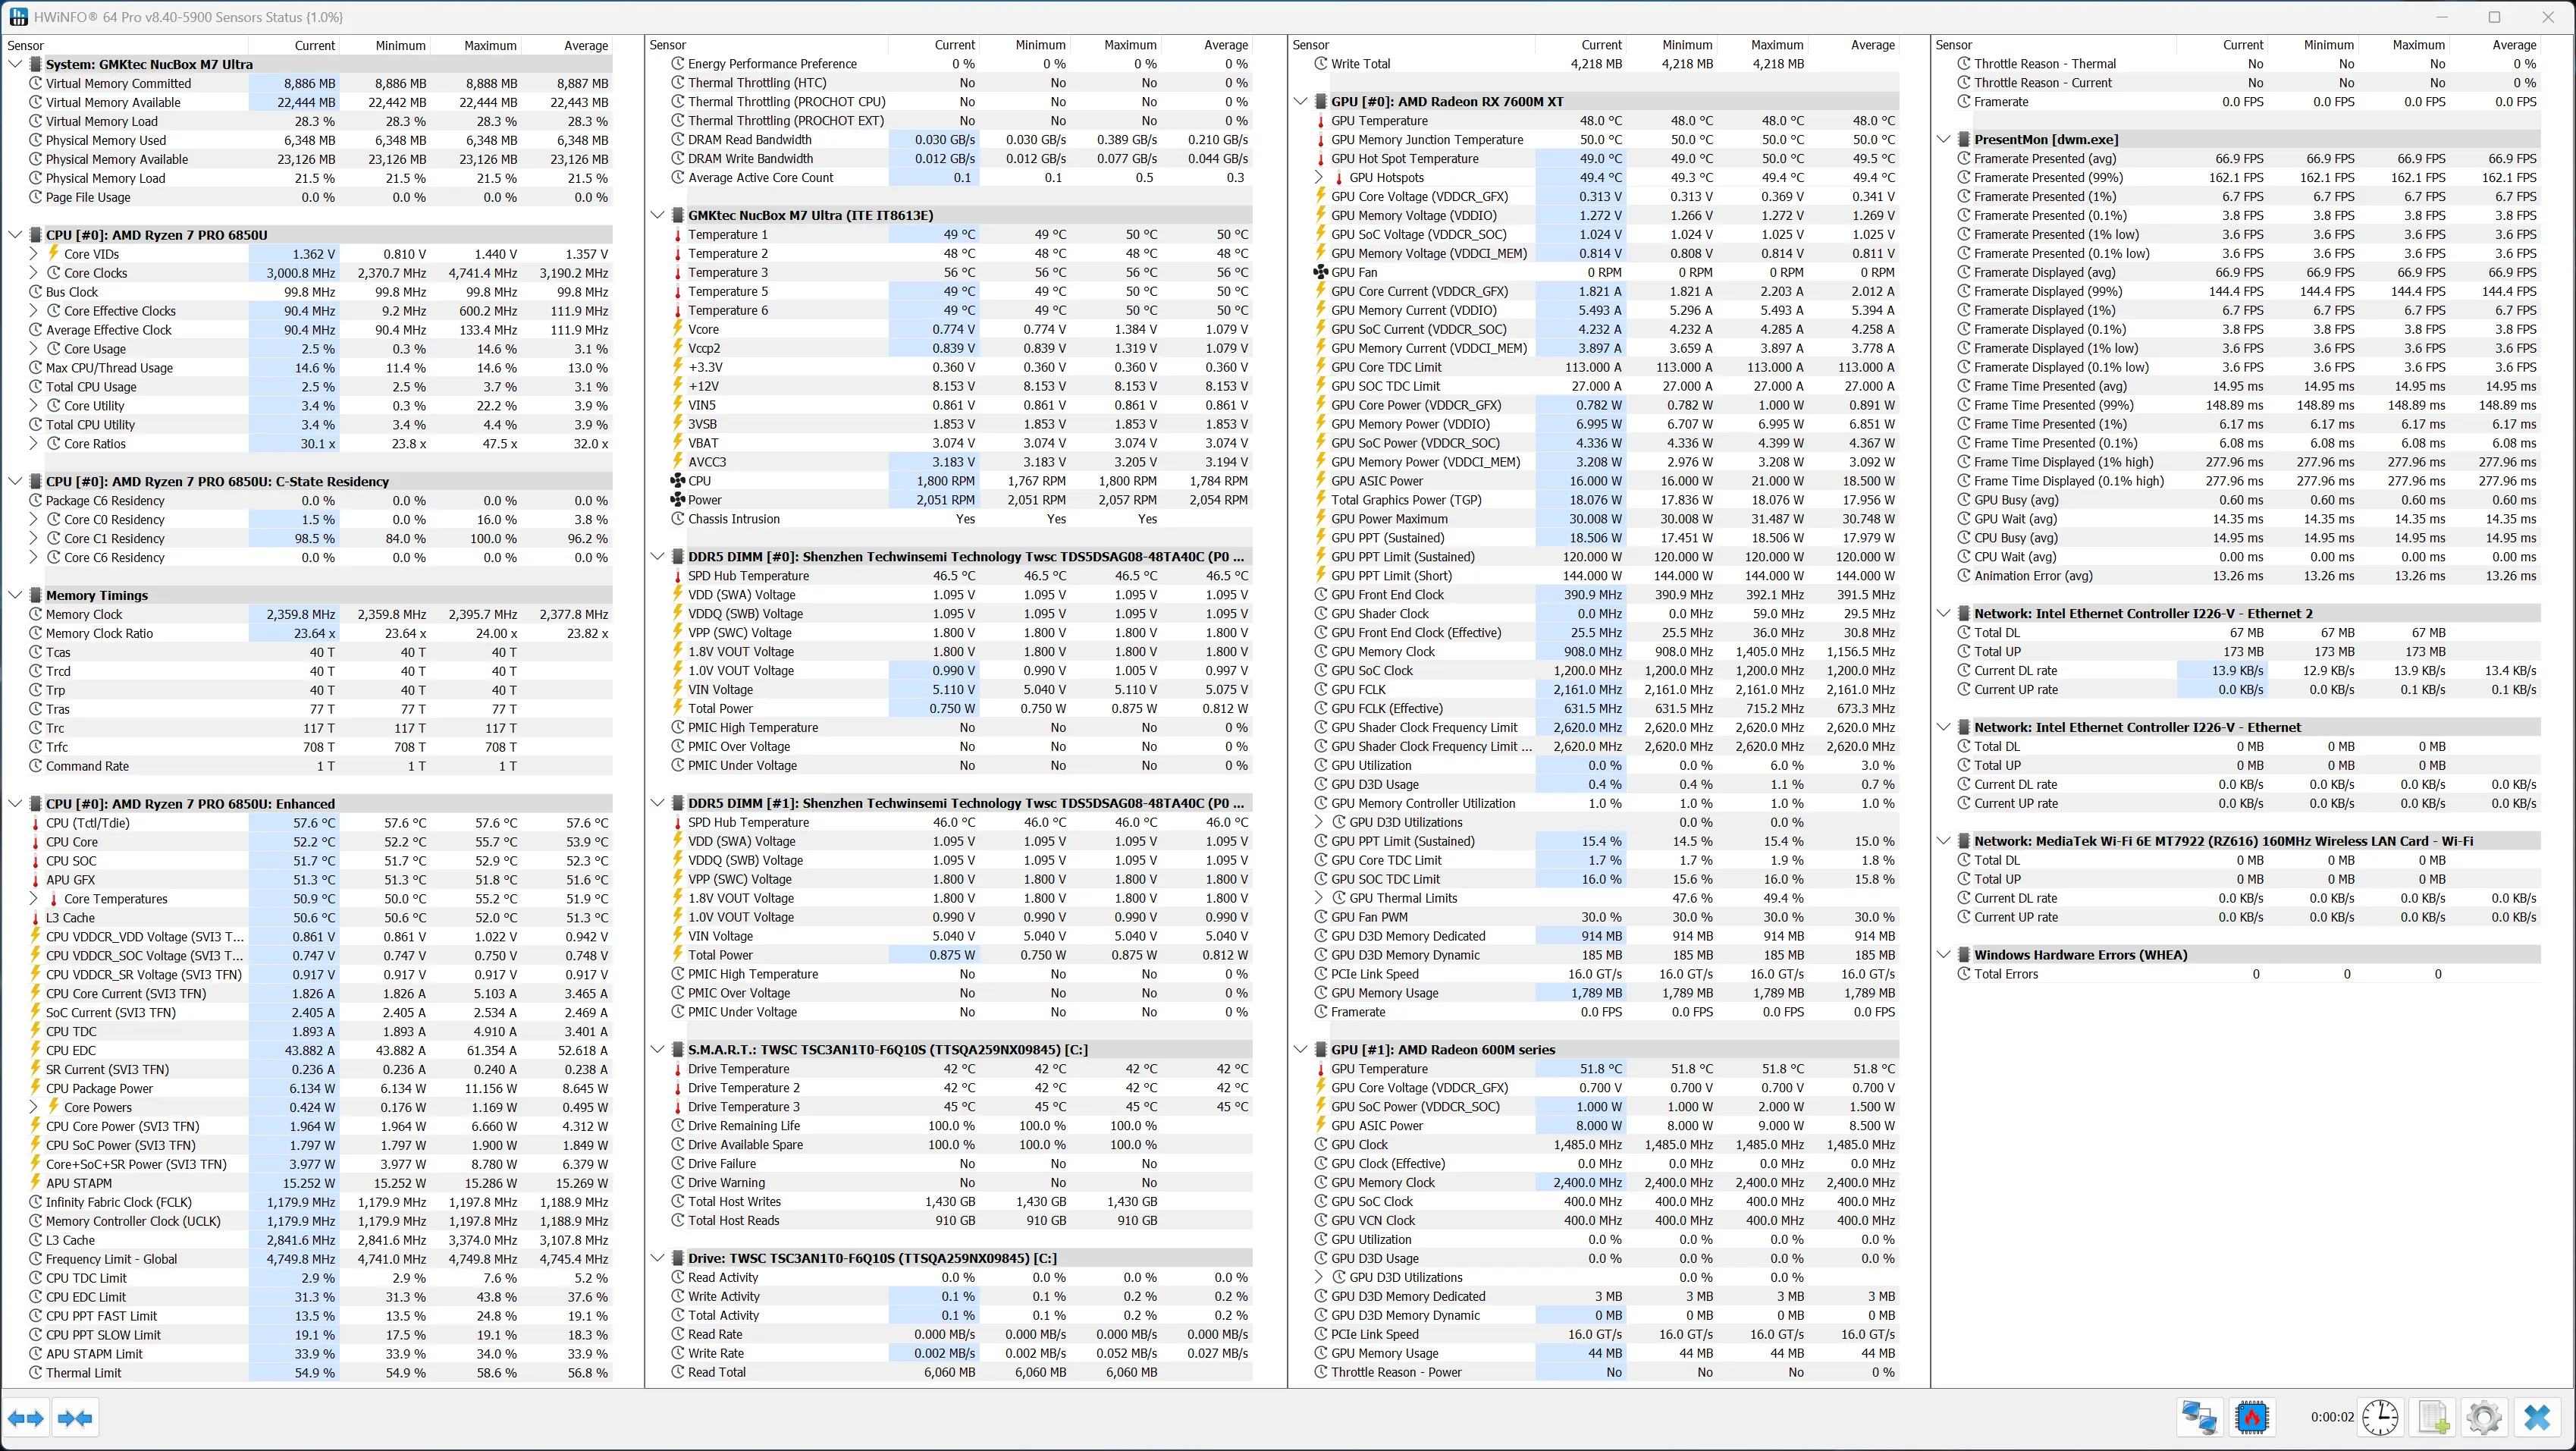
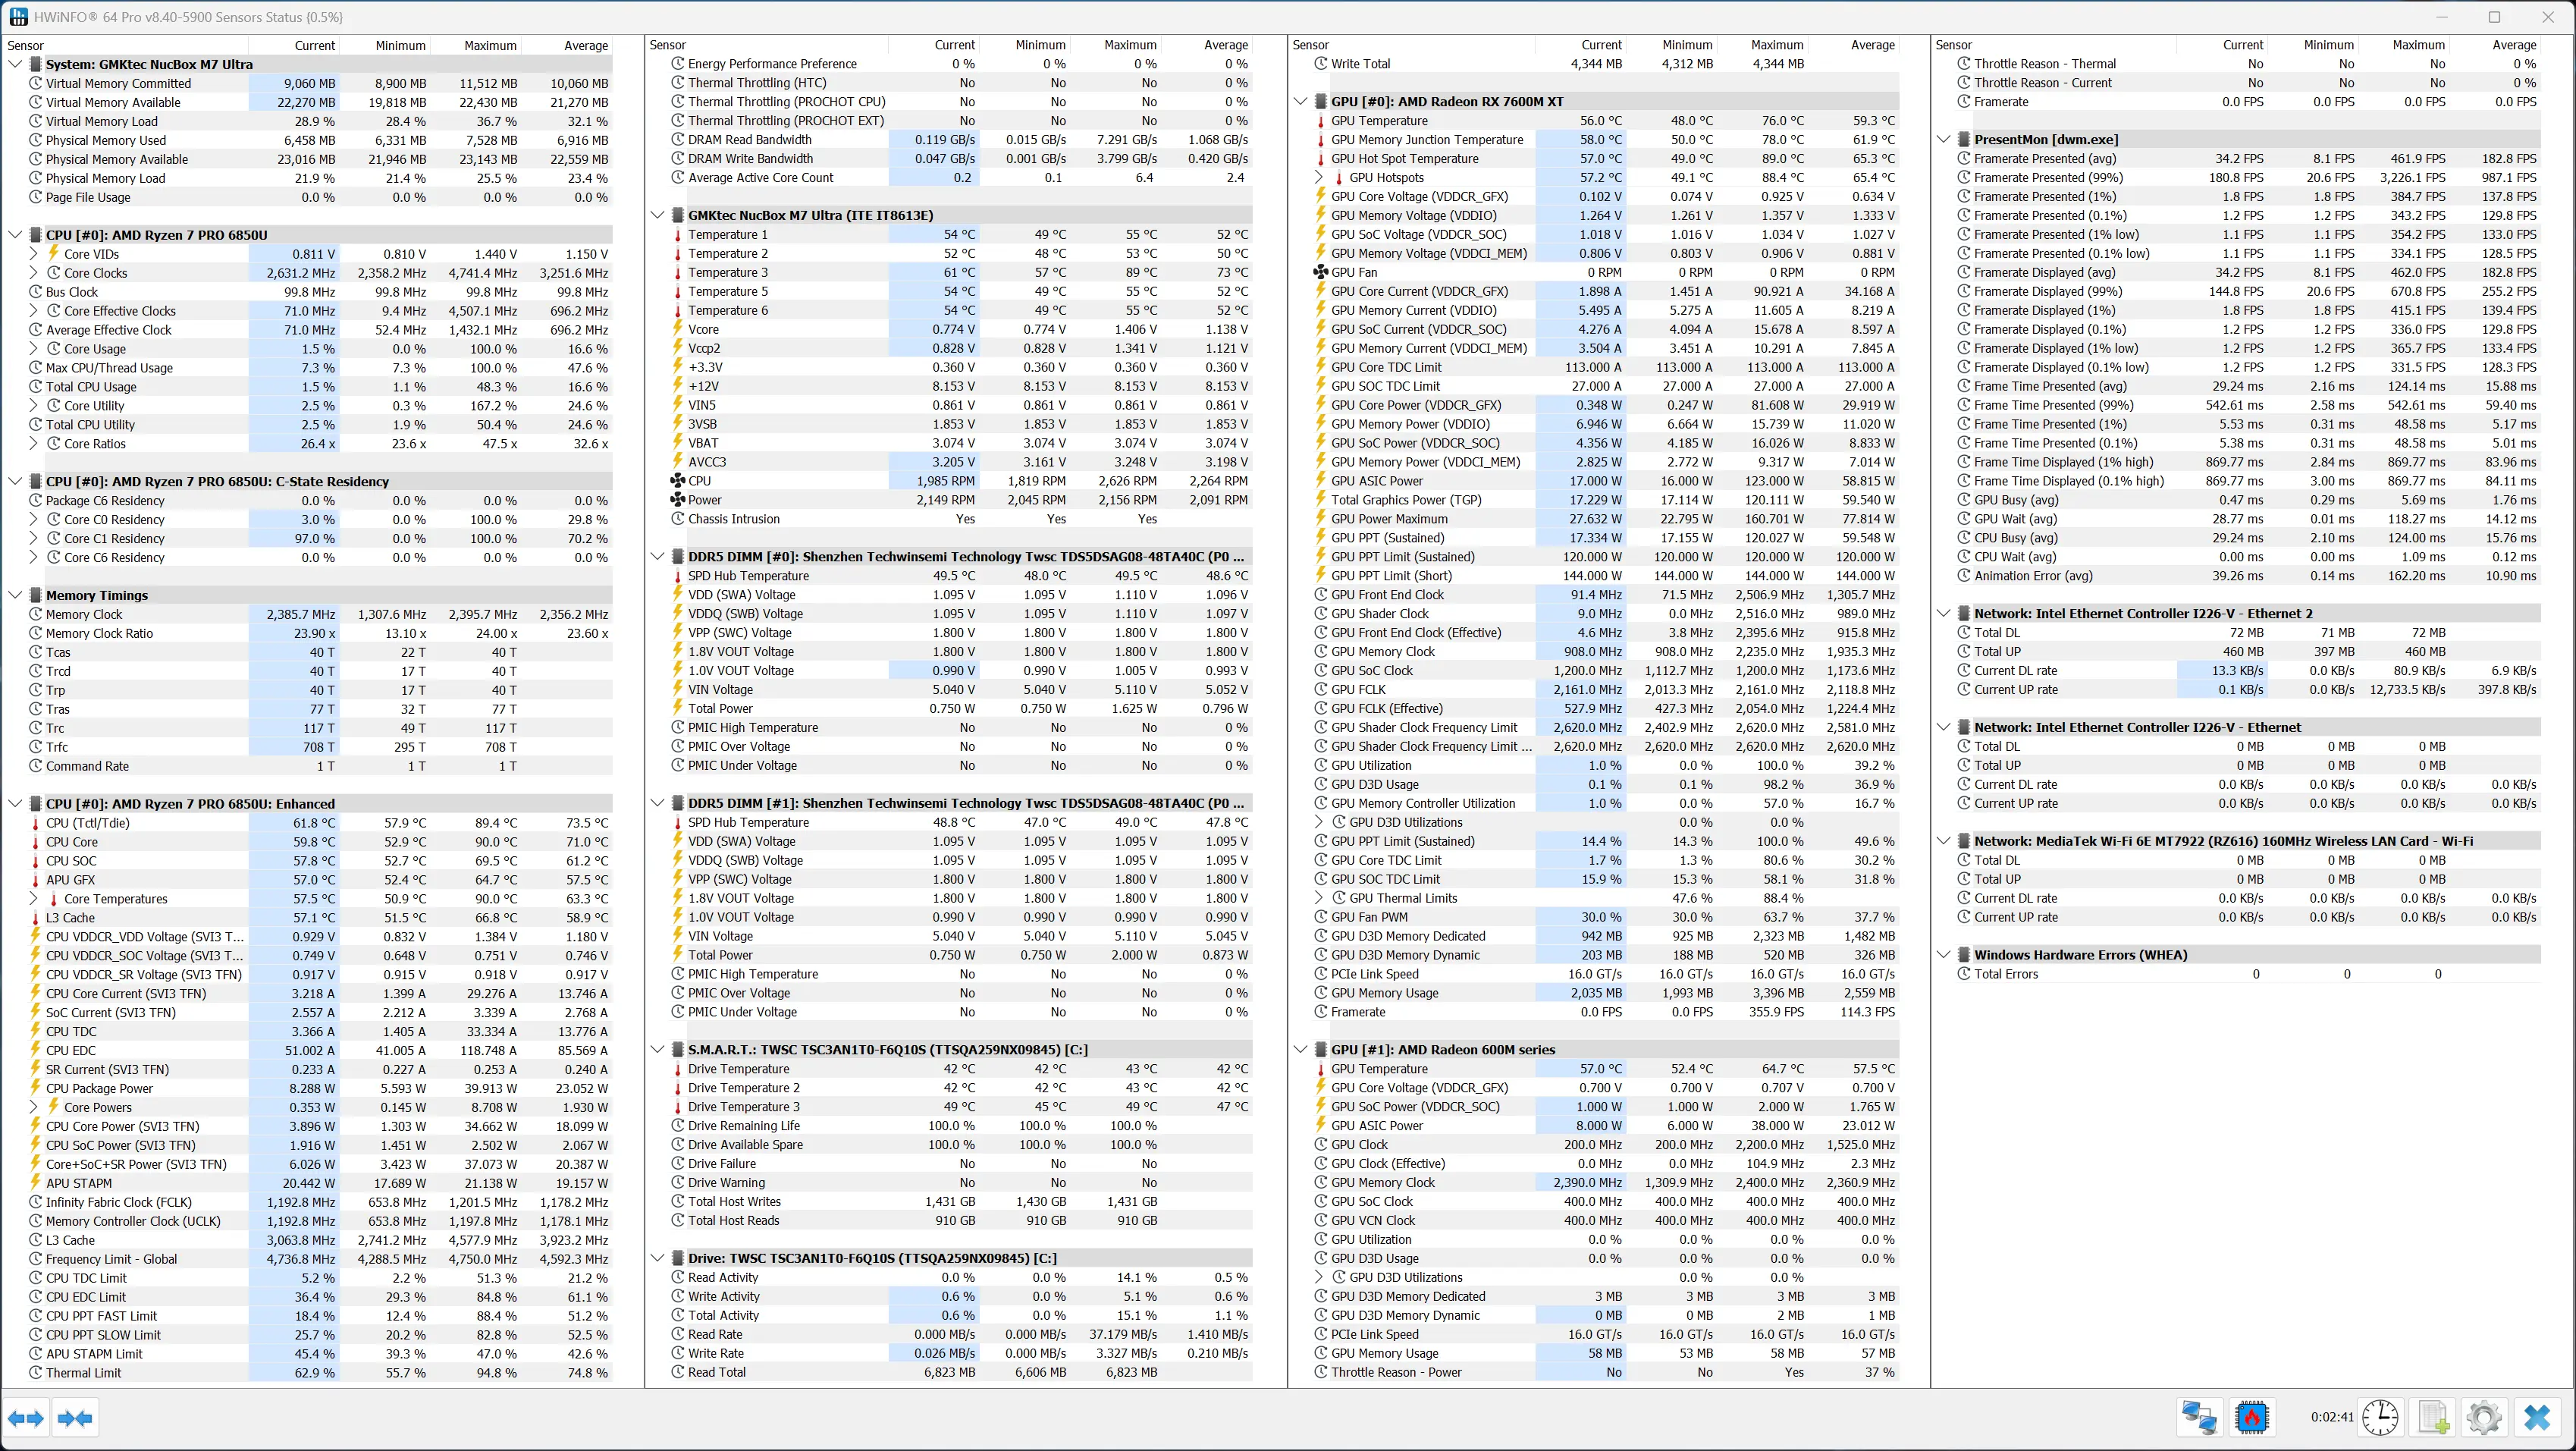
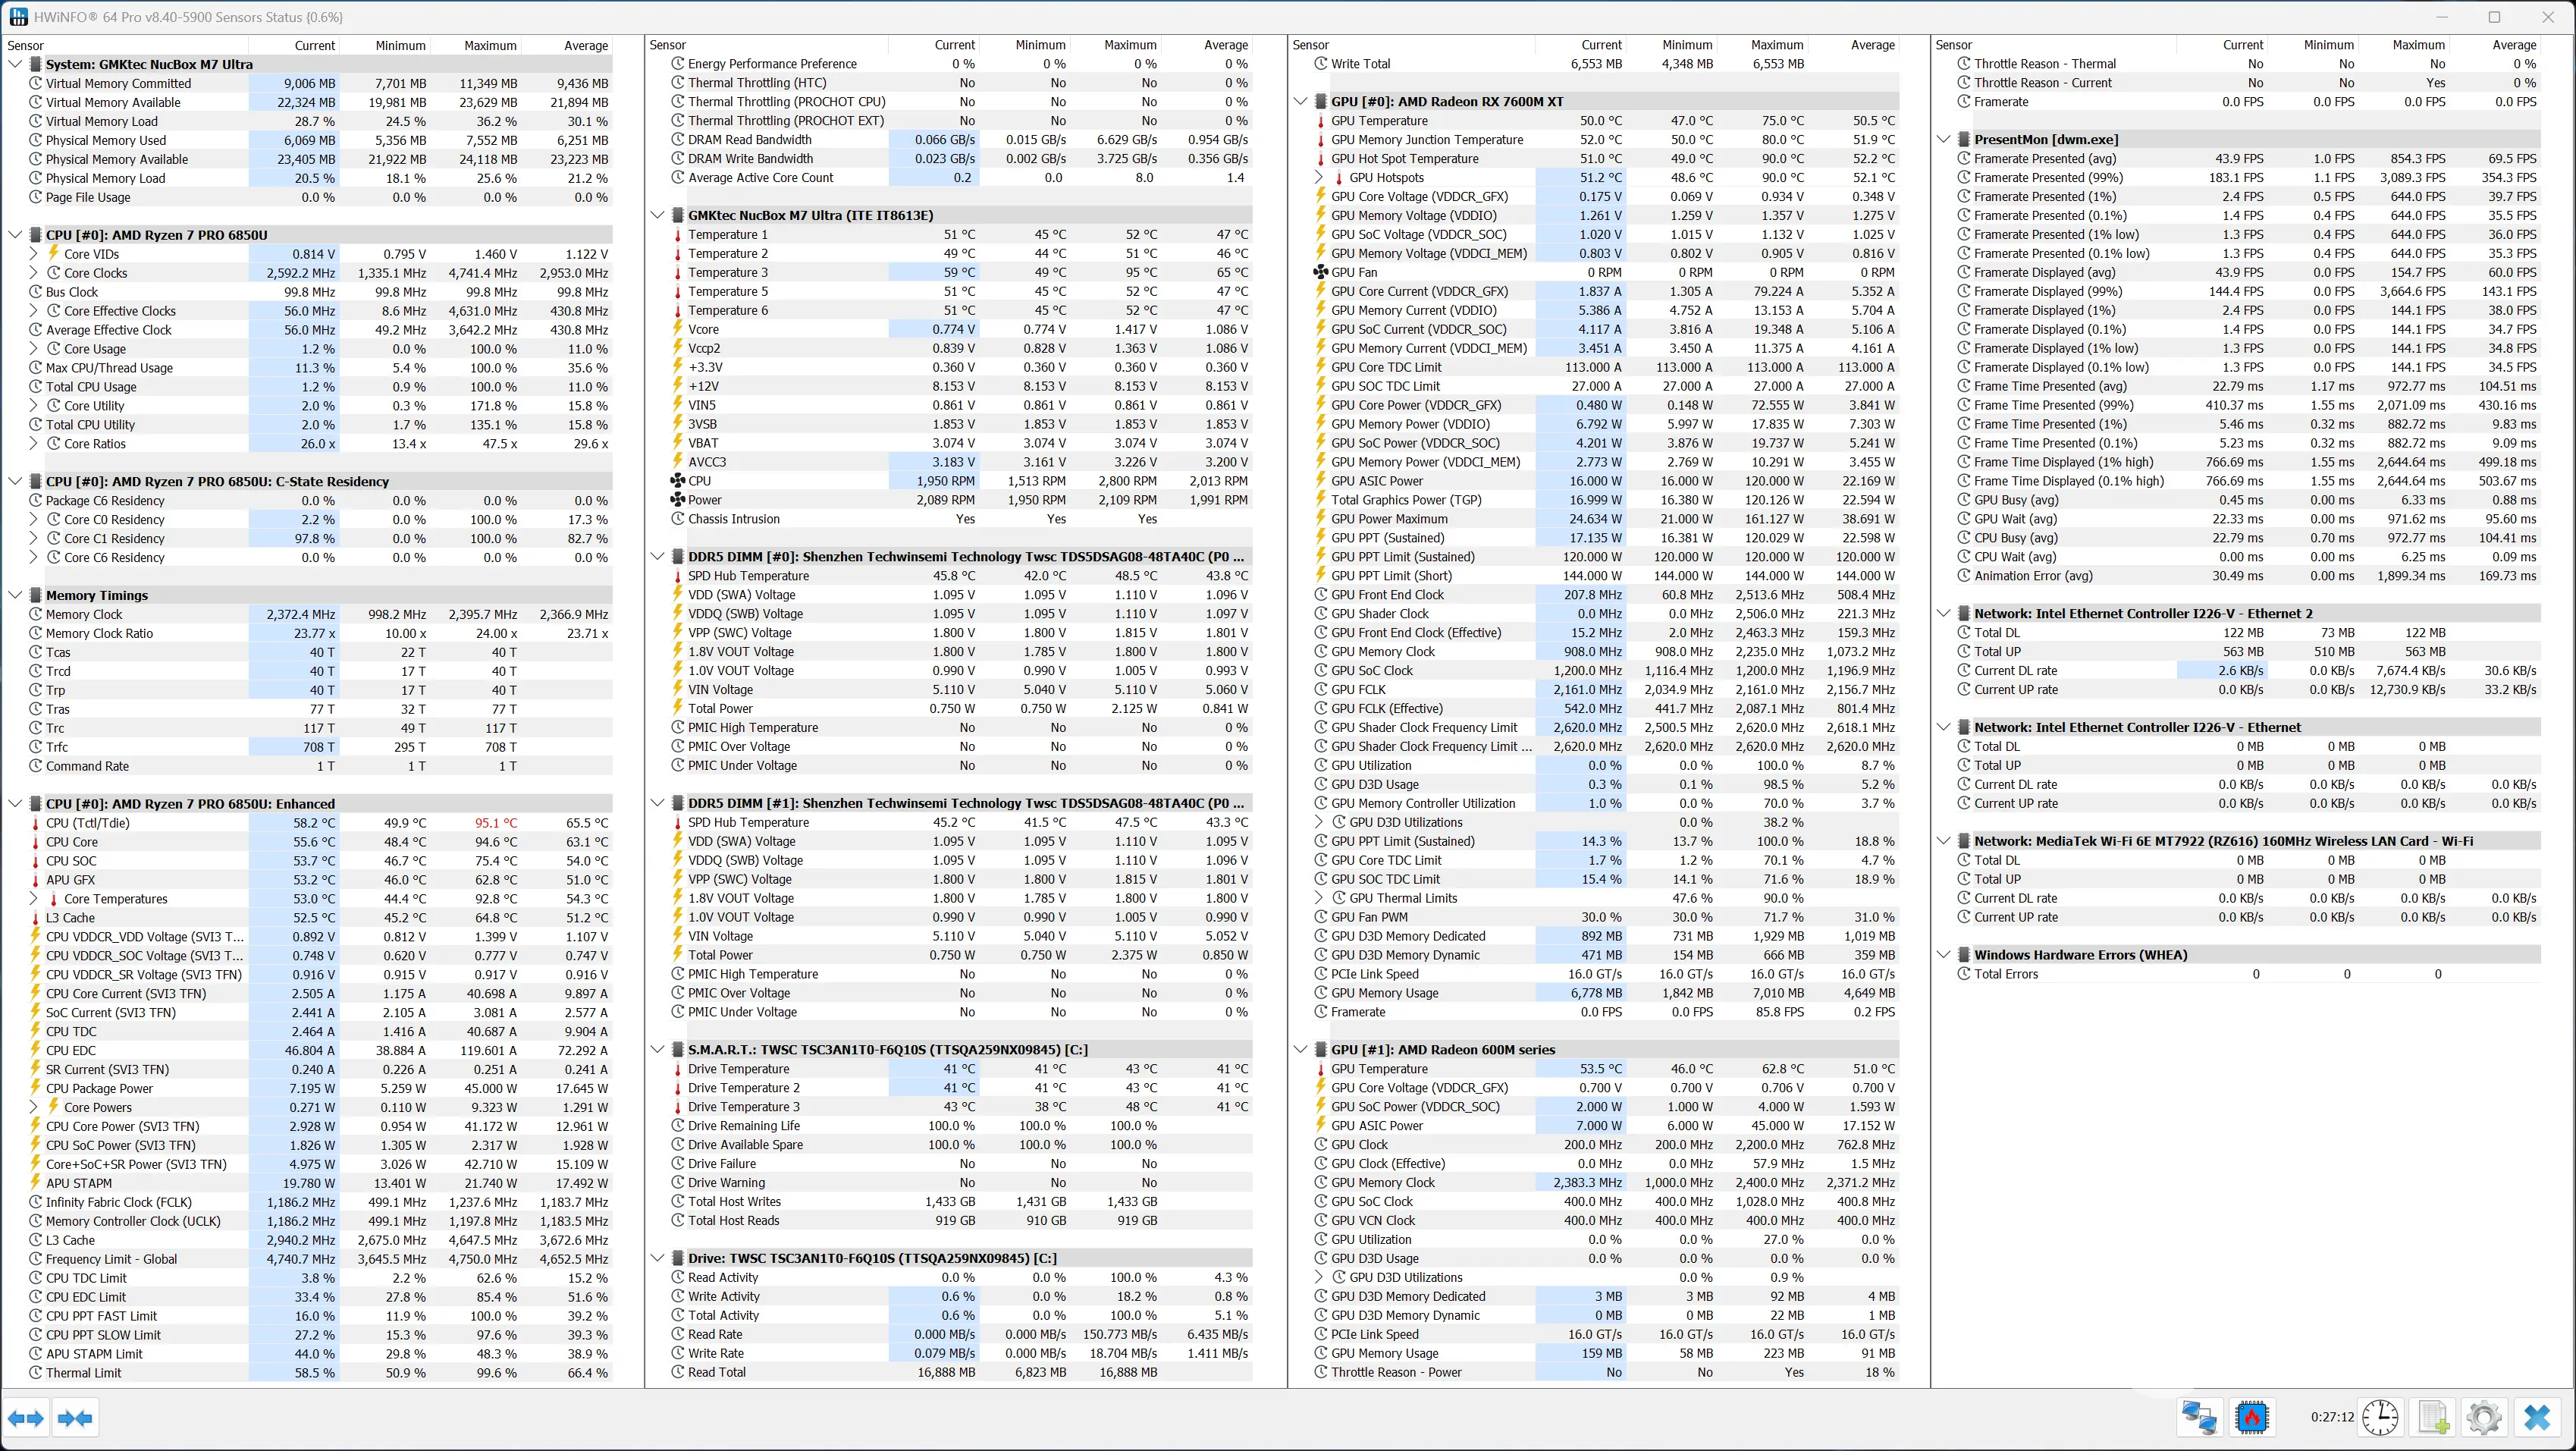
I also used HWiNFO to monitor hardware sensors and temperature readings.
GMKtec M7 UltraProcyon: Windows ML CPU
Windows ML GPU
AMD Ryzen AI NPU
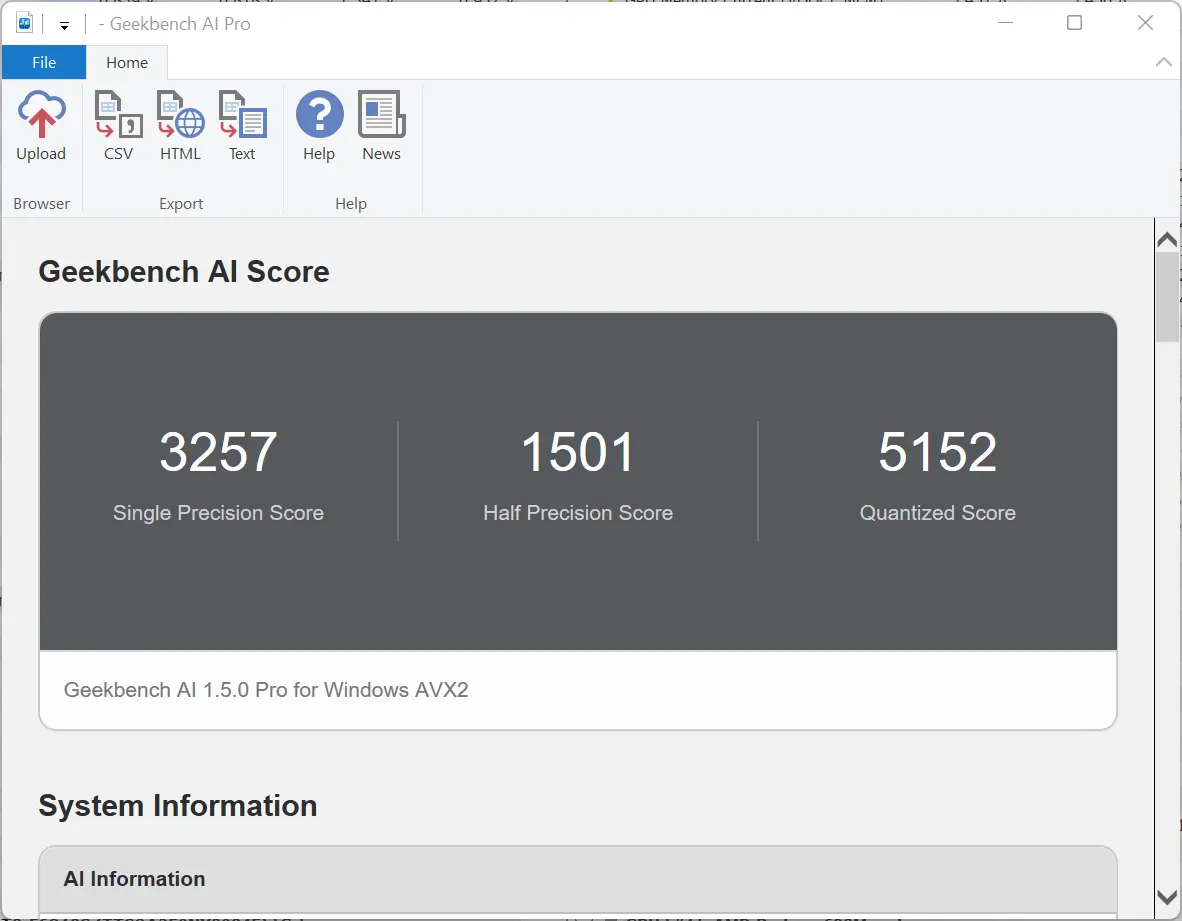
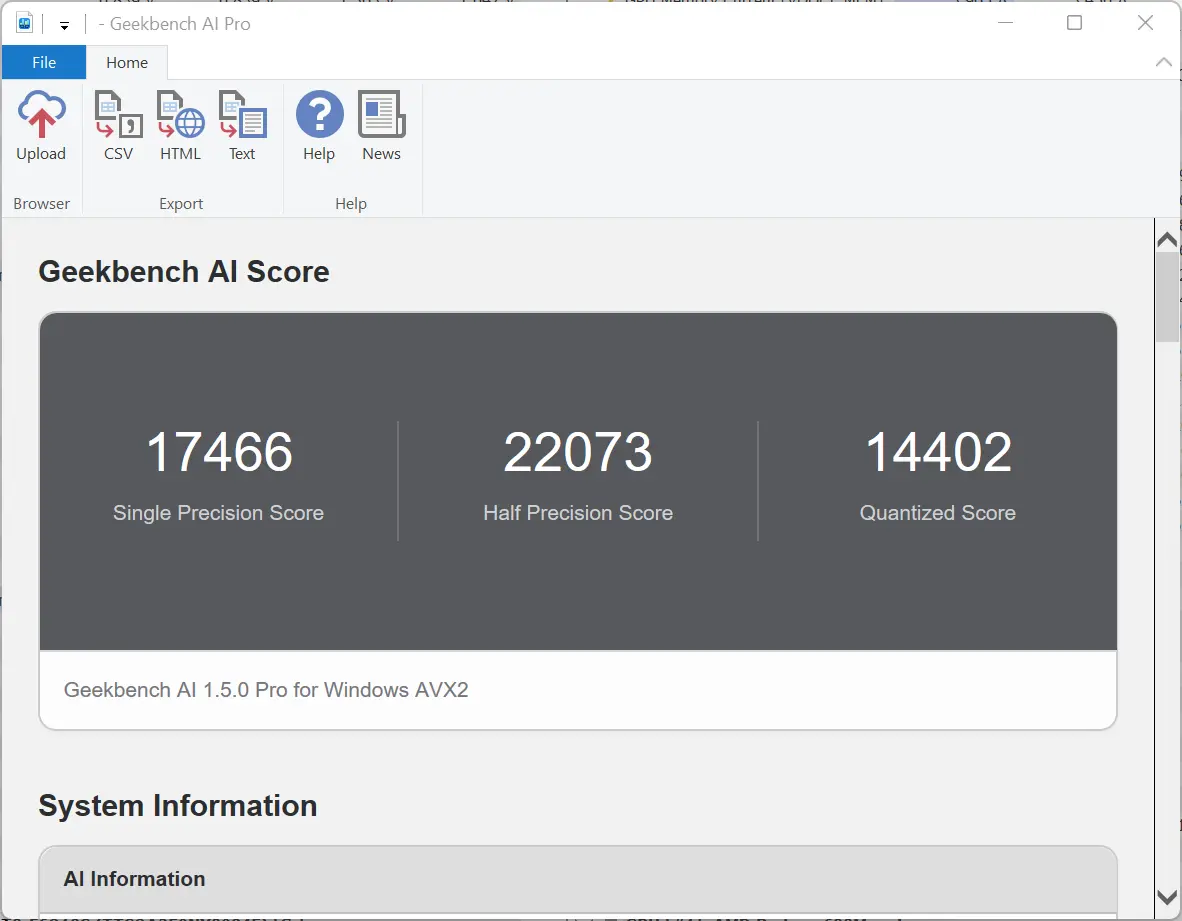
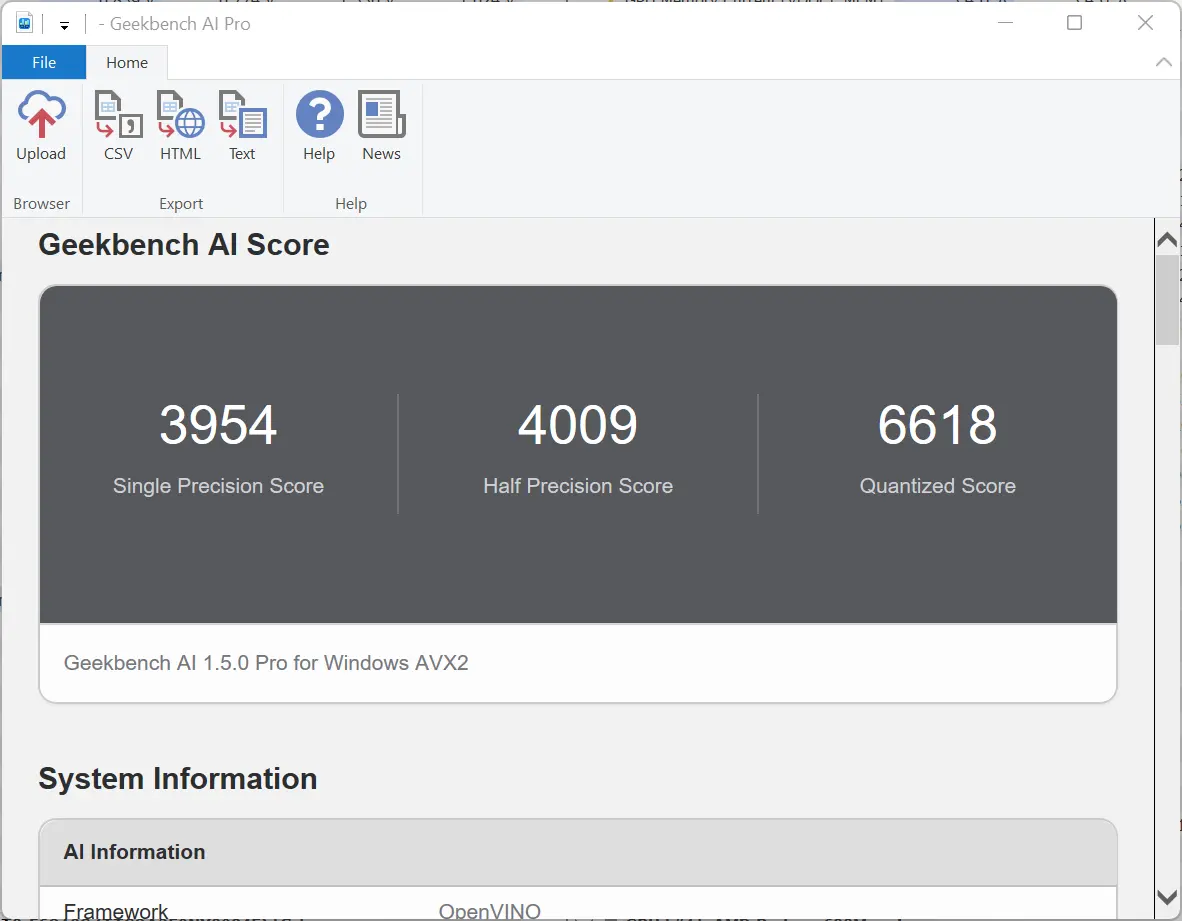
Single, Half, Quantized
Single, Half, Quantized
Single, Half, Quantized
ONNX CPUGeekbench AI scores are in the following order (left to right): Single Precision, Half Precision, Quantized.
As was to be expected, the Radeon 7600M XT blows the 680M out of the water, with only the CPU-bound tests returning a result inside the margin of error; no surprises here.
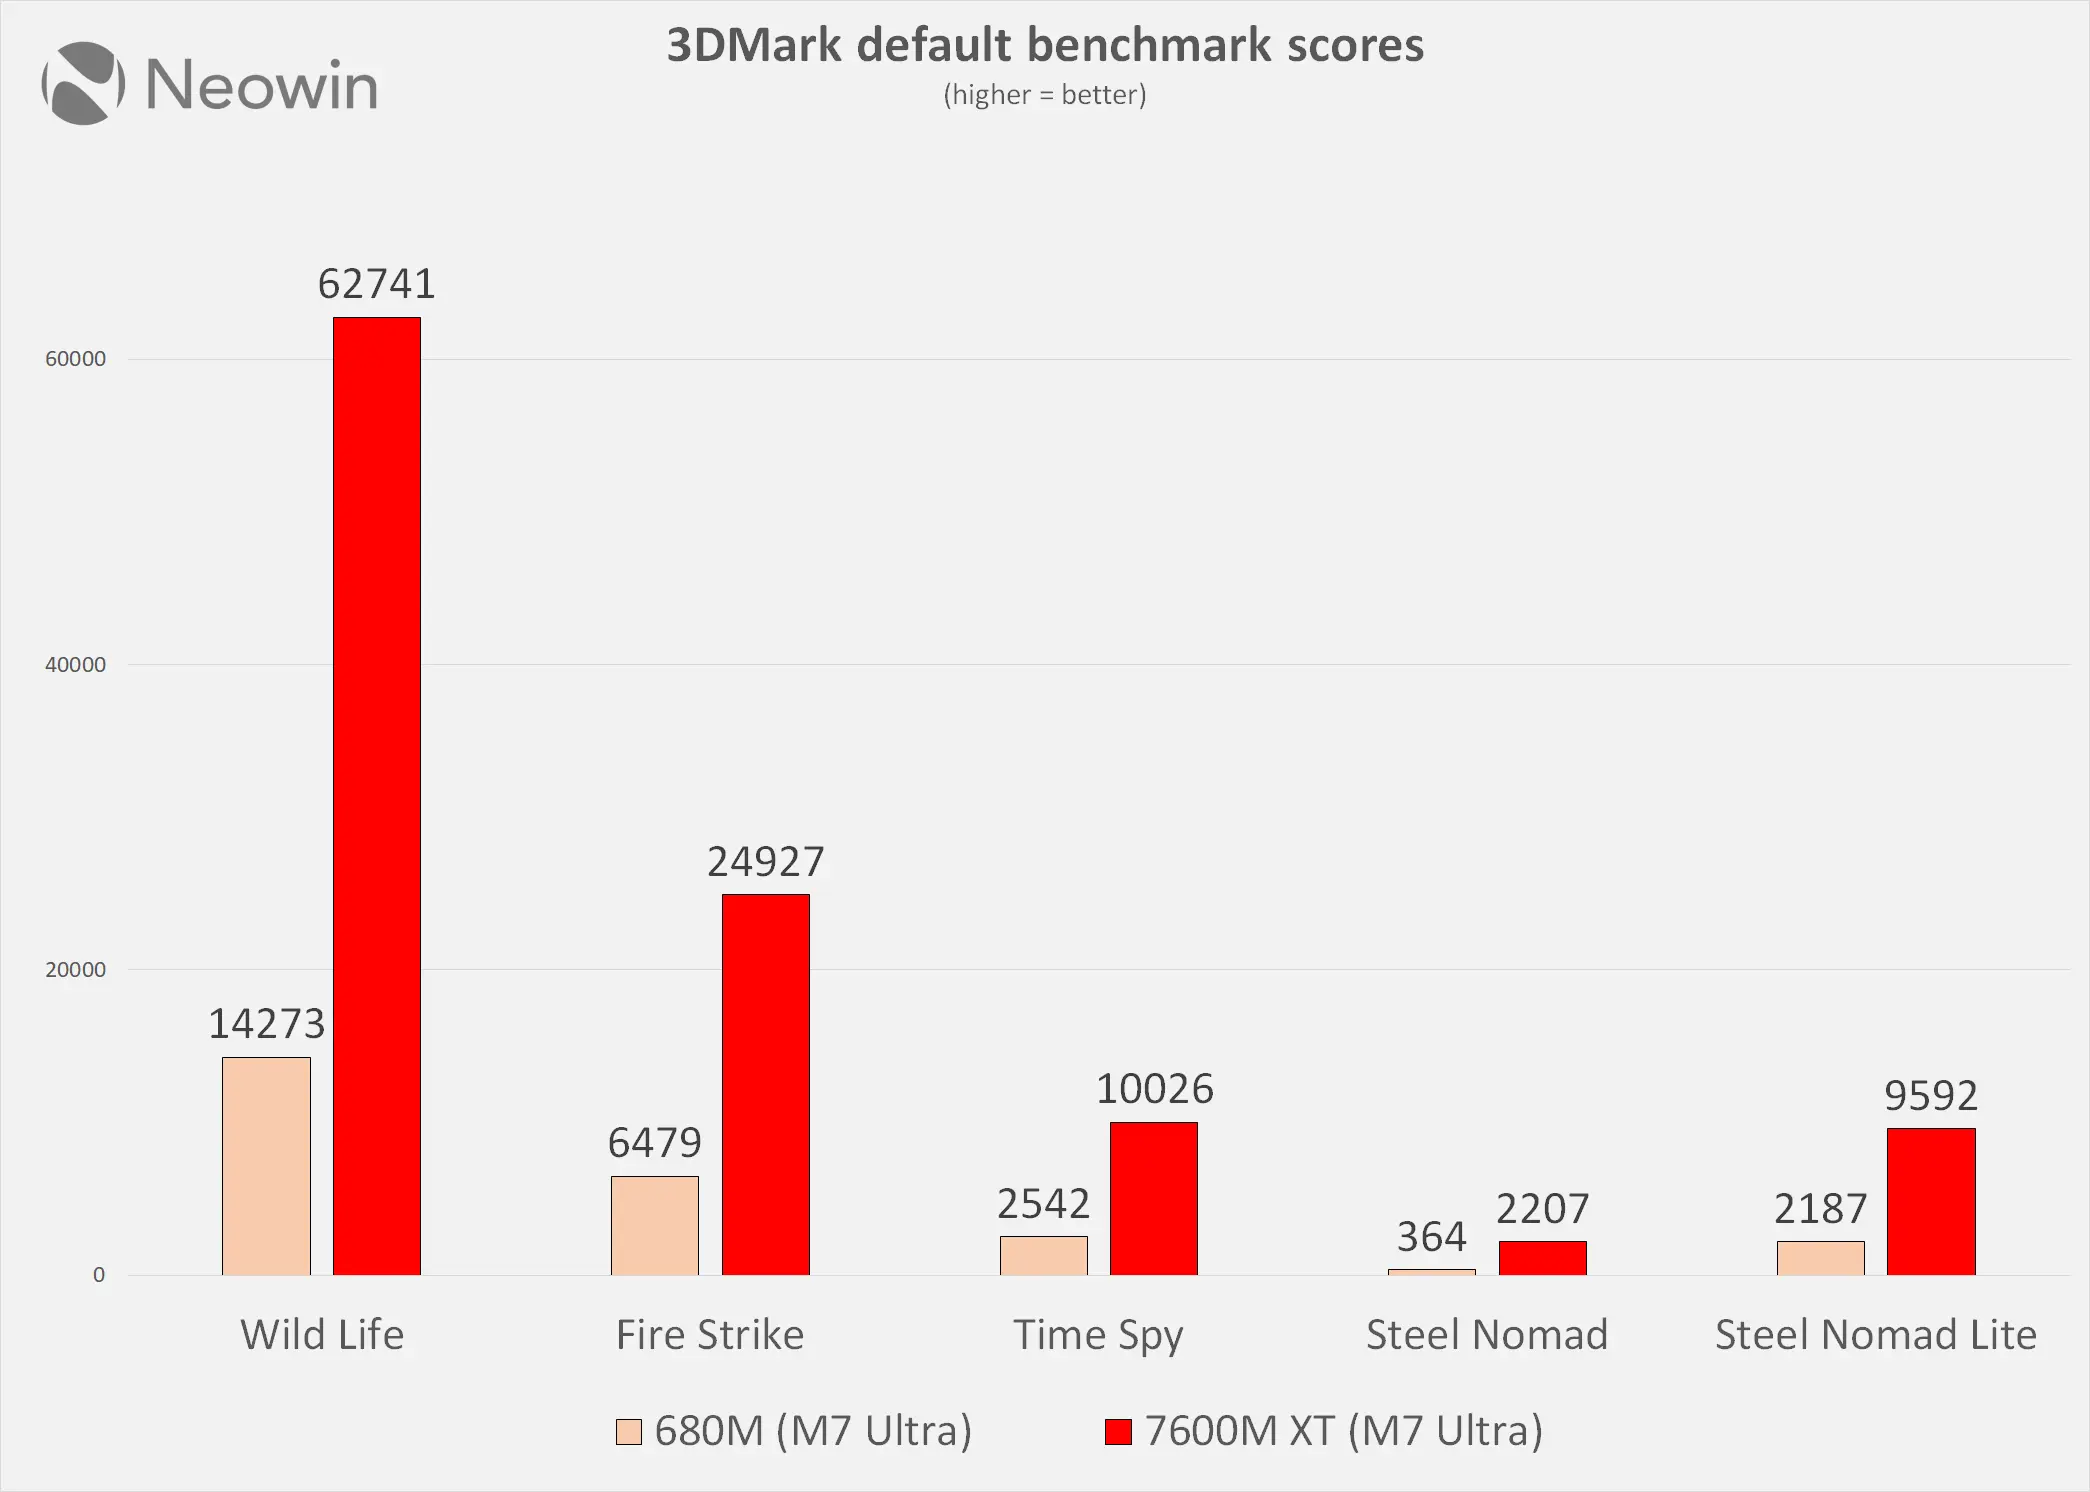
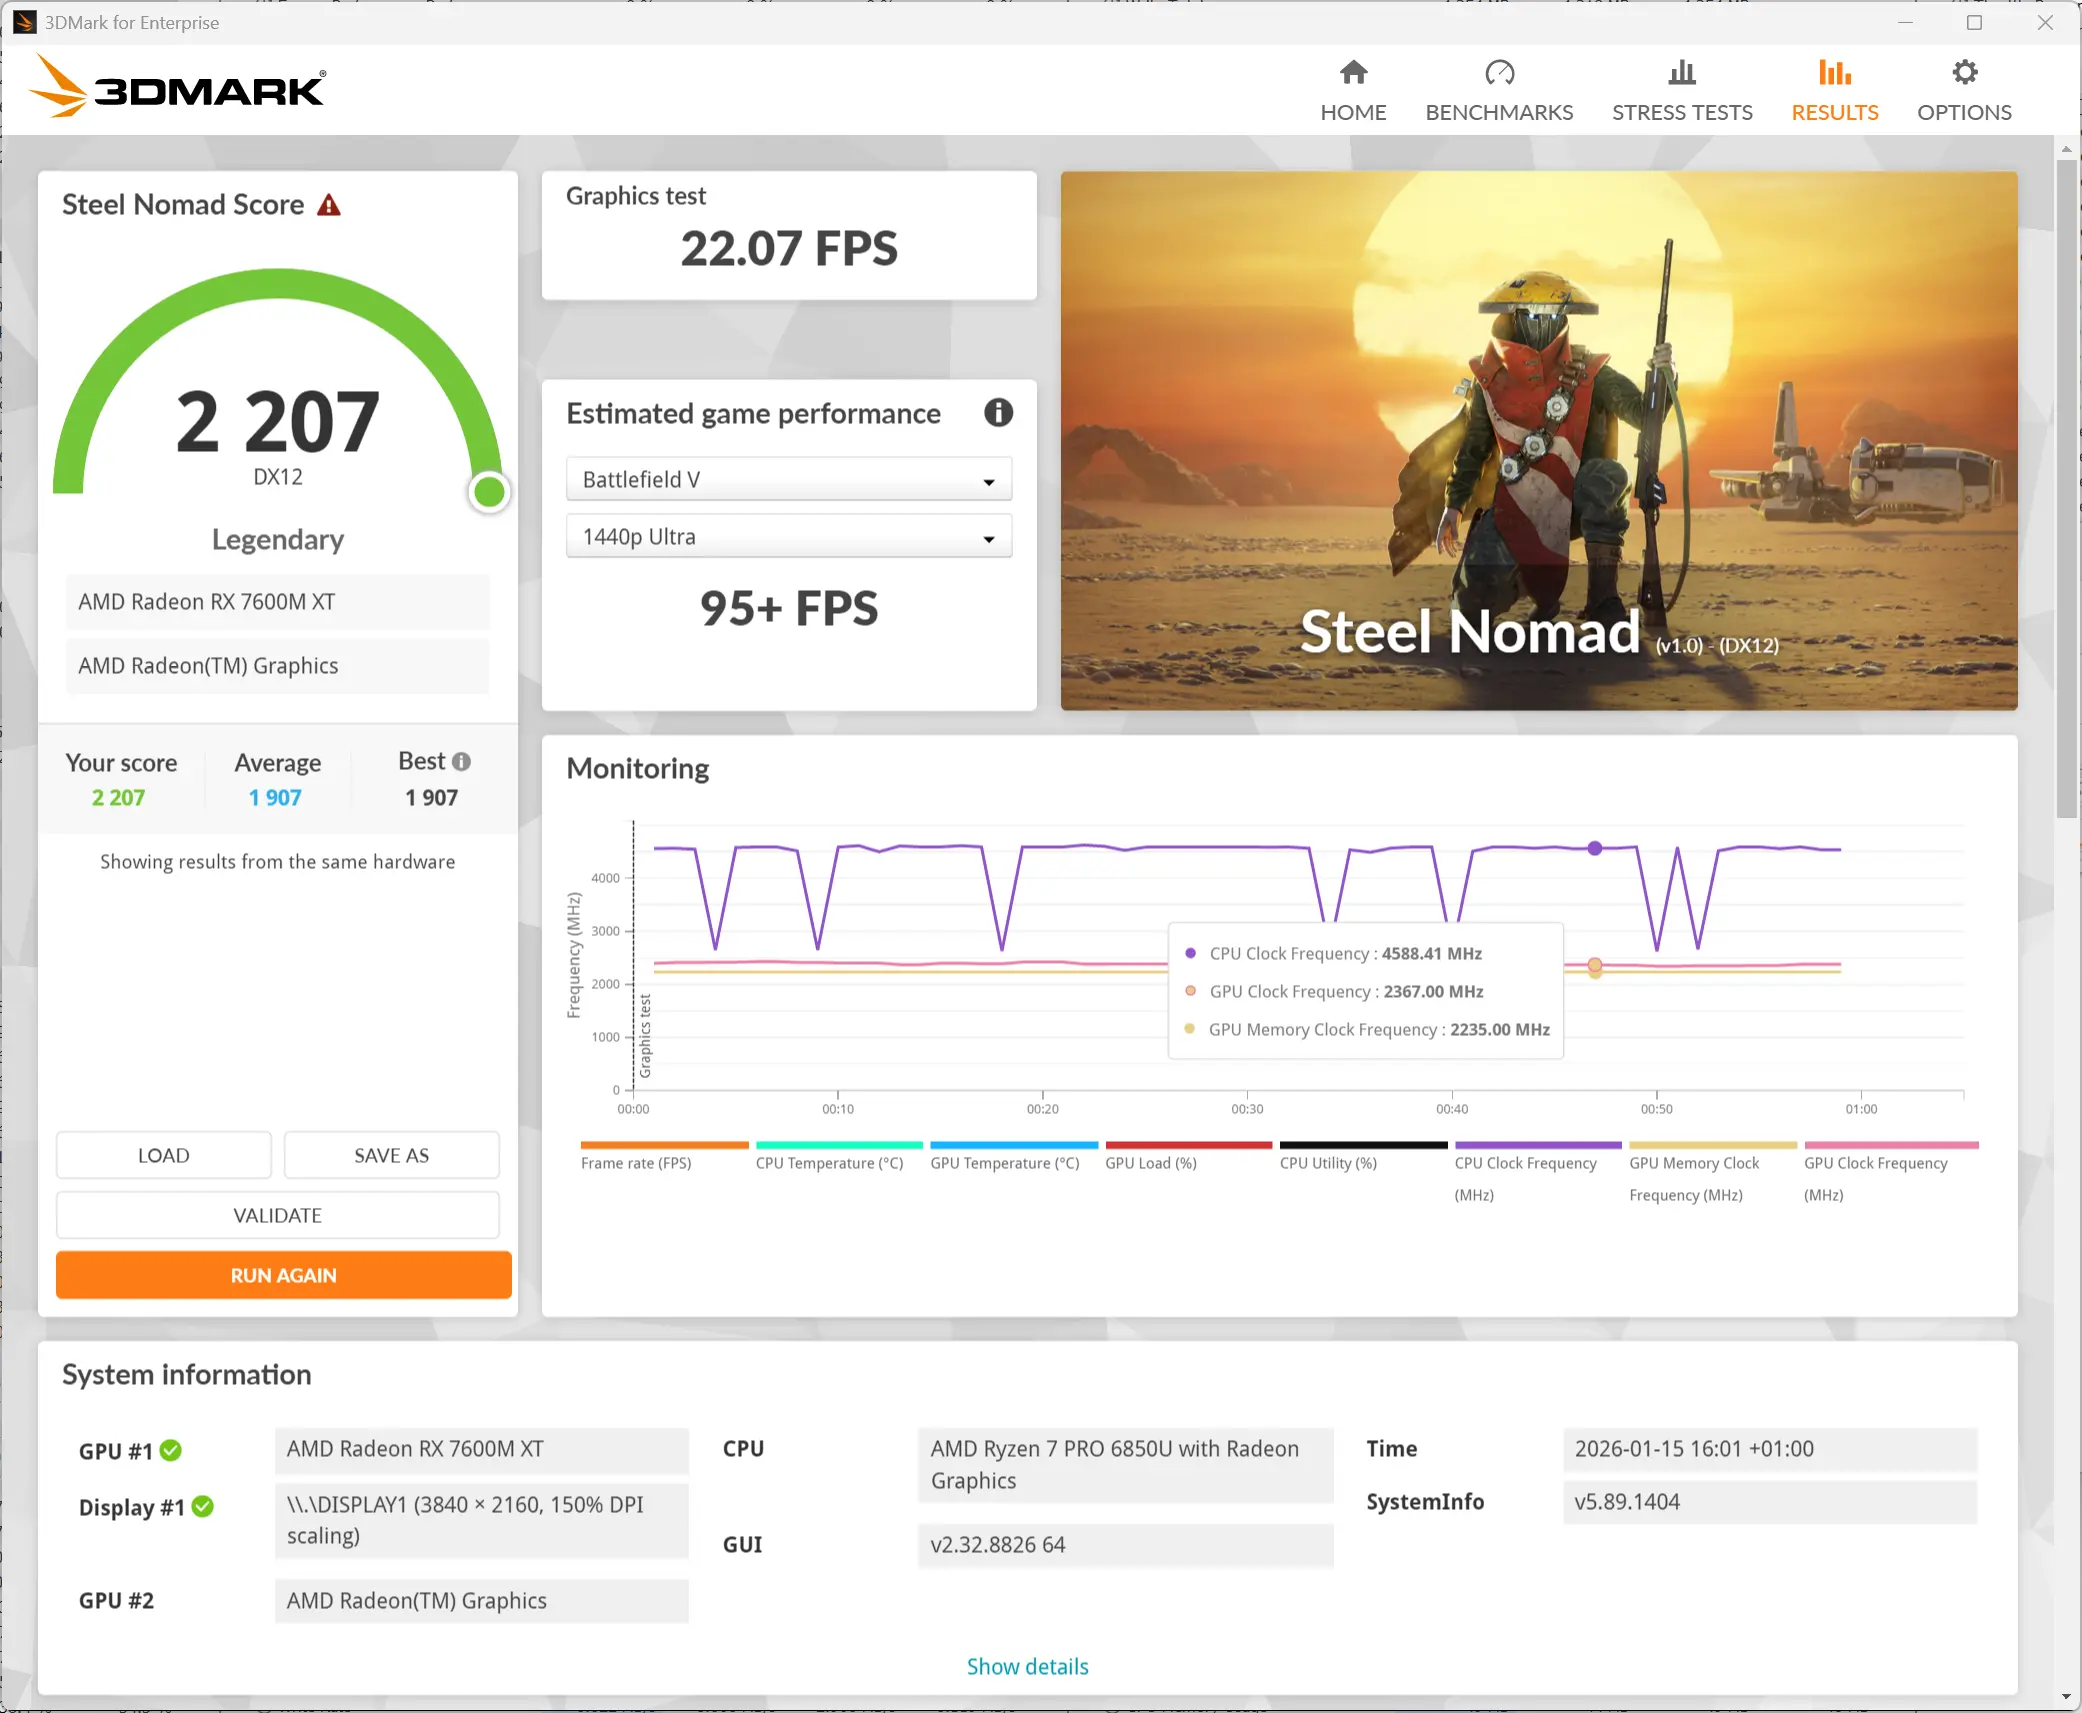
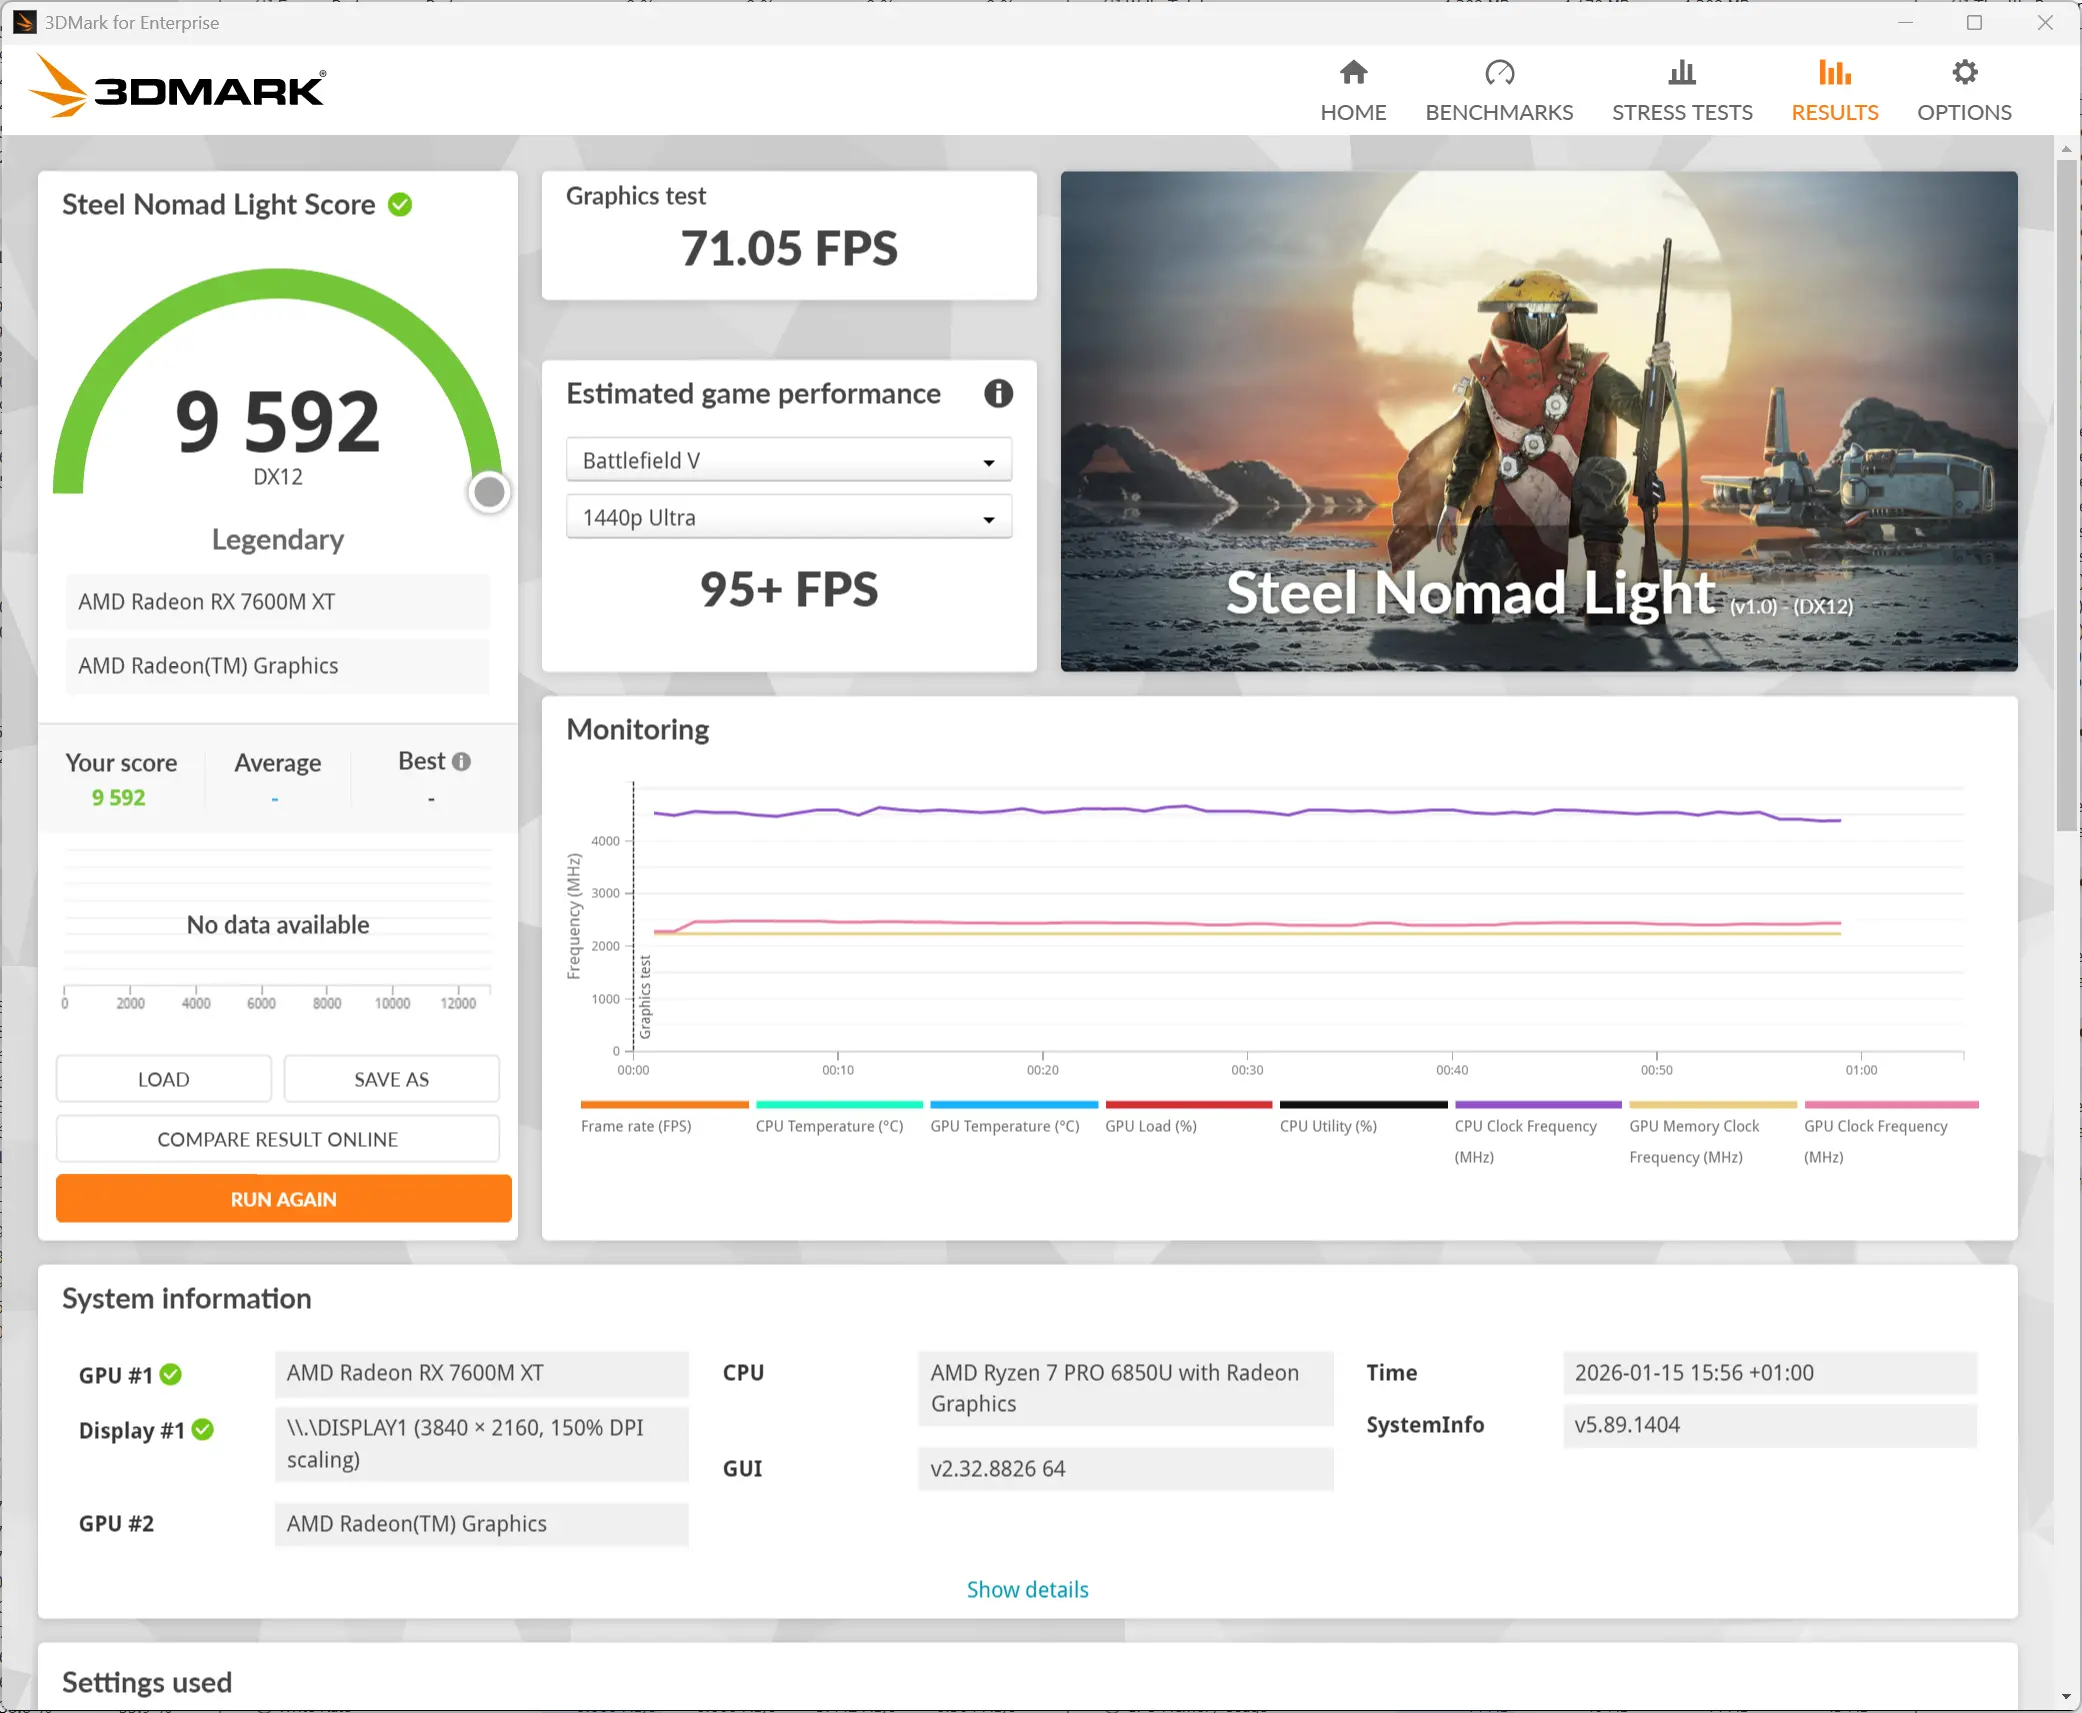
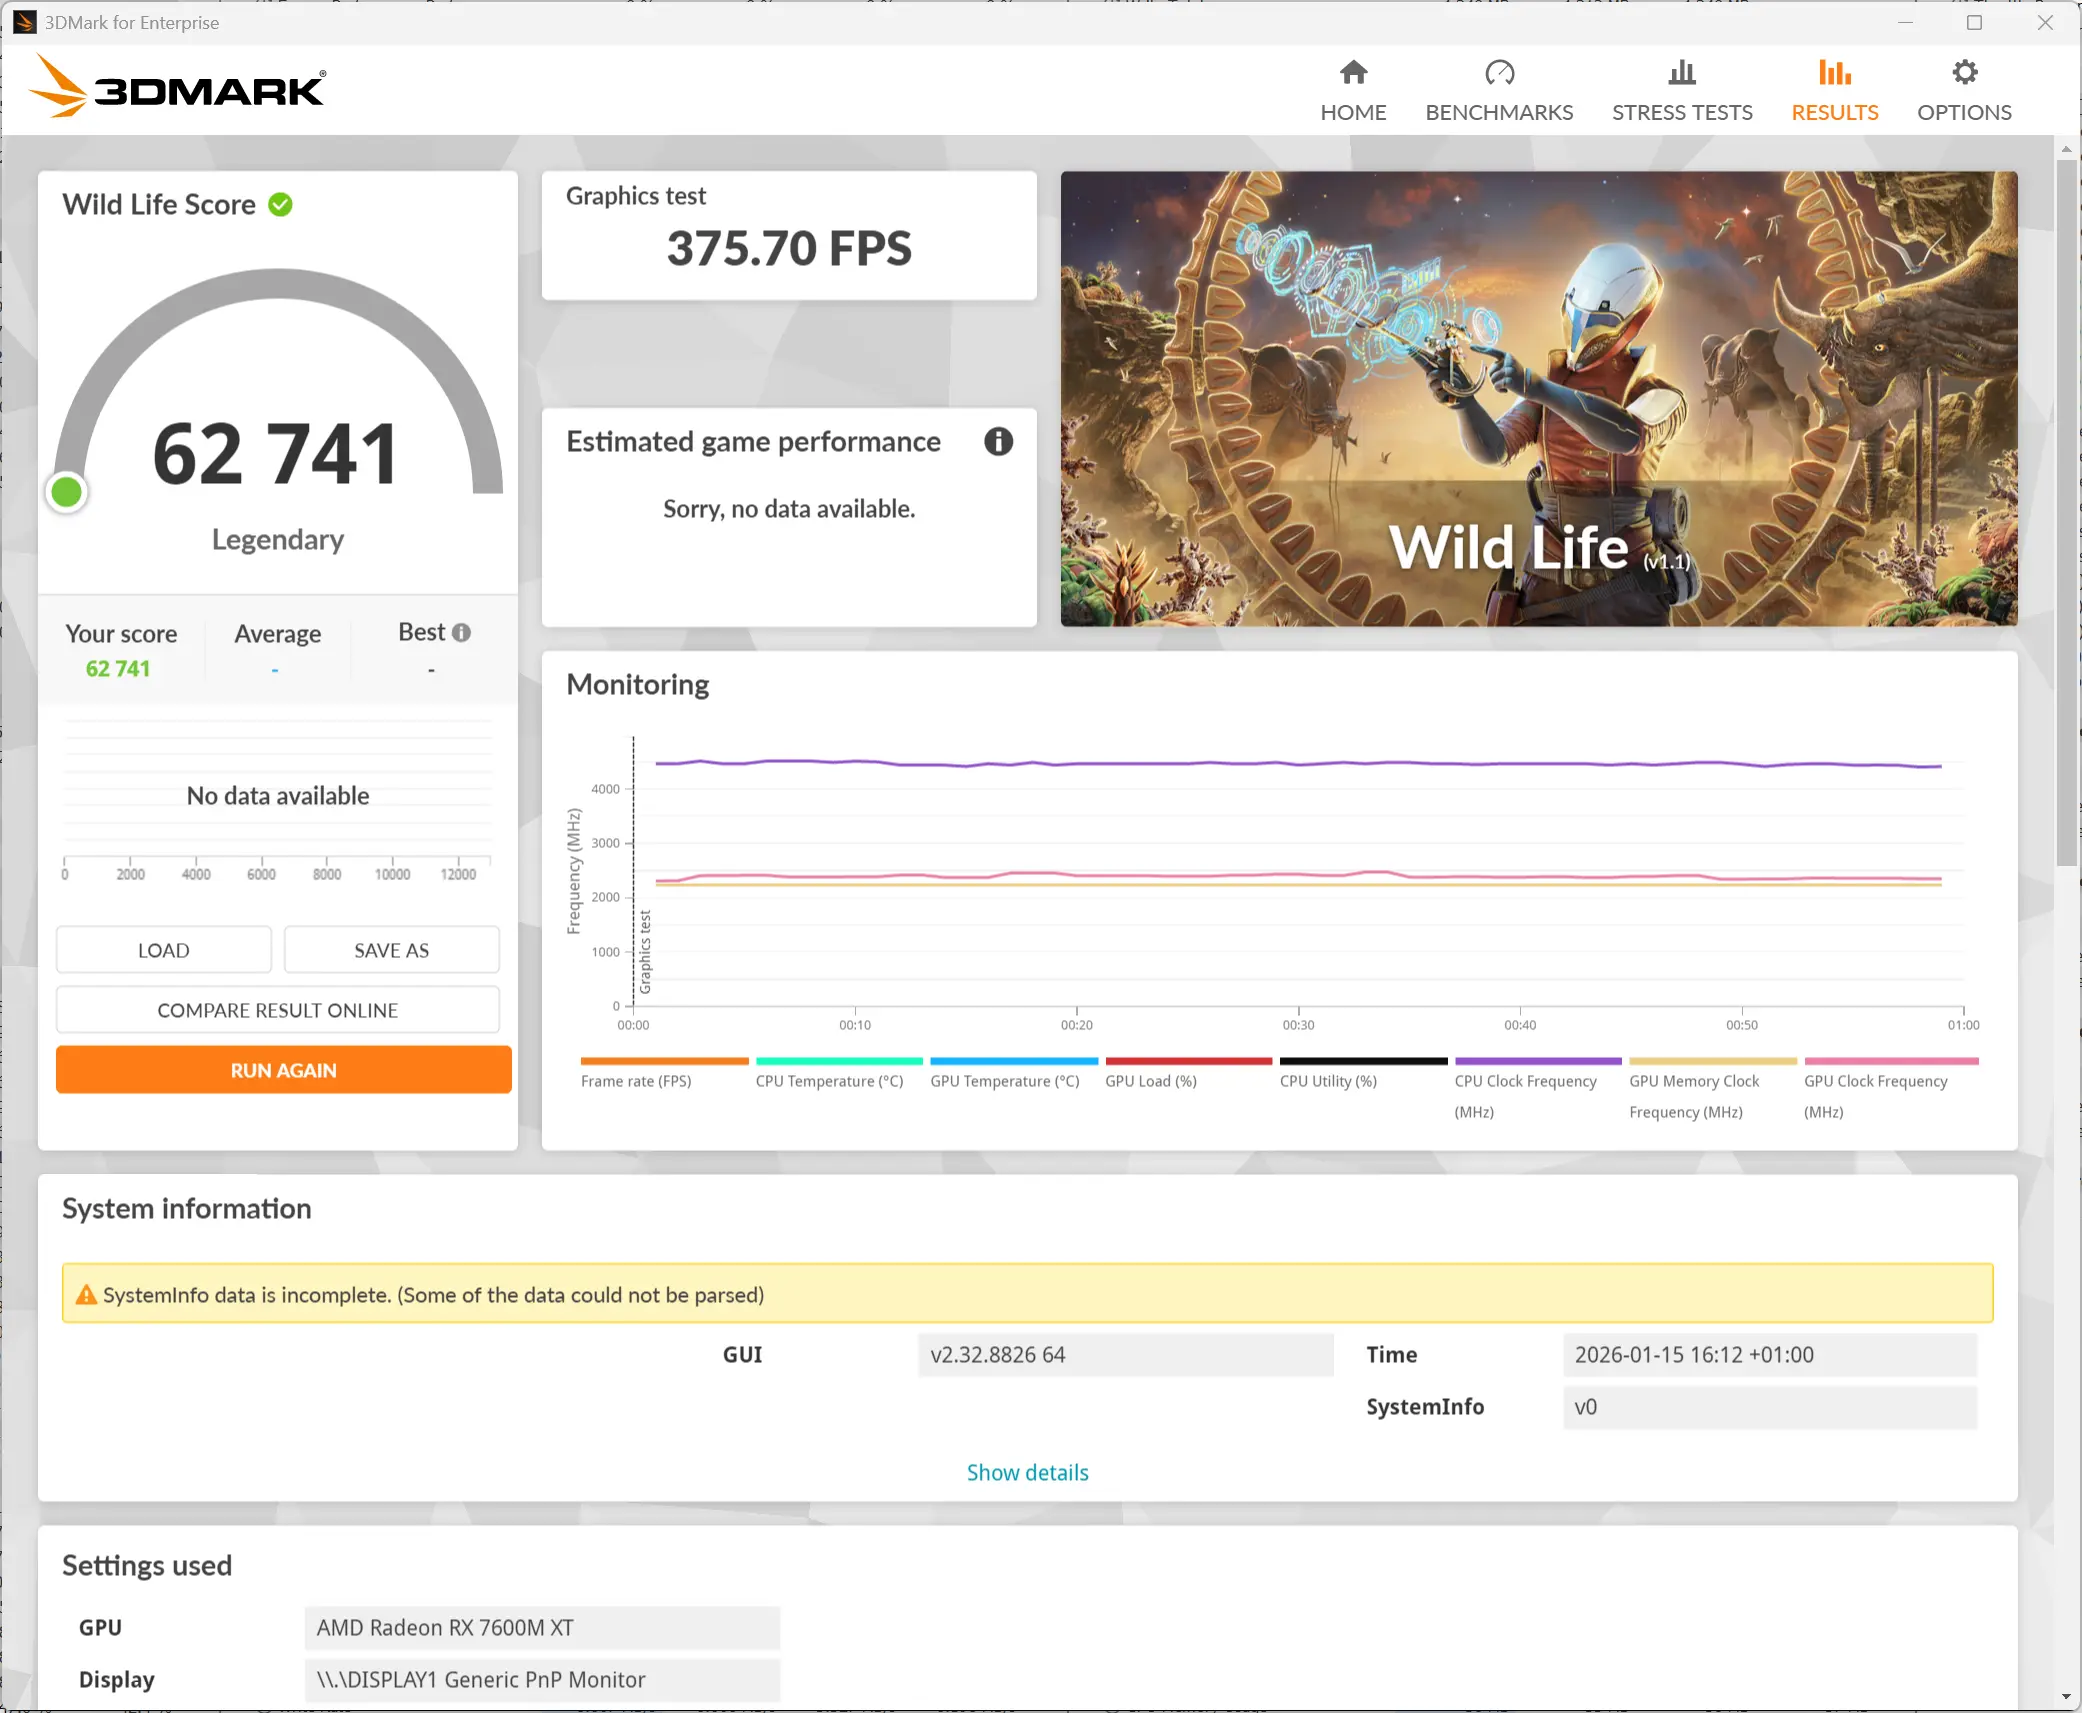
The chart above shows the humongous difference between the two in 3DMark tests, with the biggest gap in Steel Nomad, which is a modern DirectX 12 benchmark with a heavier load than Time Spy. Here the 7600M XT is over six times faster (~6.06X). On average, the discrete card via dock shows how much more you can gain in performance under the right conditions. There is also a "Lite" version of Steel Nomad, and interestingly, the 7600M XT shows almost the same uplift here (~4.4X) as it does in Wild Life, the latter runs on Vulkan API.
Real-world GamingThe M7 Ultra has a pretty weak 680M that does not come close to any dedicated GPU, so it goes without saying that the AD-GP1 breathes new life into the already decent M7 Ultra. With this eGPU addition, you can expect to power through any 1080p game, and even some 1440p ones if you check the settings.
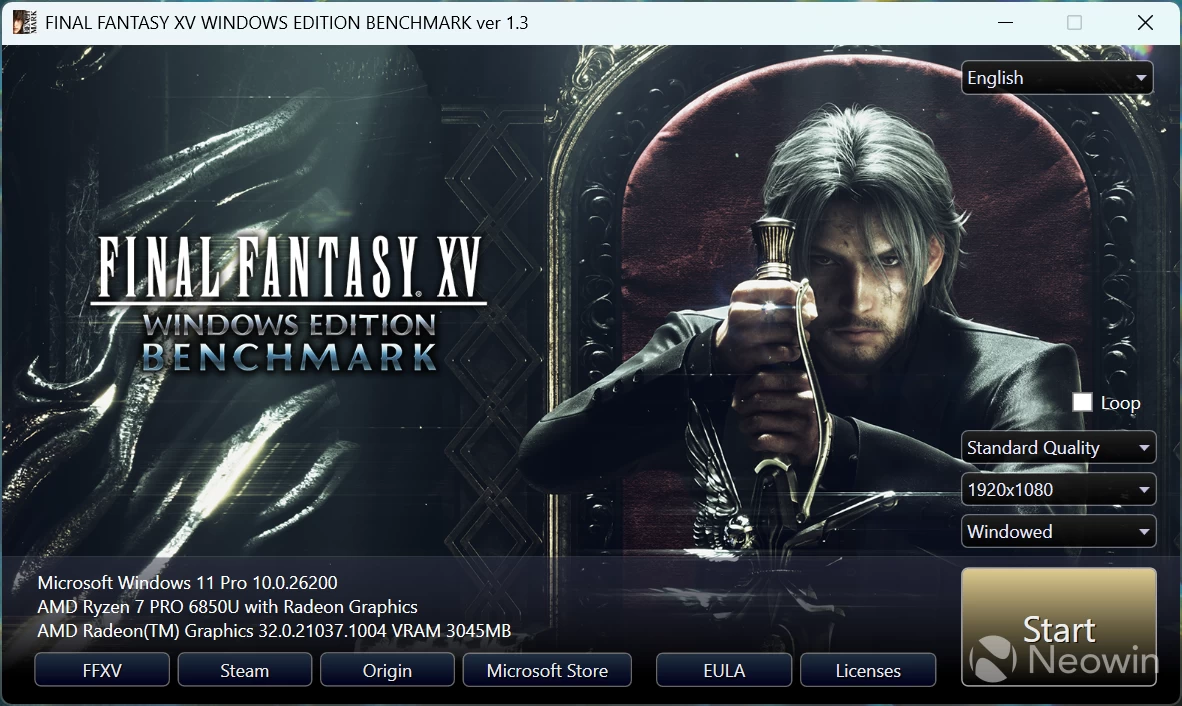
Final Fantasy XV
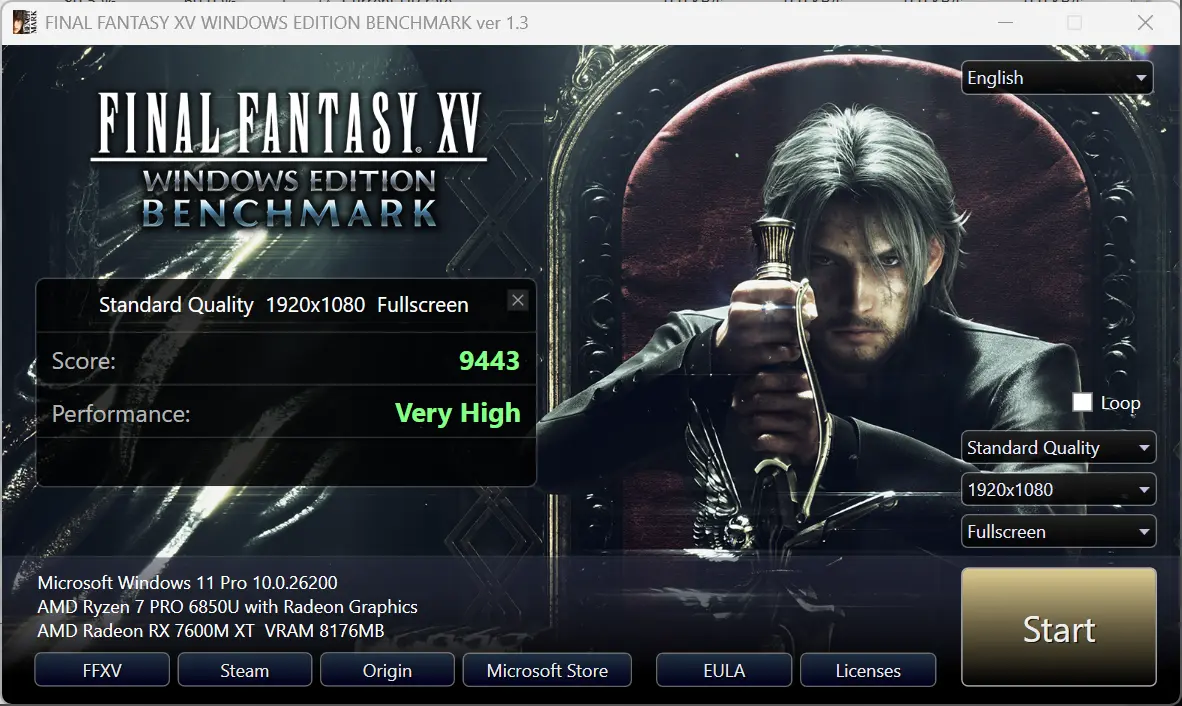
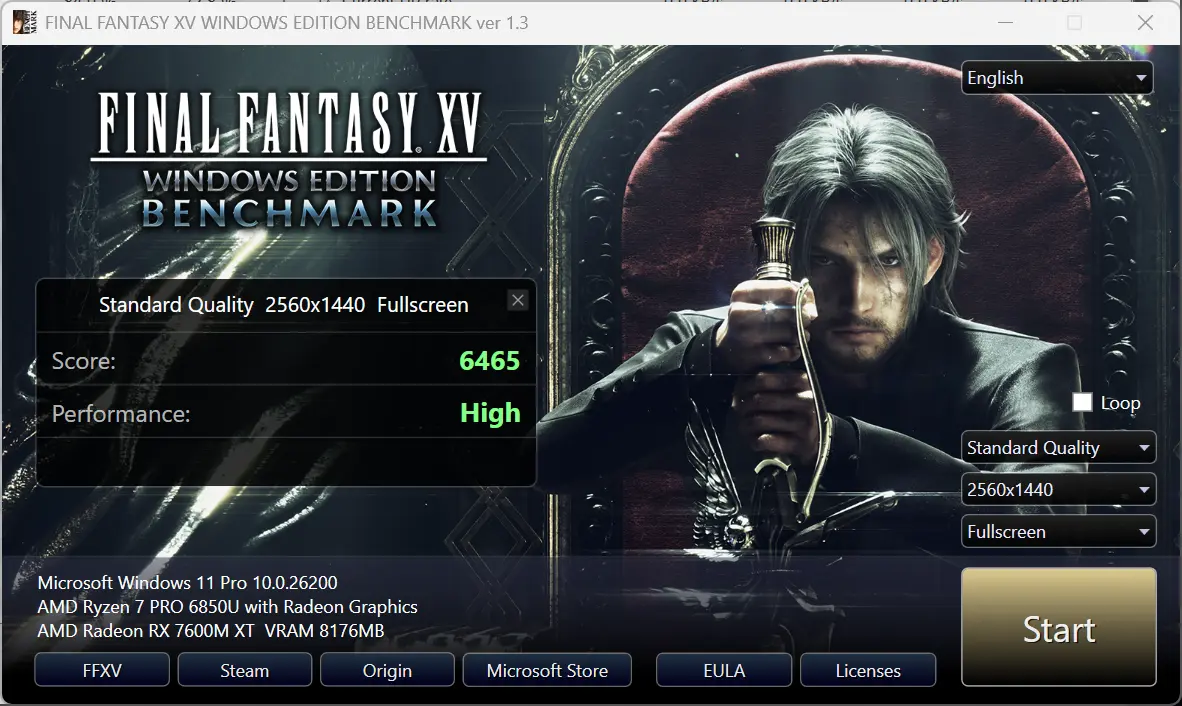
To gauge the capability of the 32CU Radeon 7600M XT, I ran the standalone Final Fantasy XV Windows Edition Benchmark on different resolutions at the Standard Quality preset to see what kind of gaming performance one can expect from the onboard GPU.
The full scores are below, and are based on the settings detected for the game, which was Standard quality.

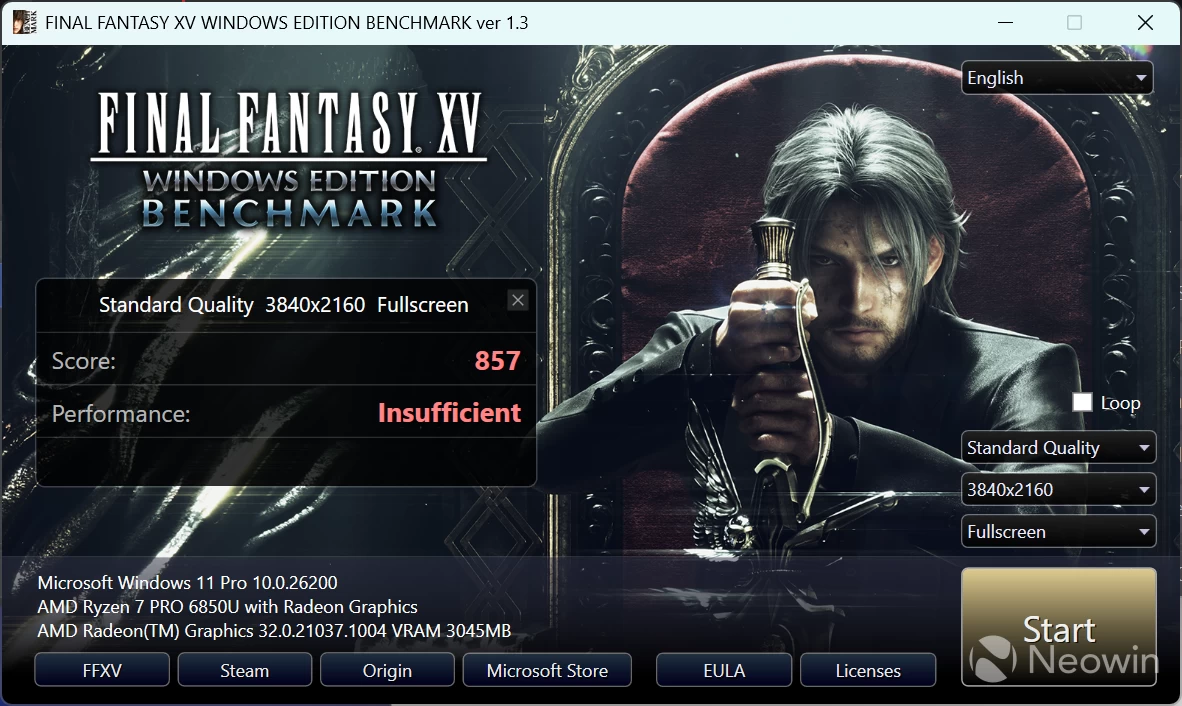
Again, we're using the 12CU Radeon 680M iGP for comparison.
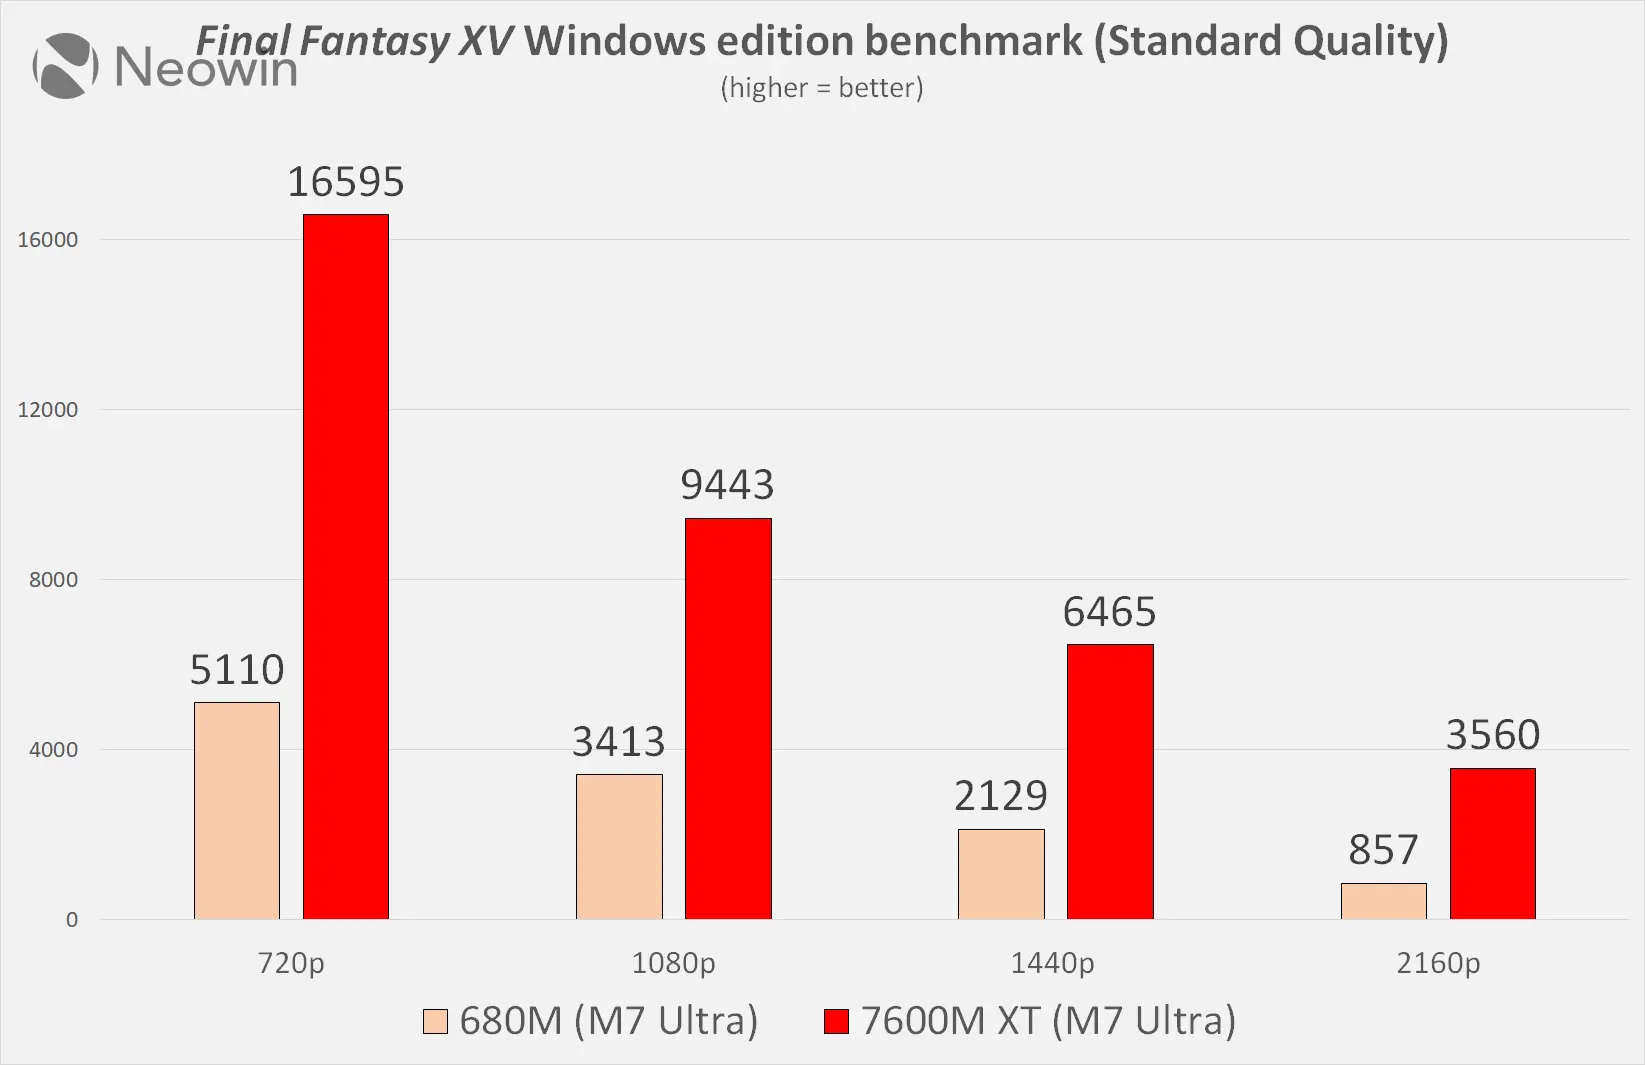
We start off at 720p. Interestingly, as 720p is the least graphically demanding, we expected the 680M to be the closest to the 7600M XT; however that was not the case as the dedicated docked Radeon GPU was over three times (~3.25X) better than the integrated graphics, and this gap actually narrowed significantly as we moved to 1080p as the split was now well under three times (~2.77X).
While it is hard to determine why this was the case, we have a theory. As 720p was less graphically demanding, as mentioned above, it means the CPU itself is used more at this resolution. However, as both the processor and integrated graphics compete for the same memory bandwidth and power headroom available, they are probably holding each other back more at this resolution compared to at 1080p.
Meanwhile, at 1440p, the 7600M XT is almost exactly three times faster (~3.04X).
Finally, at 4K (2160p), the gap was the biggest. At this resolution, the CPU hardly mattered much and played the least part, but despite that, the integrated Radeon 680M struggled even though it had almost the entire memory bandwidth to itself. That is because 4K pixel crunching is hard on not only memory bandwidth but also on the core itself. Hence, the 7600X MT pulls easily ahead as it is more than four times better (~4.15X), a massive upgrade.
Cyberpunk 2077
Running Cyberpunk 2077 at the default detected settings in 4K with Ray tracing set to Ultra returned an average fps of around 27.6, which is basically unplayable due to the constant stuttering.
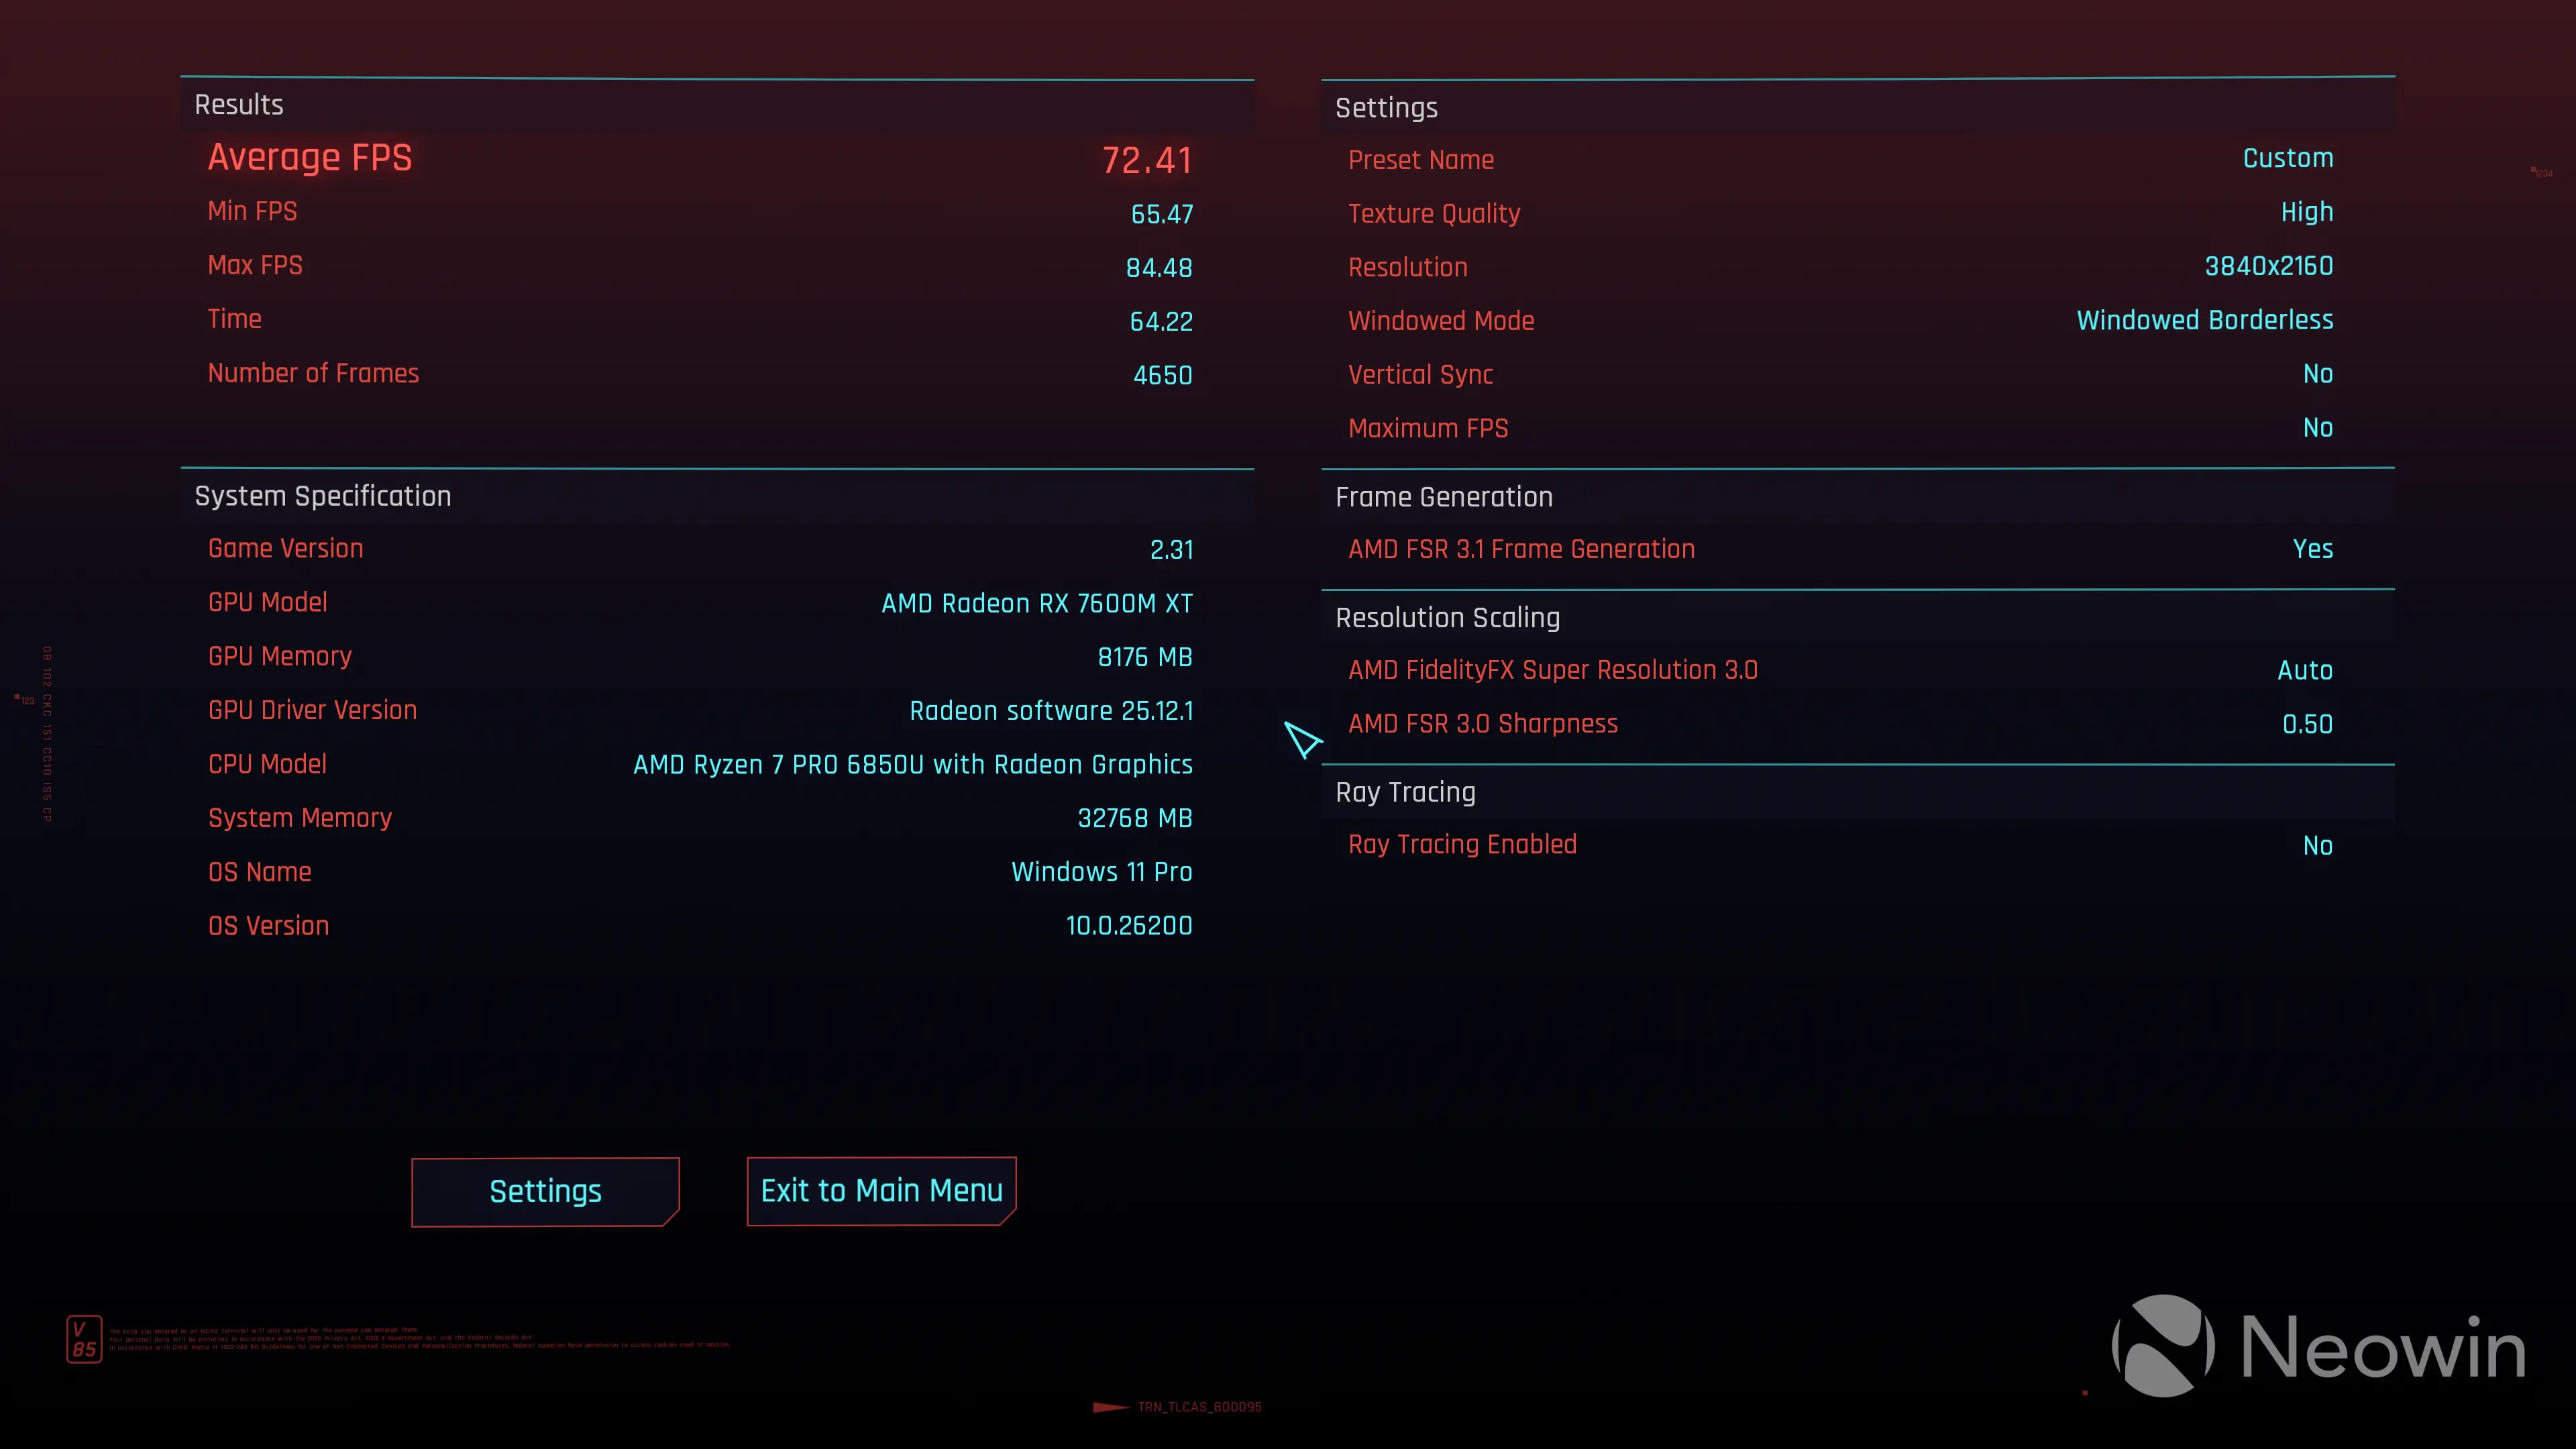
So I turned the settings down, disabling Ray Tracing, but bumping to FSR 3.1 and keeping everything else at default and ended up with a very playable average fps of 72.41.
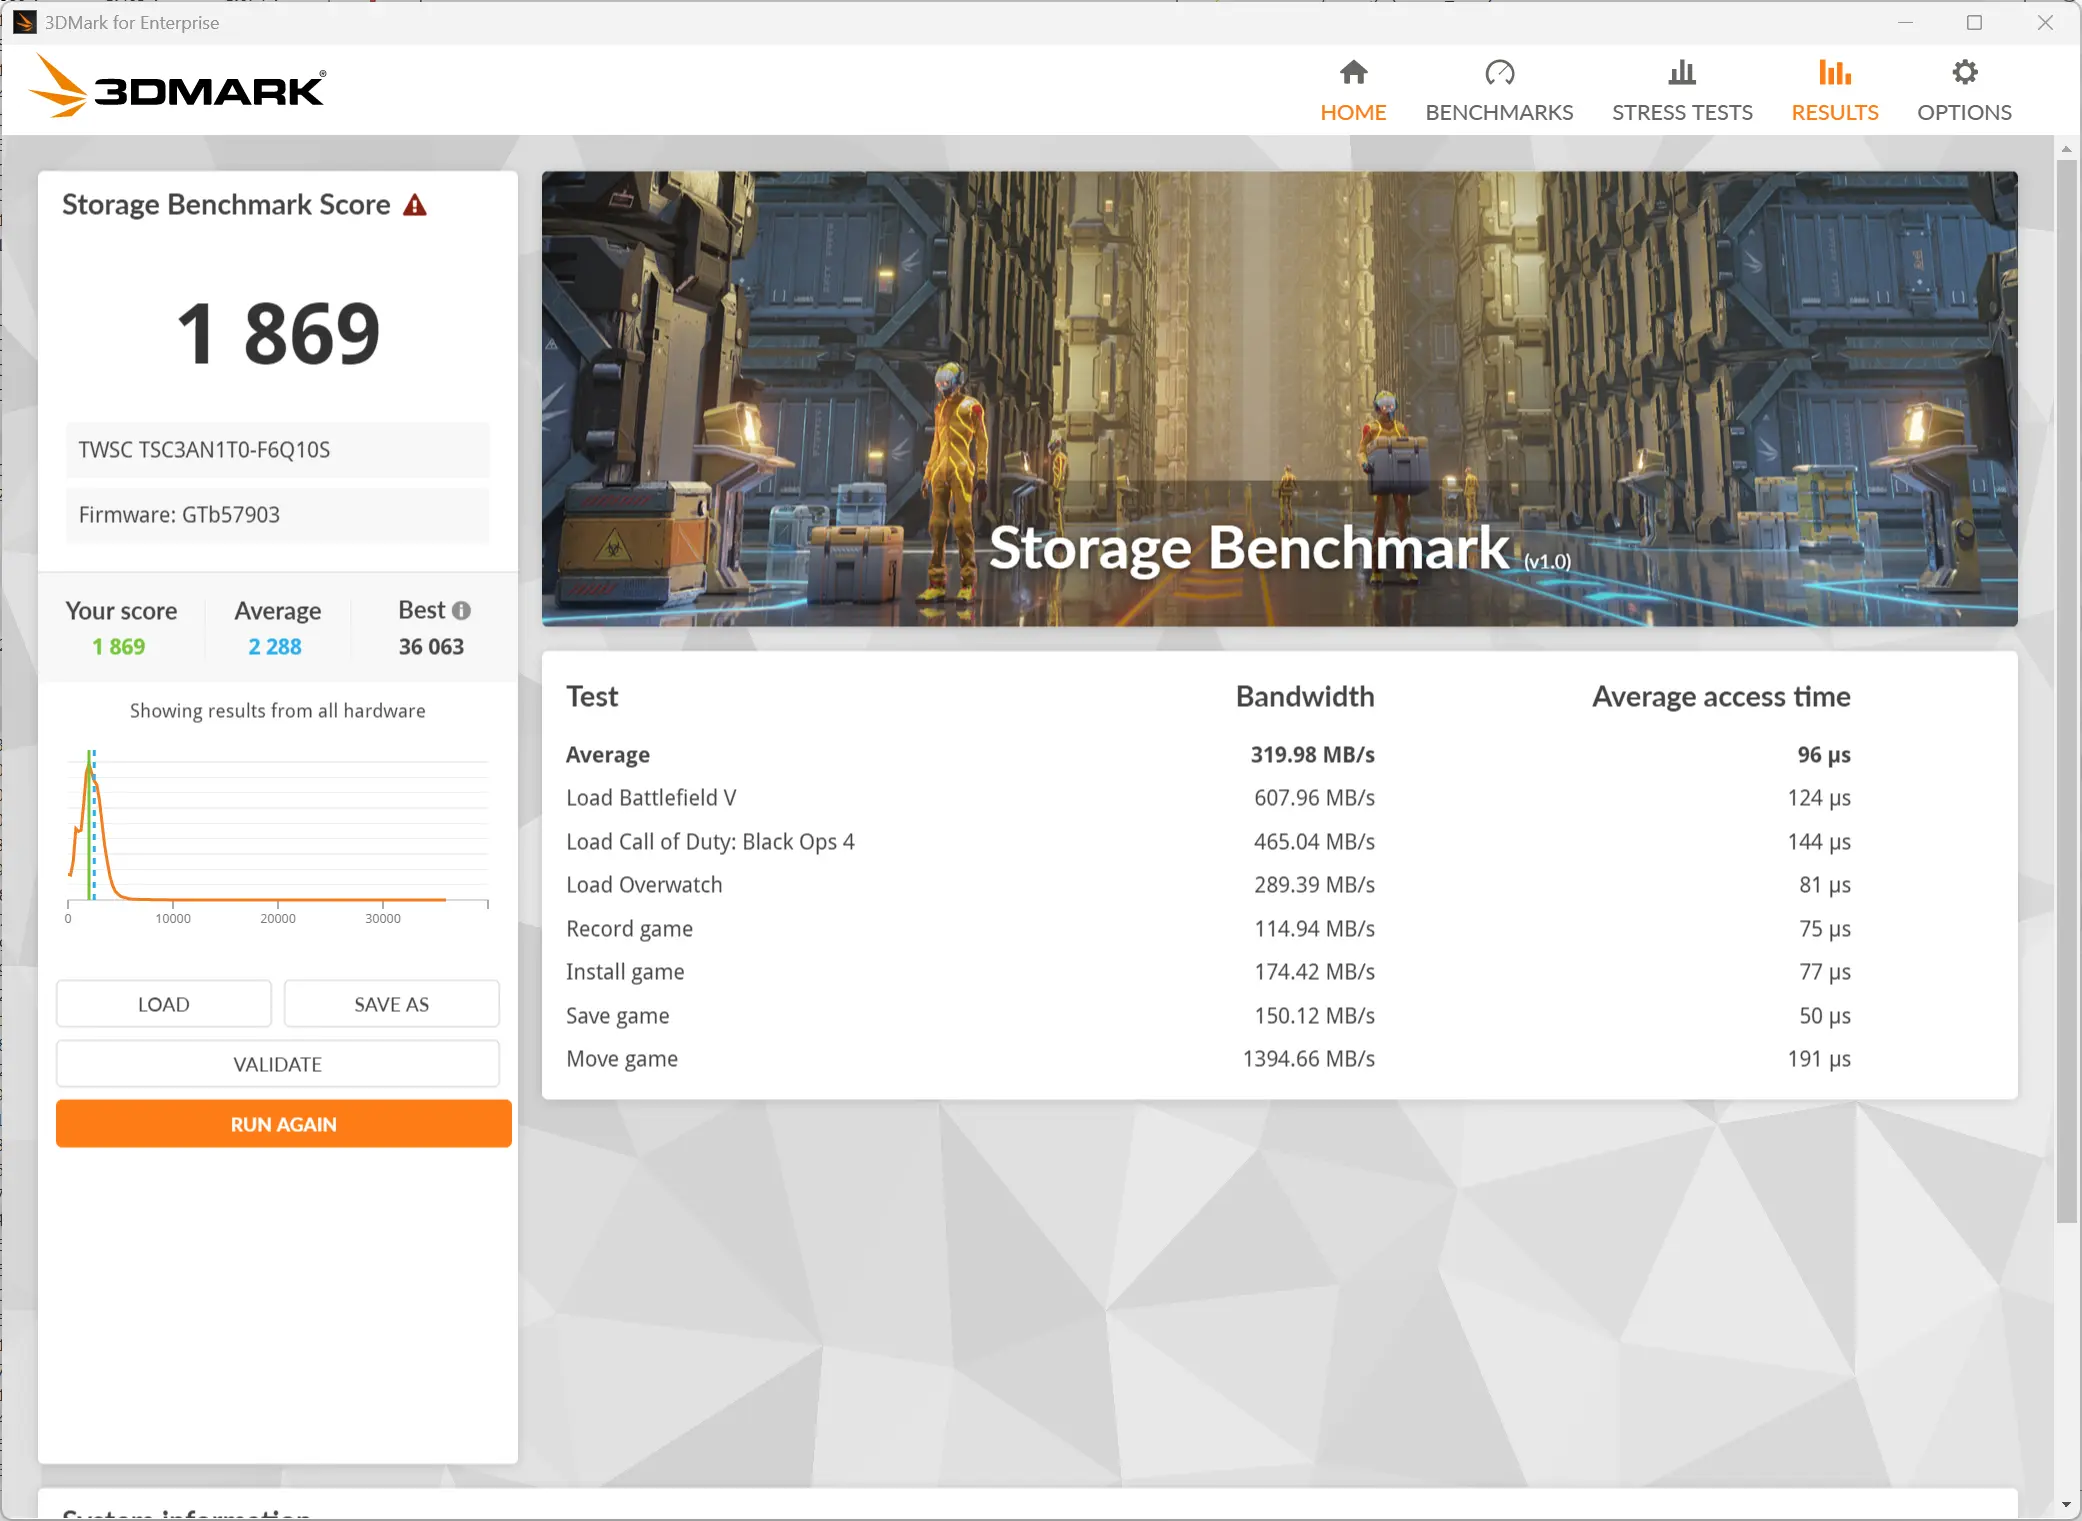
3DMark Storage Benchmark
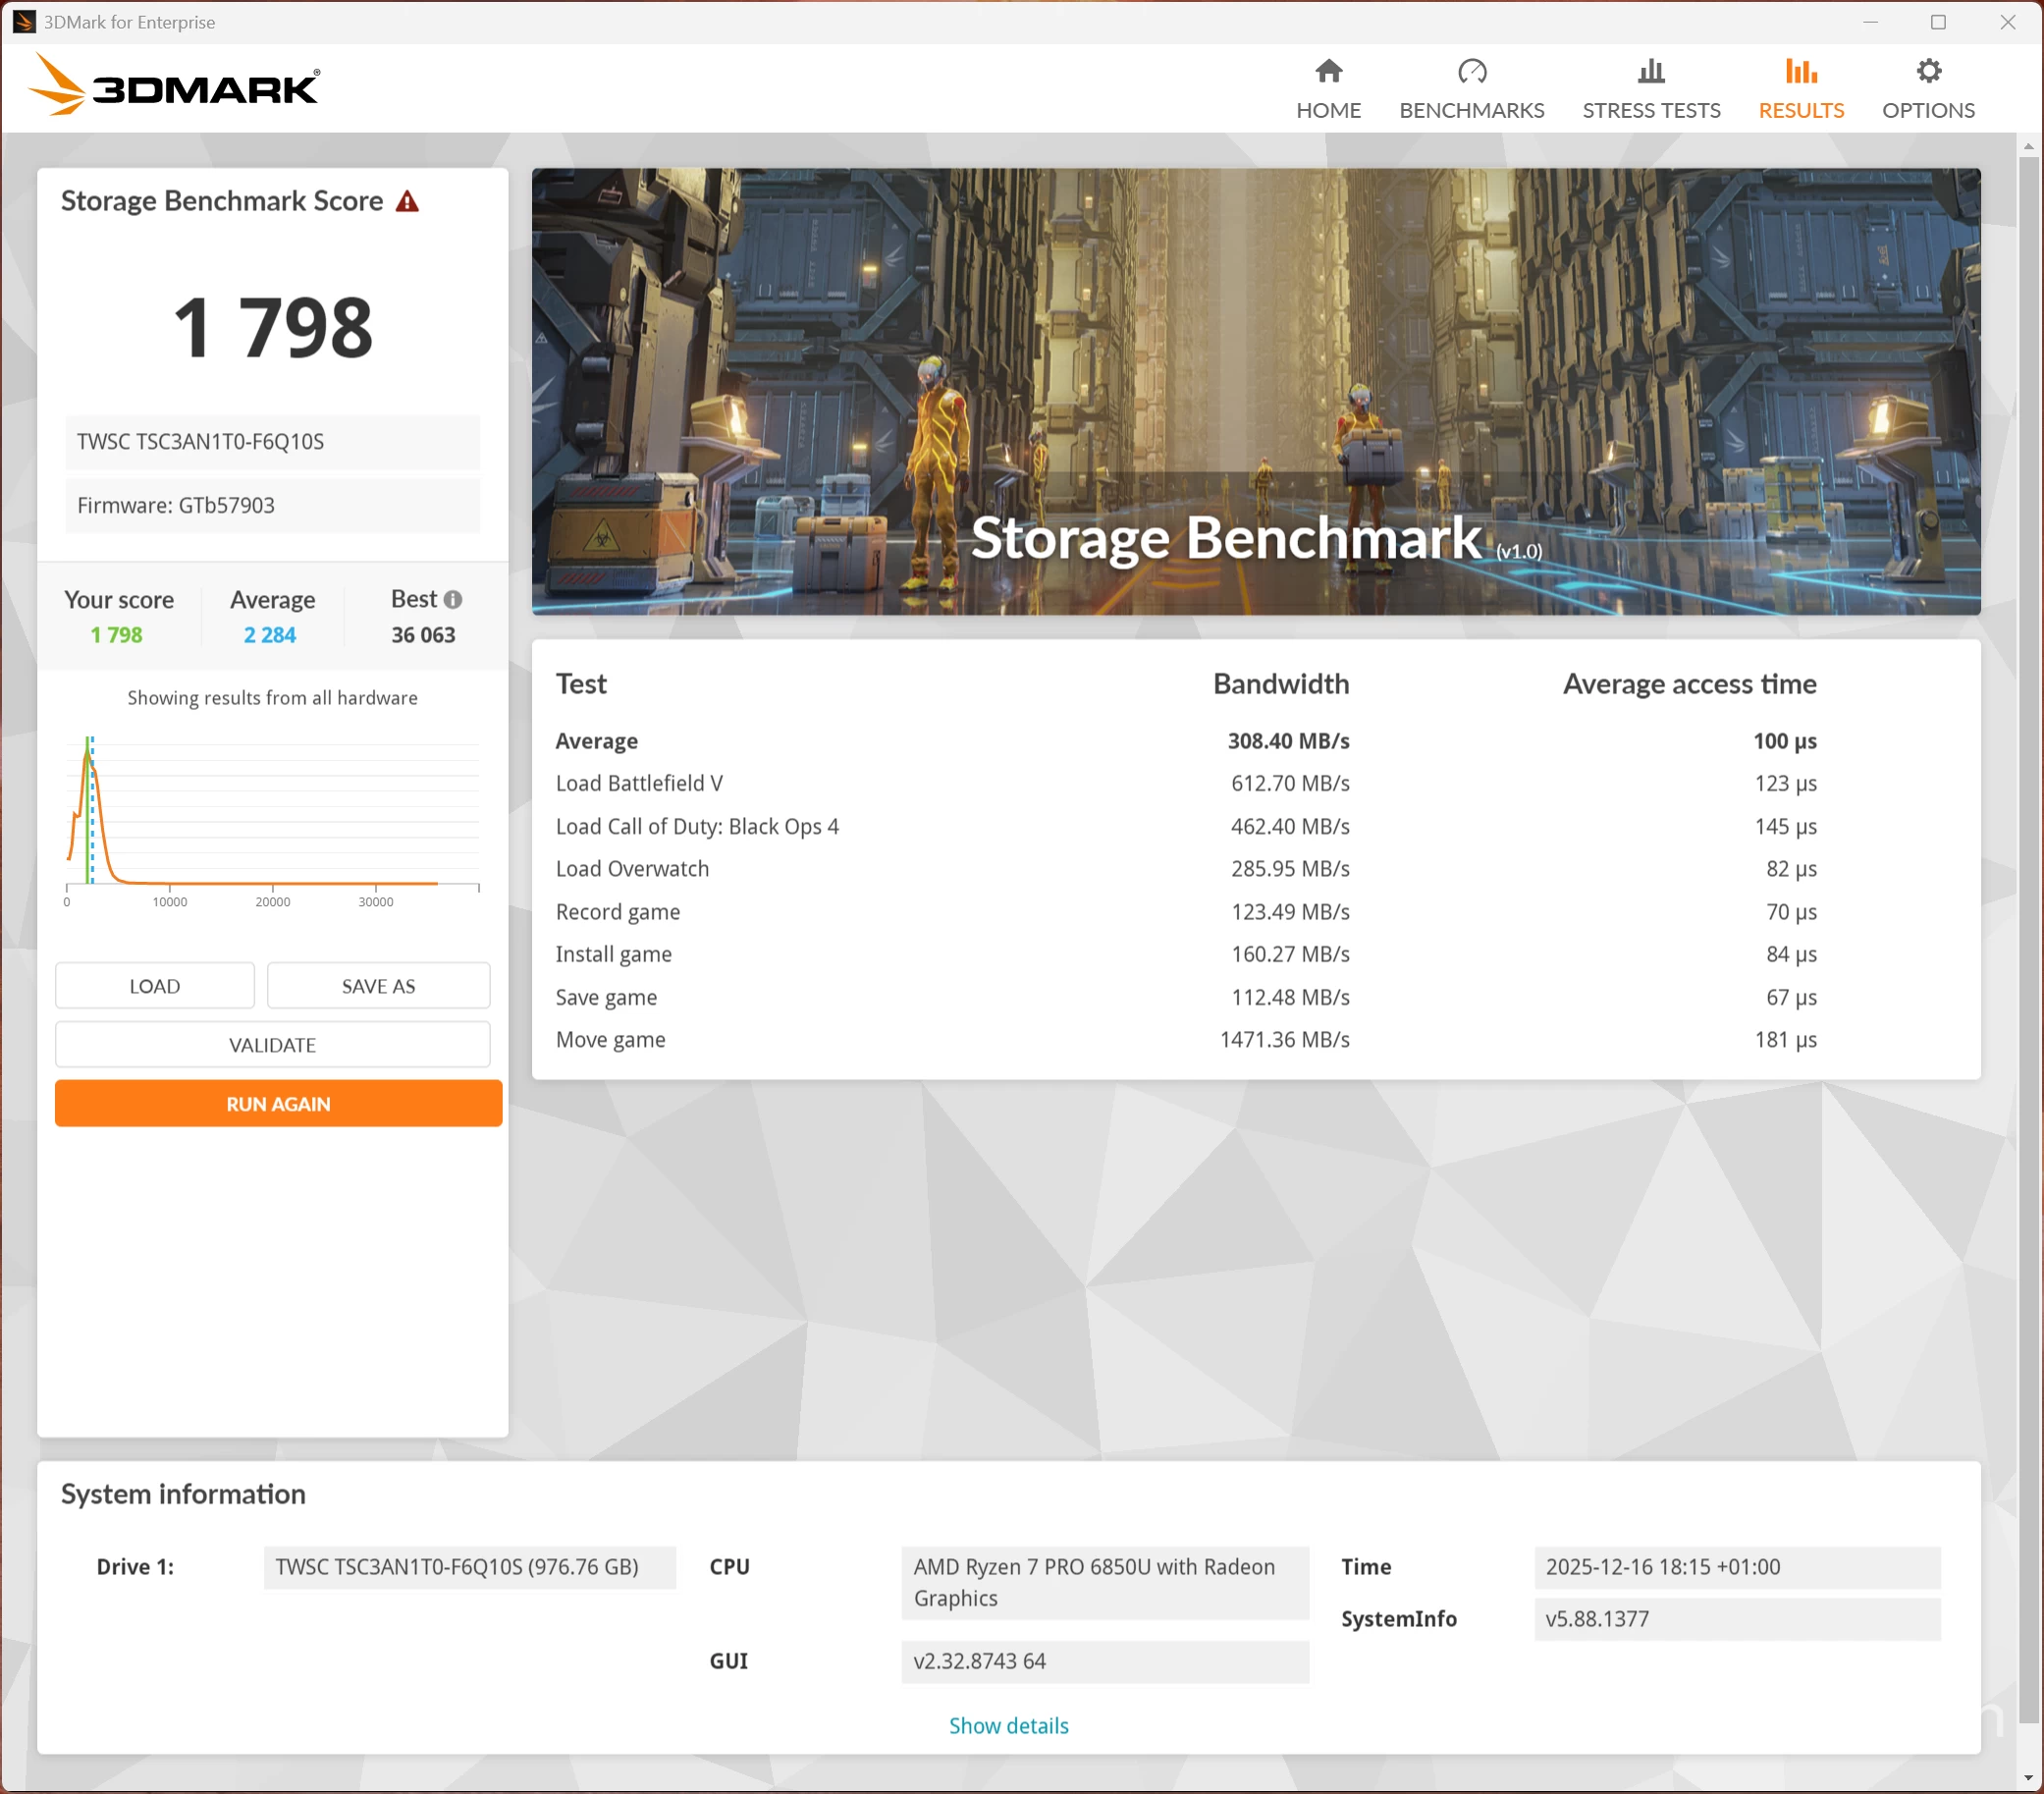
Next, I ran the Storage Benchmark, which is a component test that measures the performance of the TWSC SSD, particularly for gaming, using real-world gaming-related activities like loading games and recording gameplay. As you can see, although we gain 81 points with the AD-GP1 attached, this SSD falls well below the average of all those tested.
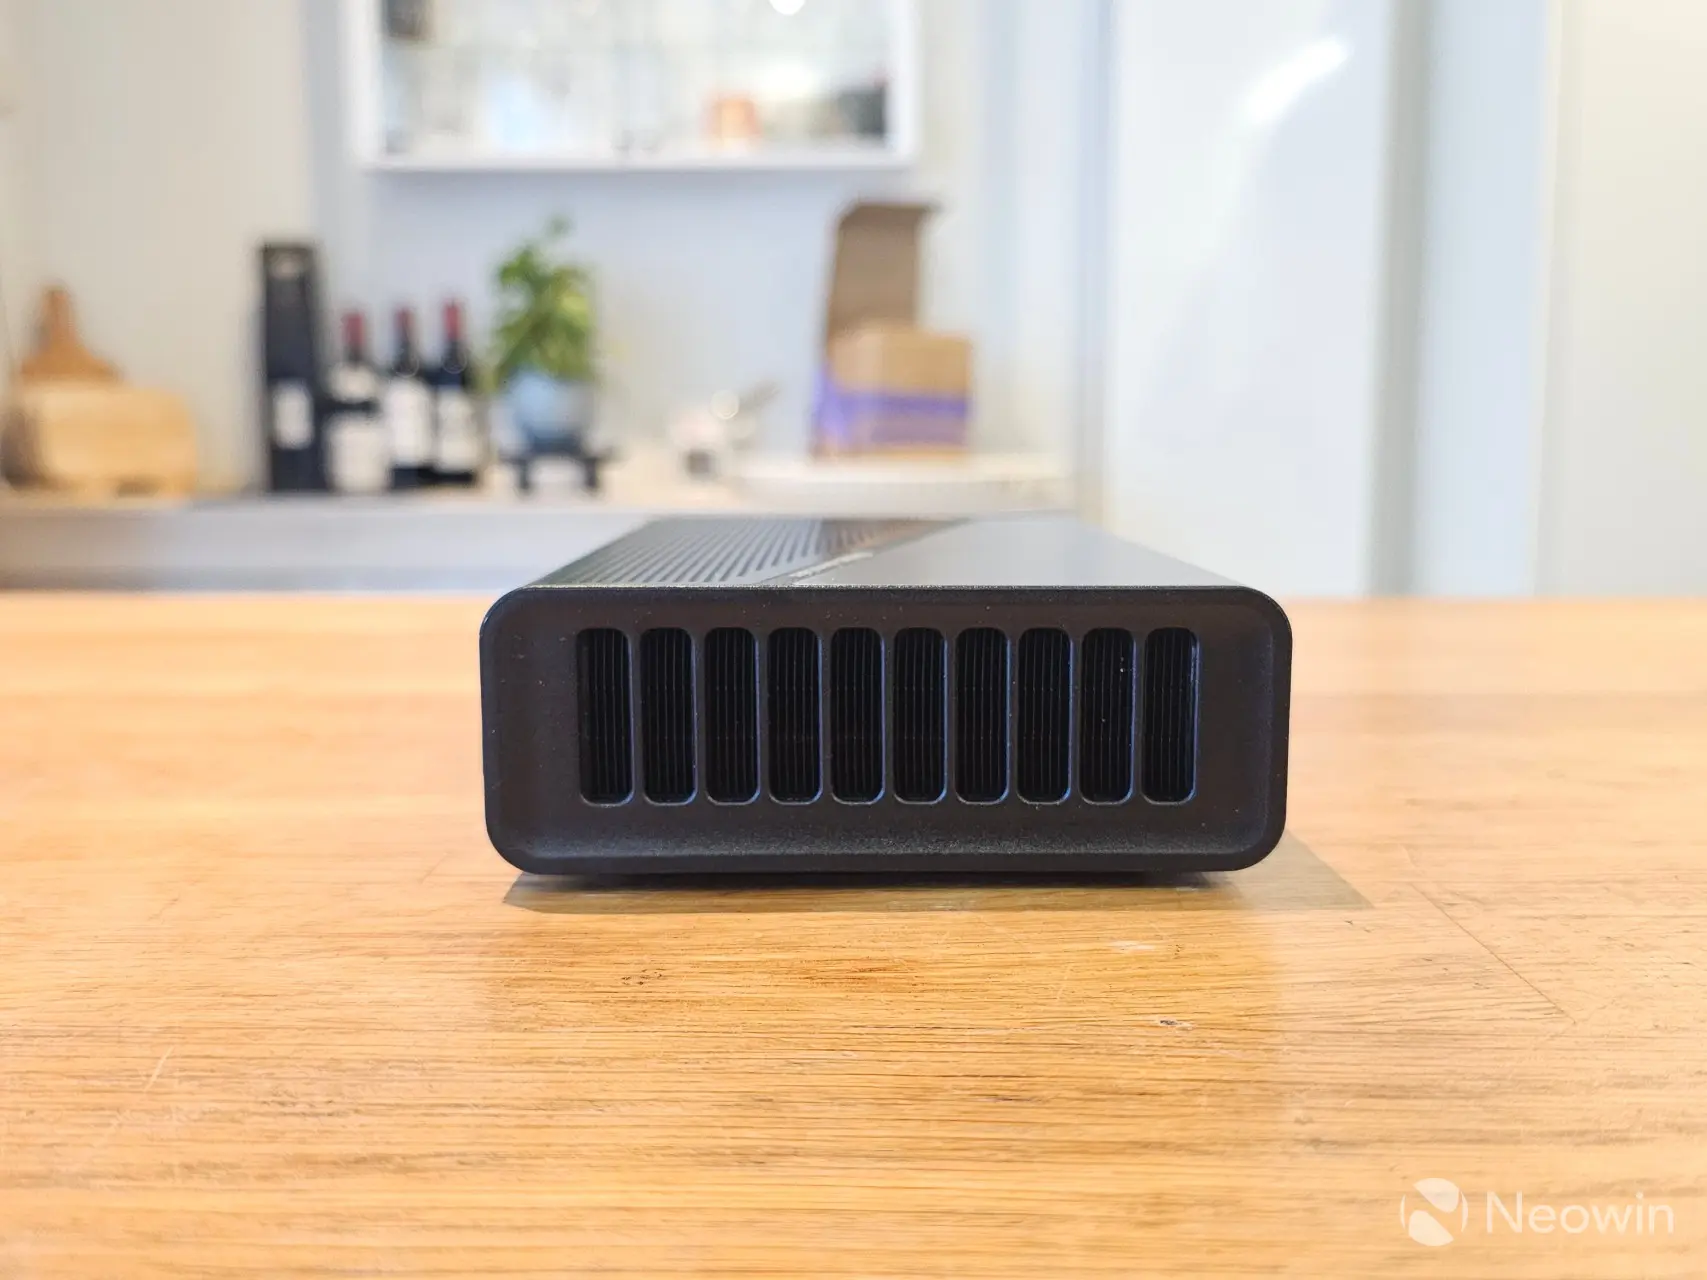
HeatDespite running all of the above benchmark tests, the AD-GP1 did get a bit warm on the top right side, thanks to the whole side grill dissipating heat. The Highest CPU temperature recorded was during the PCMark test, where the GPU Core reached 95.1 °C.
Infrared thermal imaging
Top Bottom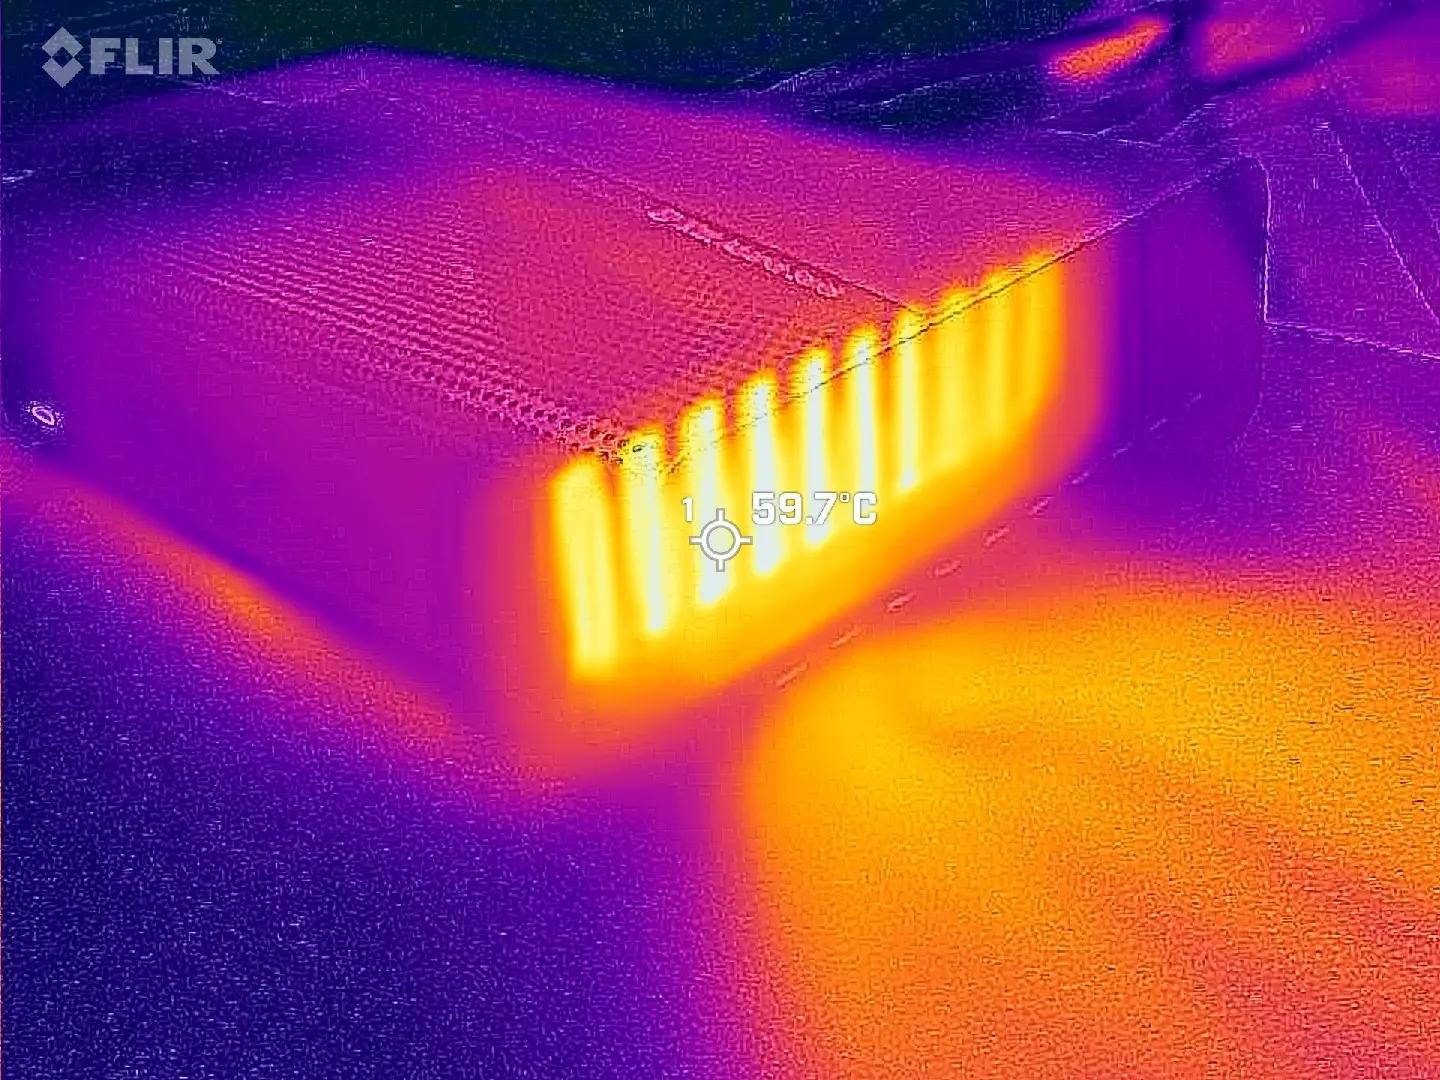

Regarding heat, most of it is pushed out the right side, which also has the largest grill openings on the AD-GP1. I measured 59.7°C using my FLIR ONE Gen 3 thermal camera pointed at a hot spot while running a 3DMark Fire Strike test. The top of the AD-GP1 acts as an intake, while on the bottom, the hottest point was behind the serial number sticker at 43.6°C, but mostly uniform across the whole plate, which suggests to me that the AD-GP1 could have benefited from slightly higher rubber pad standoffs.
Power drawDuring my testing, I also kept an eye on the power draw using a Green Blue energy meter.
in Standby Windows 25H2 idle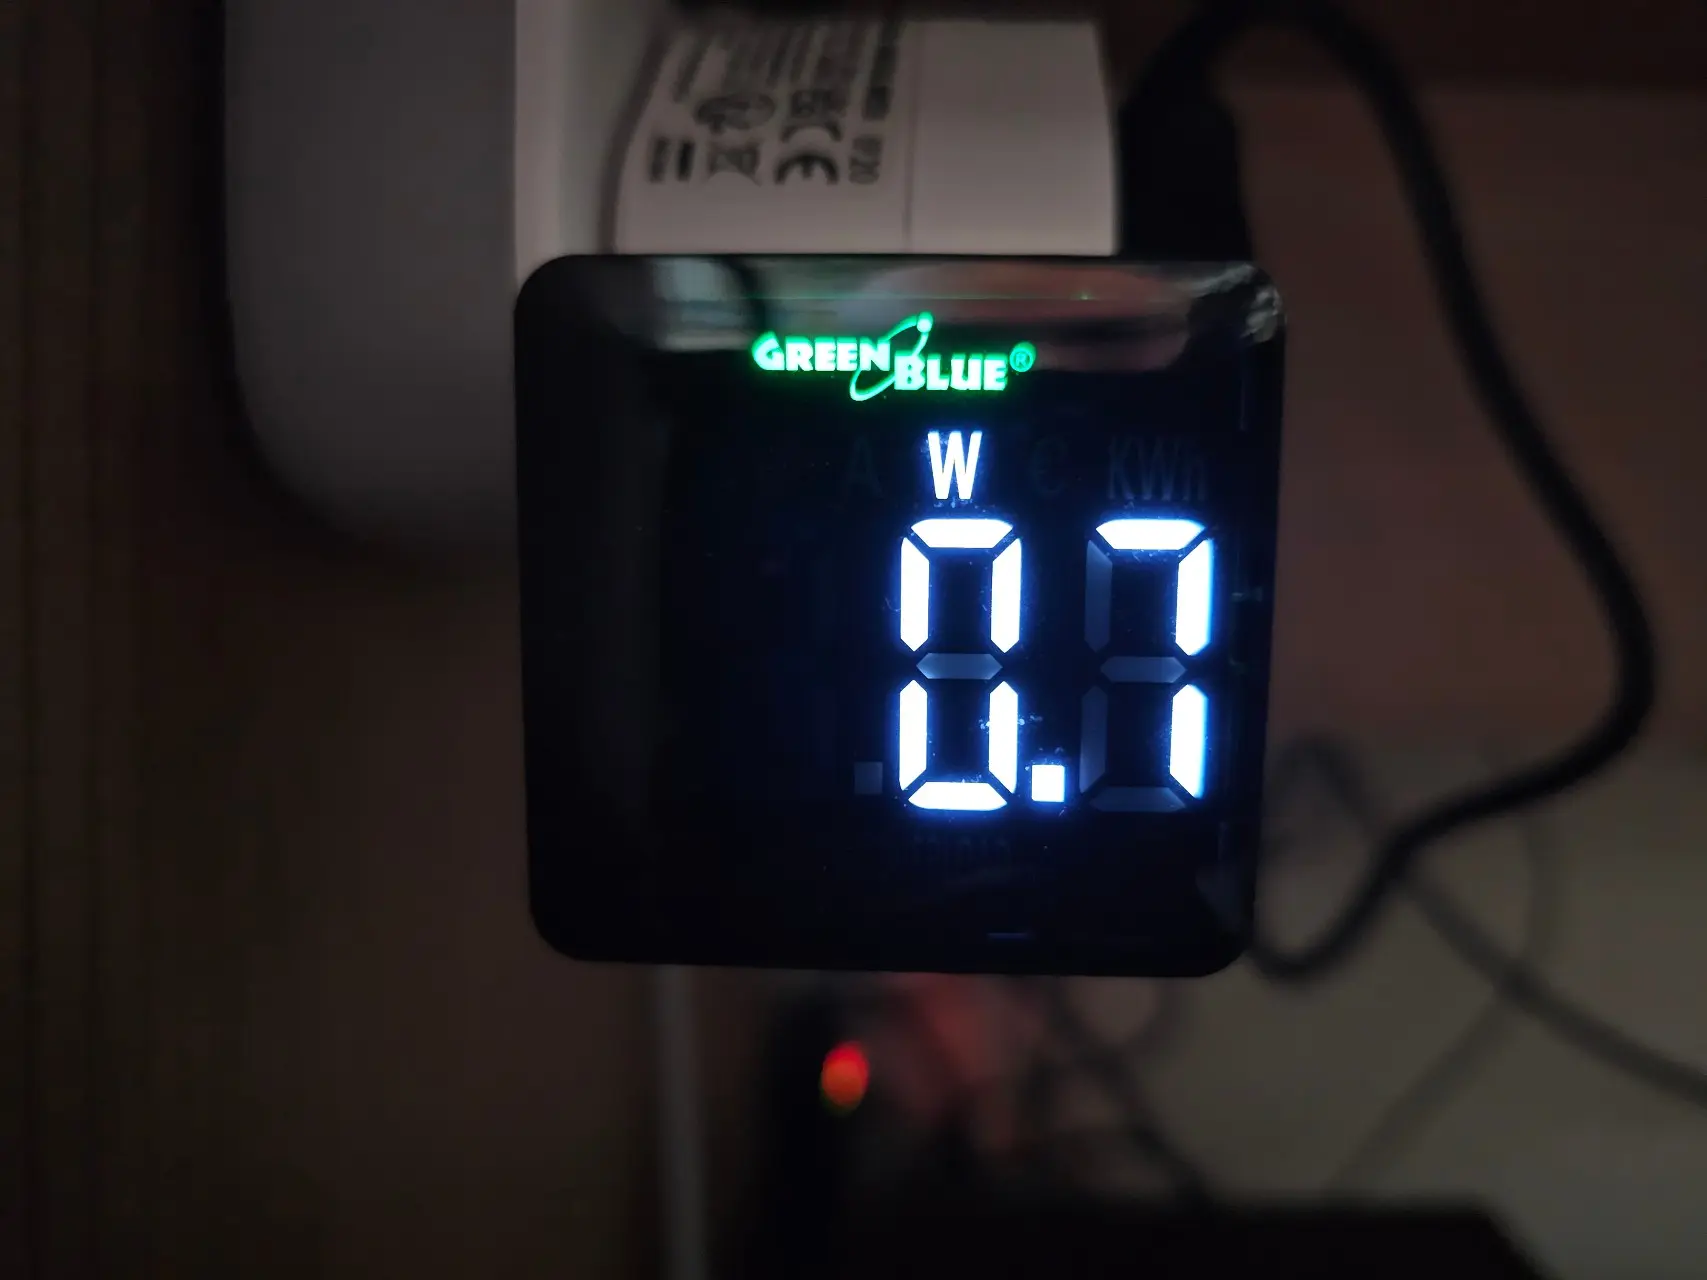
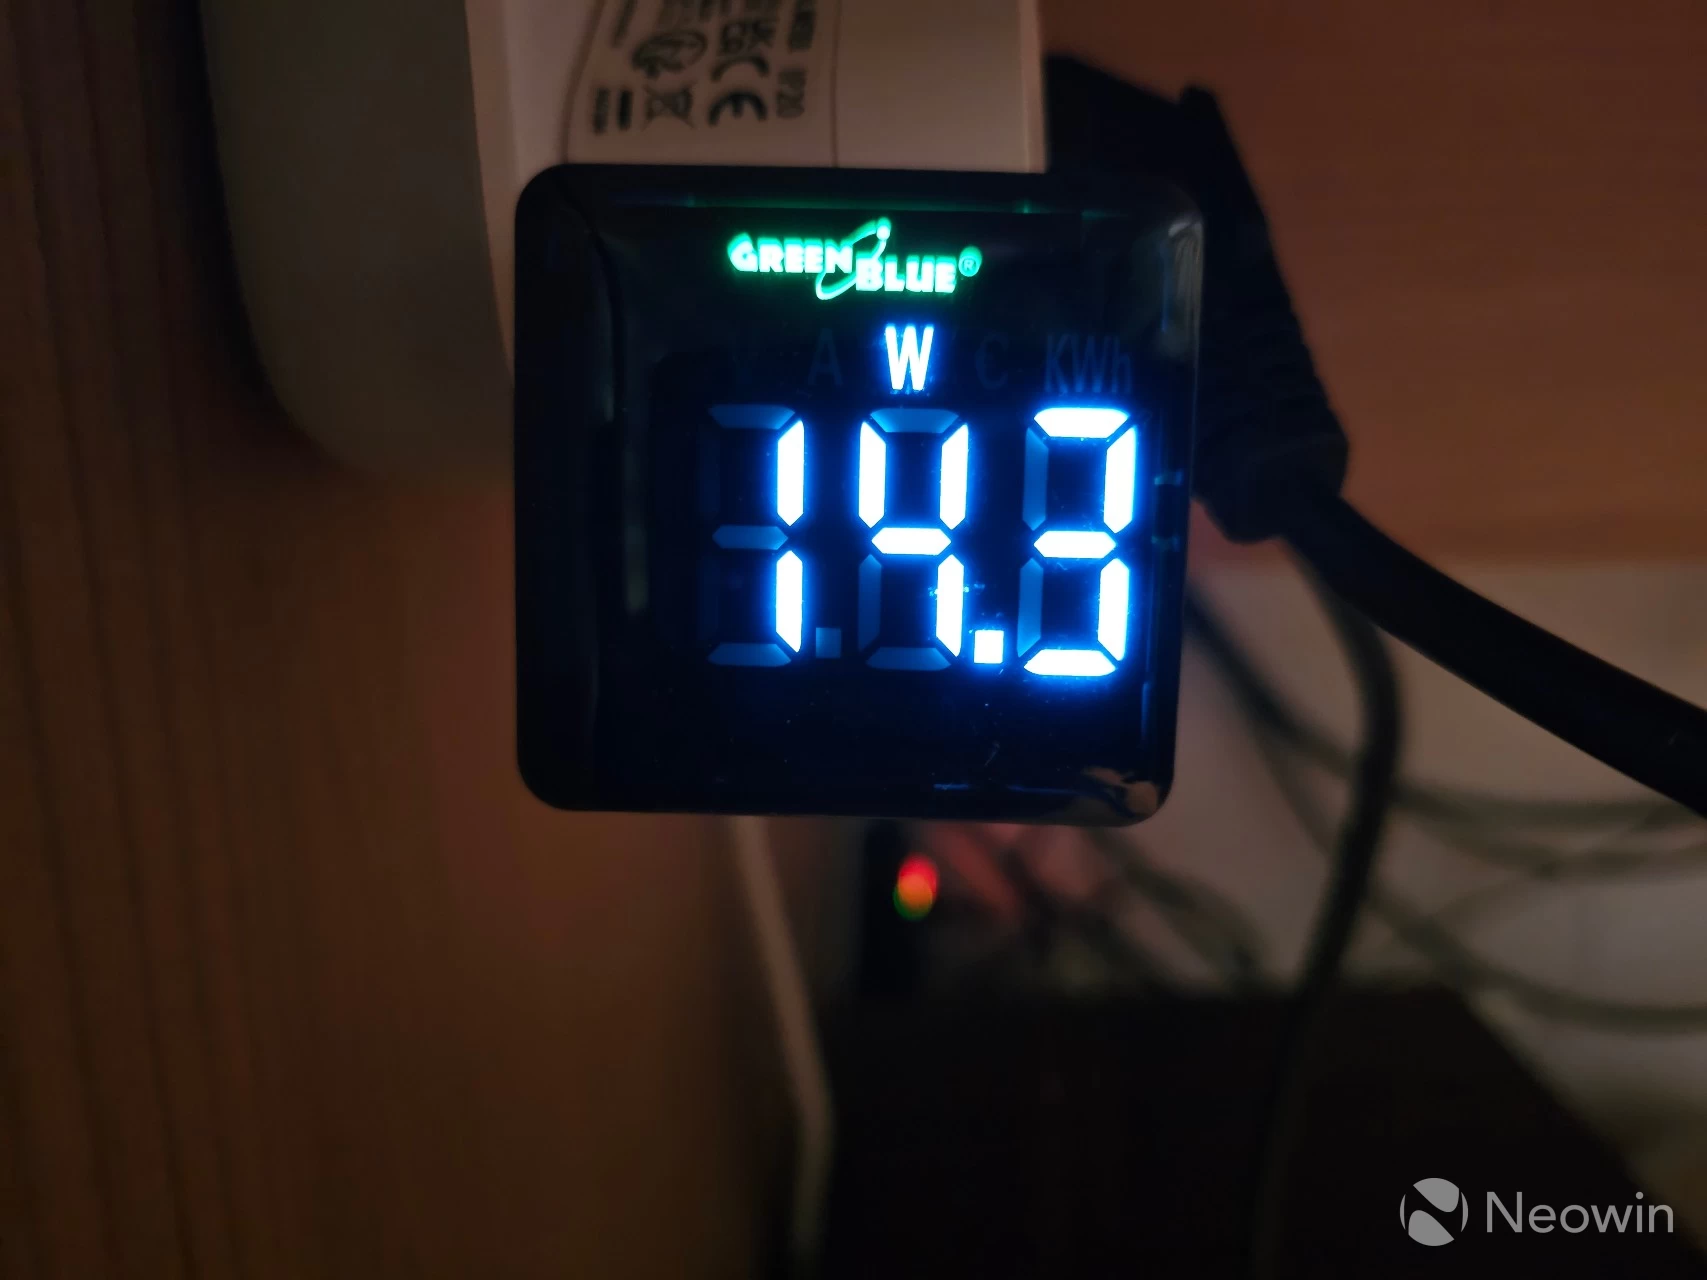
As you can see above, when powered off, it draws less than 1W in Standby. When turned on and idle with no apps opened and just sitting in the Windows desktop, the draw was roughly 24-25W.
Cinebench 2024 (peak) Cyperpunk 2077 (peak) 3DMark Fire Strike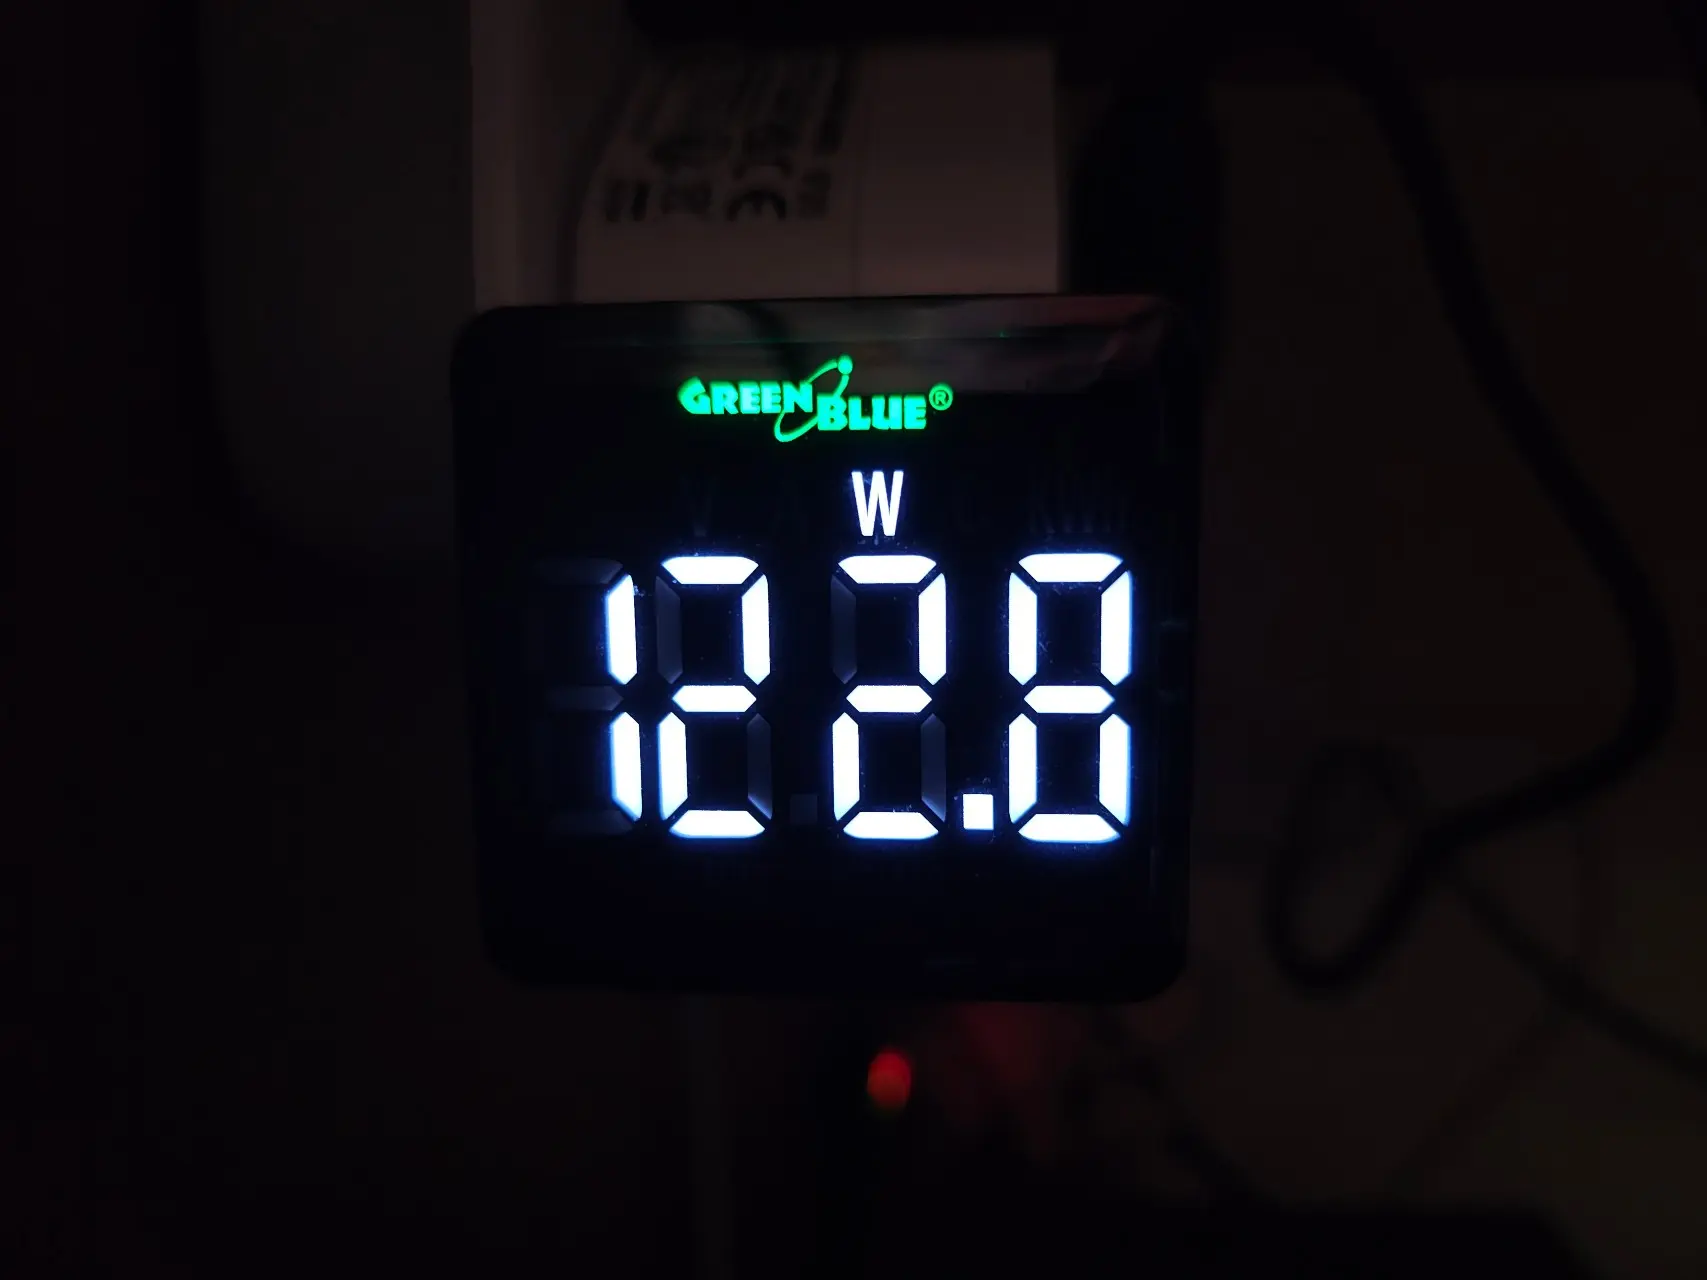
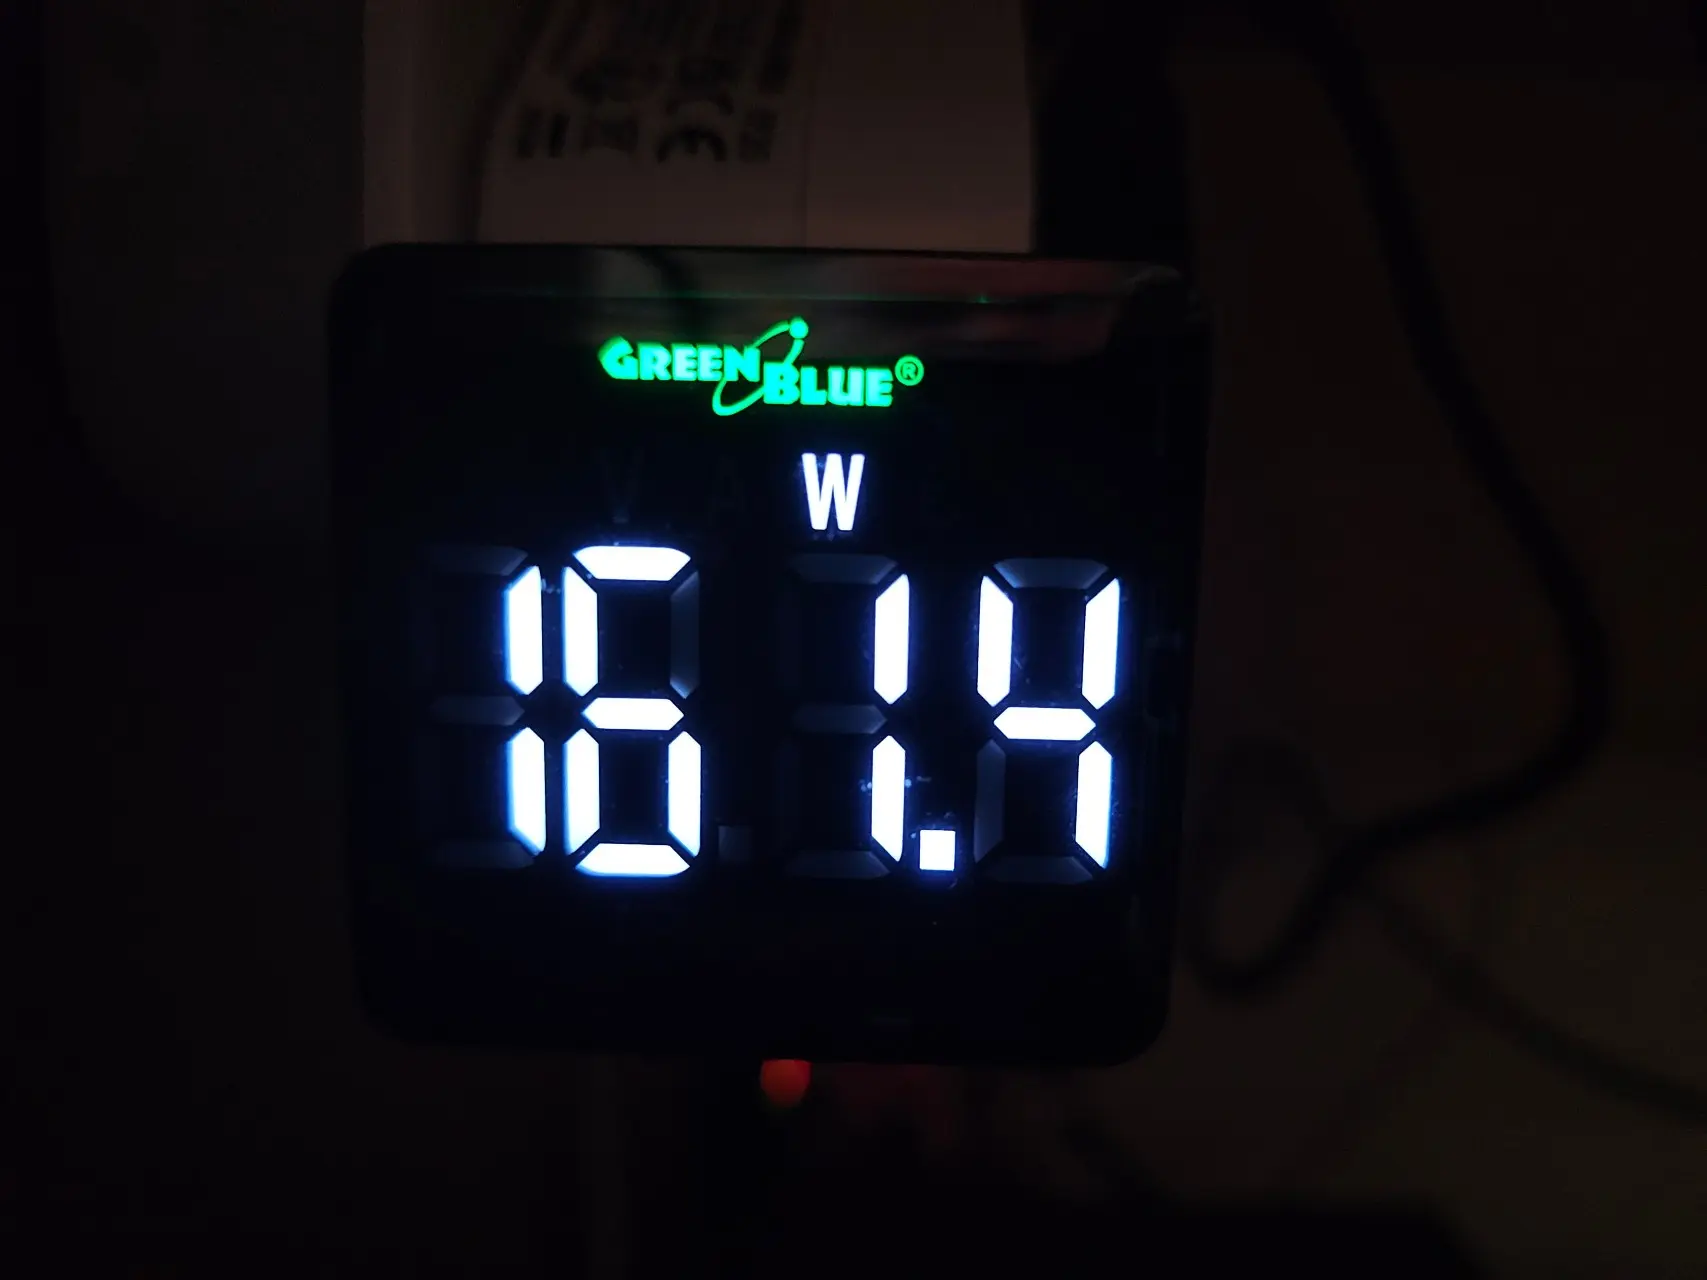
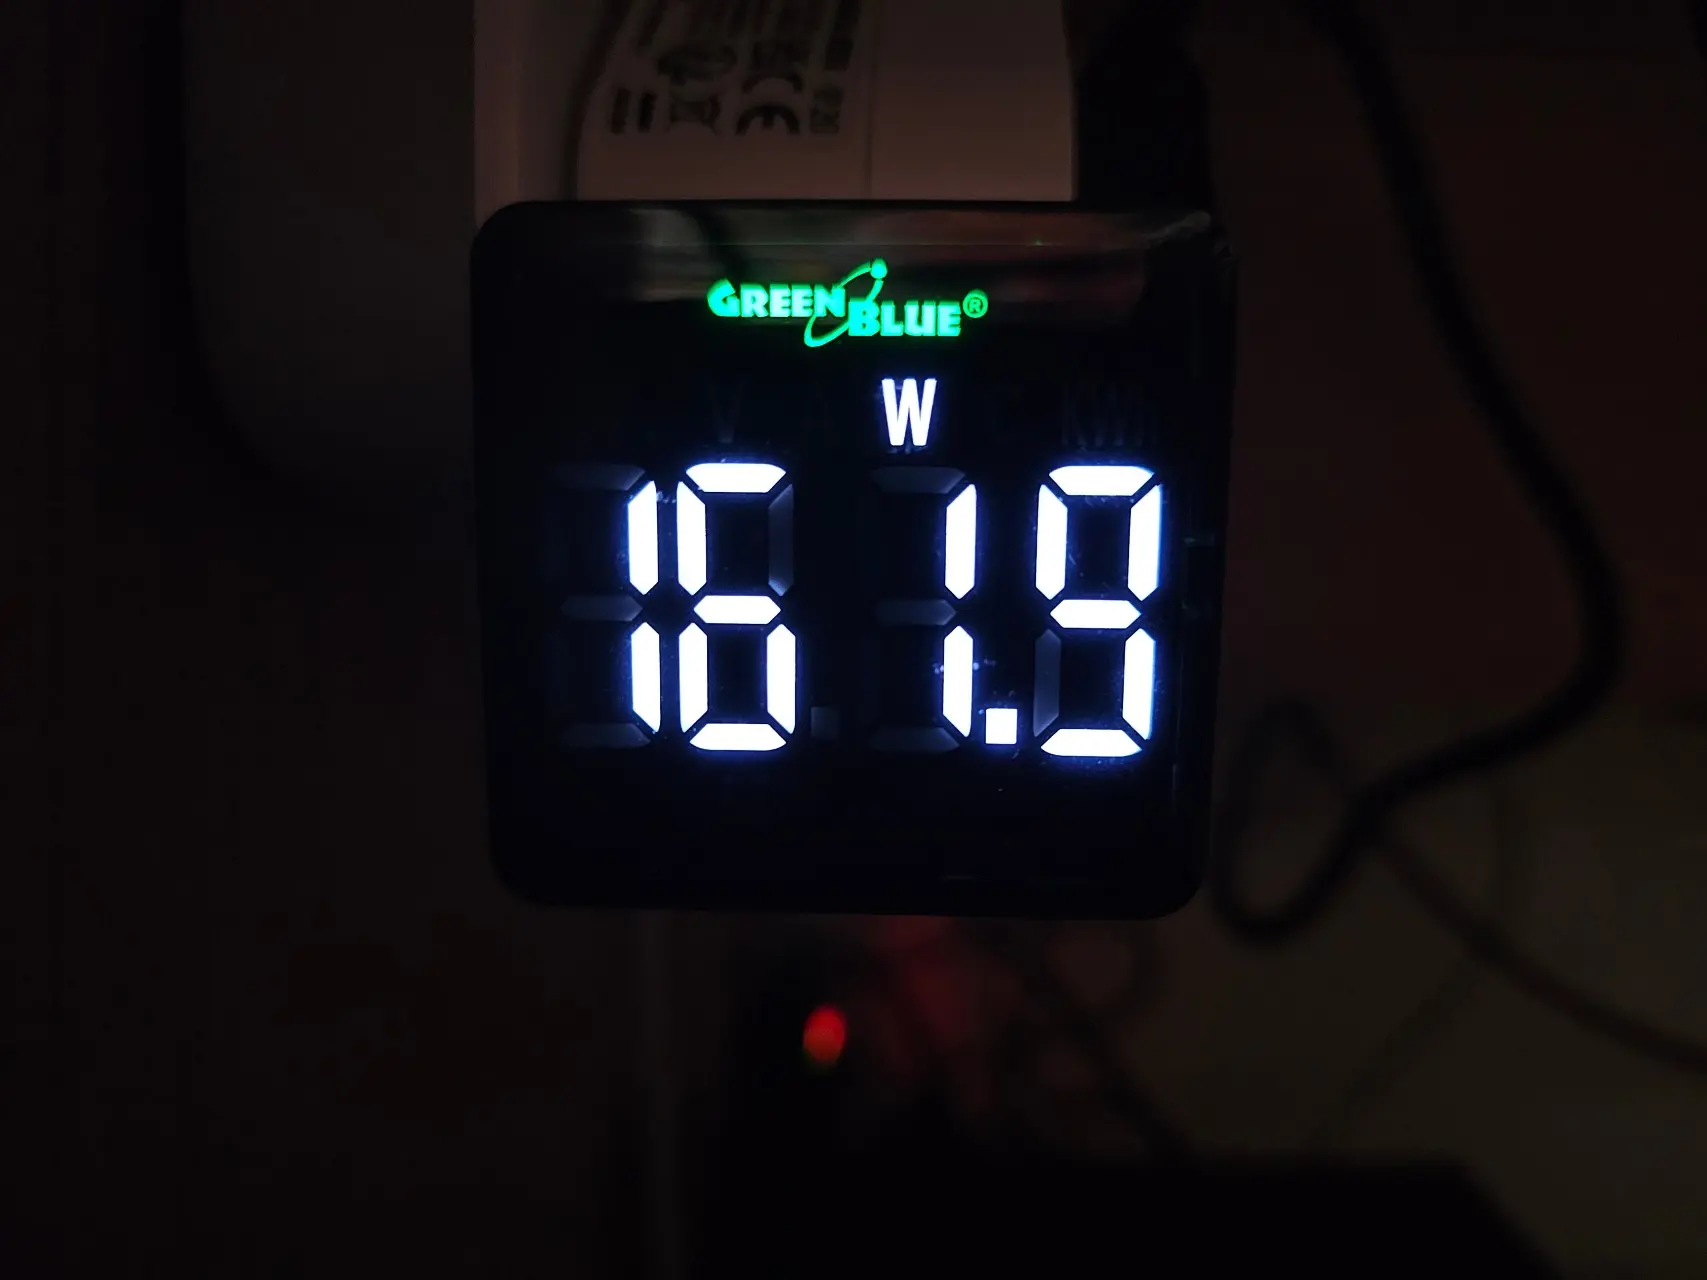
Next, I measured 122.8W, which was the maximum power draw when running the Cinebench 2024 GPU test. I also measured power usage during the Cyberpunk 2077 benchmark and saw a peak of 161.4W, and finally, a peak of 161.9W was measured when running the 3DMark Fire Strike benchmark.
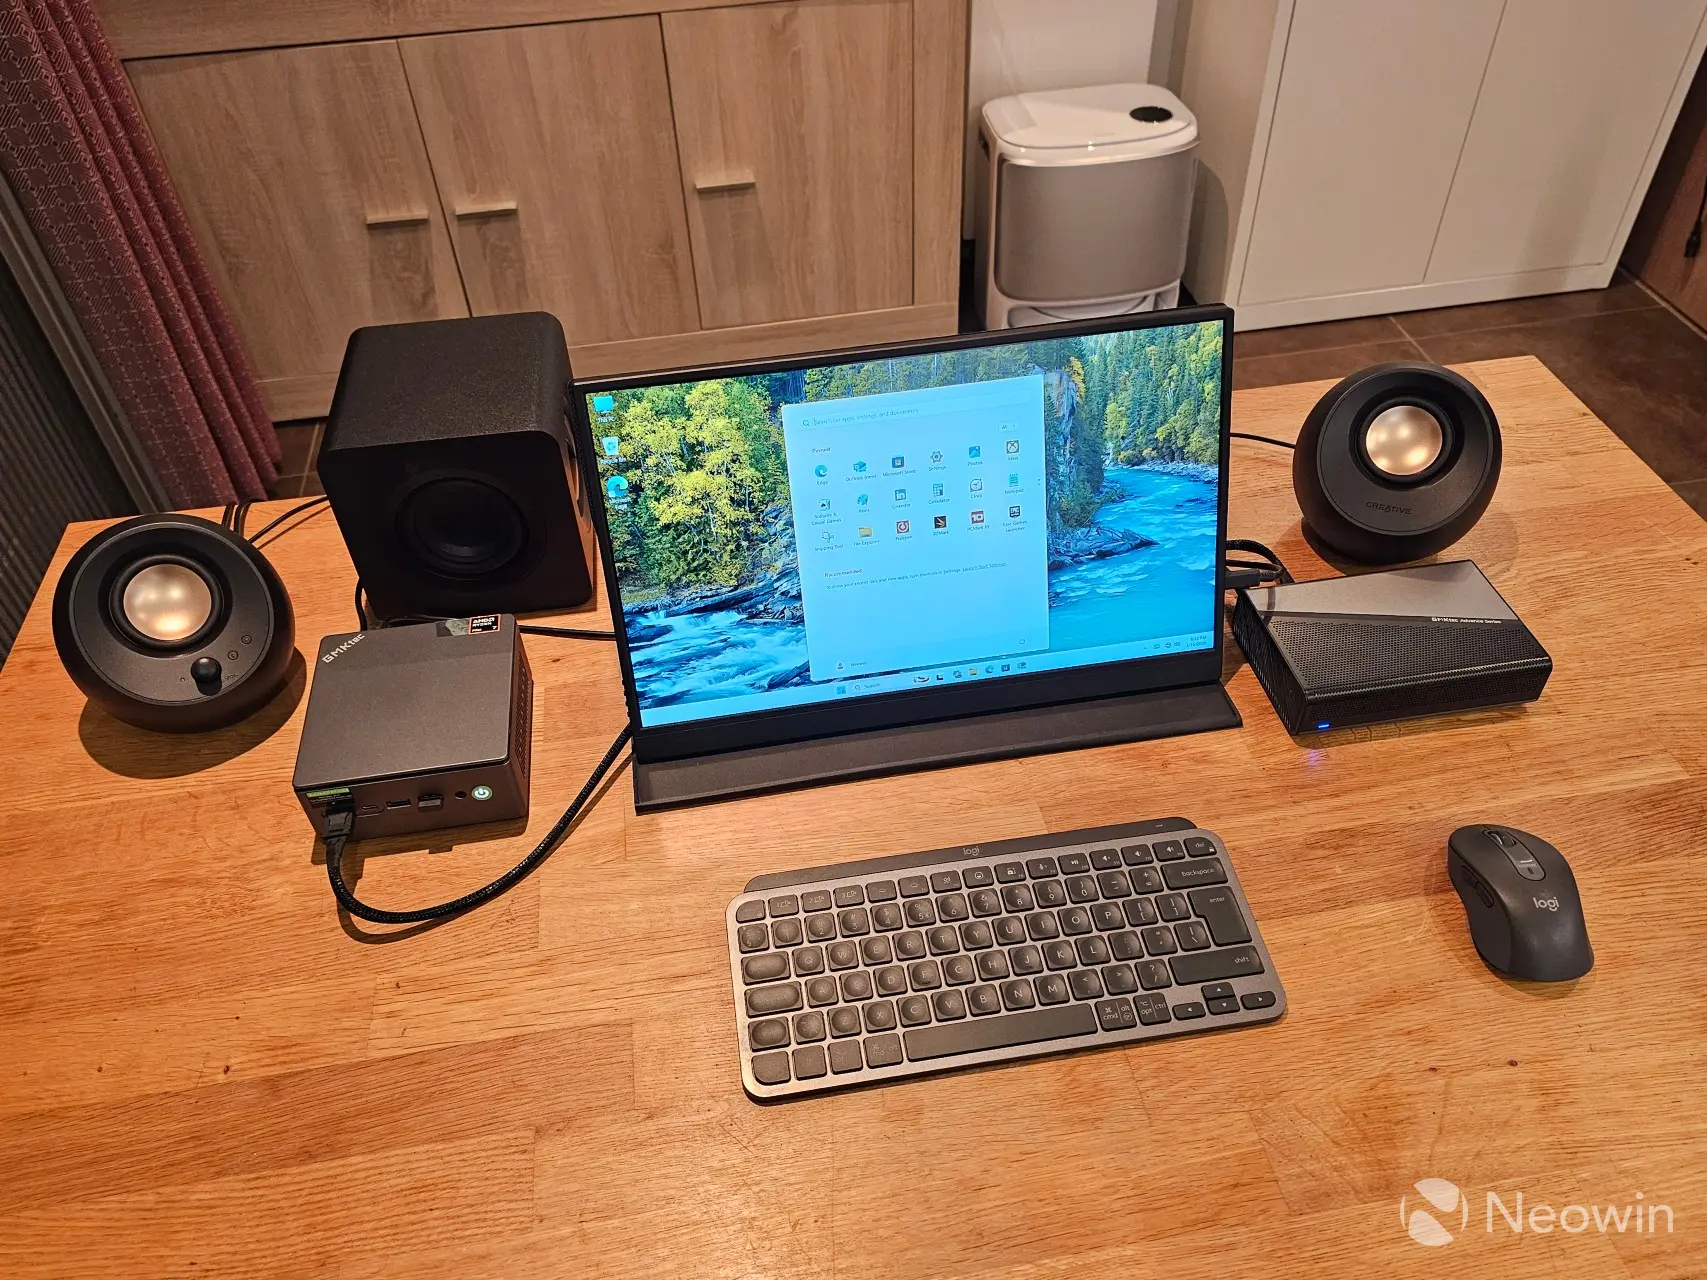
Well, that wraps that up then! If you are wondering why I did not talk about the M7 Ultra much, that's because I already fully reviewed it without the AD-GP1 dock and you can check that out here; although I gave it high marks for affordability, the only area it really tripped up on is with the graphics, however the AD-GP1 fully corrects this giving you a full desktop PC experience all for under $1,000.
The goodSimply put, this dock turns the relatively weak (on the graphics front) M7 Ultra Mini PC into a capable gaming PC for less than it would cost to buy the desktop GPU equivalent. What's not to like?
The badAs I said above in the thermals section I can only really fault the AD-GP1 with heat dissipation, the bottom remains warm when in use because the stand offs are short, and all of the heat is pushed out of the right side, so you will have to take this into account when placing it (in my usage, it was to the left of the Mini PC, which is bad placement on my part). In addition, the power LED never turns off or changes state, so even in Standby, it is the same color, and there's no on or off button anyway. I feel like GMKtec should have at least added states for the LED, at the very least a color for on, and another for standby.
For no more than $600, yes!
Where to buyIf you made it this far, thanks for reading! So, if you think this is something for your setup, GMKTec currently has it discounted by $100, bringing the price down to $469.99 on the official website, however it is out of stock in all regions; it is available on Amazon though at varying price points which you can see below.
It's also important to take into consideration the price of a separate eGPU dock and card is going to run you over $600 and not look as good as this slimline all in one.
I did ask my contact if they would offer a bundle price, but as of writing this has not materialized on their product page, but I will update this if my contact comes back with an updated listing and bundle discount.
Please note that the links below are all affiliate, which means that Neowin gets a commission based on every sale, but it does not affect the price at all, so if you would be so kind as to use our links, it is very much appreciated as it all goes toward supporting the ever-increasing running costs of the site!
Our stories may contain affiliate links for products/apps where Neowin is paid an affiliate fee if you complete a purchase via those links.
GMKtech AD-GP1 eGPU docking station
Pros
Oclink and USB4 support Cheap with discount ($469.99) No nonsense does what it says
Cons
Power LED only has one state (same on or off) Bottom rubber leg standoffs could be taller No instruction manual in the box or official website
Comments (0)