
Remember me


Docker is an important tool for developers and for running apps across networks, and it has many uses for the pro and hobbyist alike. Here's how you can get started using the containerization tech on your Mac.
If you've been checking out our NAS guides, you may have occasionally seen a reference to Docker support. It's something that doesn't usually concern the typical Mac user, but it is gradually becoming a useful tool for more advanced users.
There's quite a bit to know about the software, and it's not for everyone. But for those who have a need for it, Docker can be an essential addition to their Mac setup.
What is Docker?In short, Docker is containerization software that can provide system-level virtualization, for the running of contained apps and services on any compatible platform. Breaking that down a bit, consider it as similar to a platform that lets you run virtual machines for specific software.
While a typical virtual machine simulates the hardware needed to run an entire operating system, a container that holds an app contains the bare essential elements of an operating system needed for the task. It doesn't create a full-blown computer, but more of a sandbox for an app to be installed onto.
The intention is that a container for an app or service will operate pretty much in any Docker installation the same way, system bottlenecks and specifications aside. It can be built once but run anywhere that supports the container and Docker.
Docker, which is free software and with optional paid services from the eponymous company, handles getting the container working with the base operating system and hardware.
Why use Docker?The theory is that a container could be pulled from one location and installed in another environment with minimal fuss, since the container has Docker to communicate with the system directly.
In an enterprise network environment, this could take the form of spinning up multiple containers of a server, or moving containers from Google's cloud server architecture to Amazon Web Services, for example. It reduces the headaches involved with setup and configuration for administrators.
A developer may want to run software in a sandbox instead of their desktop for test purposes. A container effectively isolates the content from the host machine.

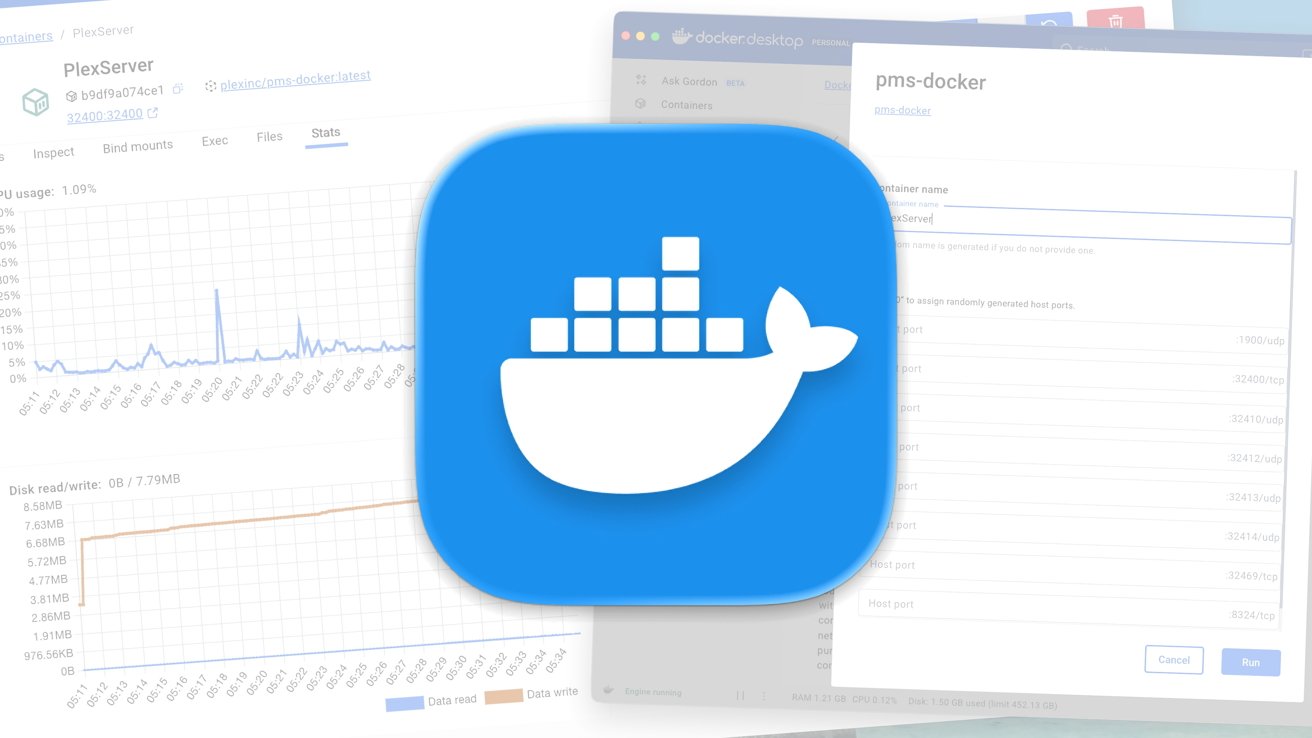
You can run Plex in Docker if you want it to be run in a sandbox instead of the usual Mac server
For home users, Docker is used as a pseudo virtual machine for the most part. It could be used to do things like running Linux container images on a Mac, or running a fileserver that is independent from macOS itself or has custom software that won't work on macOS.
More practically for the home user, this can be a way to run multiple servers on a network to handle different services. For example, you could run a Docker version of the Plex Media Server that doesn't directly interact with the macOS environment.
If you also have a NAS on your network that supports Docker, you could install a container onto that to run servers or apps. While the setup process will differ from getting Docker and containers running on a Mac, the final result is practically the same.
An Apple alternativeAs with almost anything in life, there's always more than one way to do something. Just as you don't have to do full-blown virtual machines when you can use Docker, you don't necessarily need to use Docker to get the same effect.
As part of its WWDC announcements, Apple said that macOS Tahoe would introduce a Containerization Framework. In short, it's a framework to allow developers to run a Linux container directly on the Mac.
It's one that is built on an open-source framework, optimized for Apple Silicon, and provides a secure isolation of the container images from macOS and other containers. This is a Swift package you can download and install right now if you want.
However, while this feels like yet another case of "Sherlocking" by Apple, it's not quite at that stage.
For a start, it will take a long time for Apple's system to be widely adopted. Second, it's a Swift package made and optimized for Apple's own hardware platforms, not traditional servers or a NAS.
Ultimately, if you're regularly setting up Docker on a wide variety of servers, you're probably going to continue using the same tool across the board. Regardless of any potential compatibility assurances anyone may make.
Getting started with Docker on MacArguably one of the easiest ways to get started with Docker is to download Docker Desktop. Available from the Docker website's download pages, the Docker Desktop is a graphical app for setting up and managing Docker, without needing to deal with the command line.
While it is provided for free from Docker directly, be aware that it does come in free and paid forms. Officially, the service agreement makes Docker Desktop free for small businesses with fewer than 250 employees and less than $10 million in annual revenue, for non-commercial use, educational use, and personal use.
There are also plans available that offer various extras, but they only really apply if you need the software professionally or simply exceed the usage allowance of the free Docker Personal plan. For most people trying it out, there's no need to pay for it at all.
Be aware that, for the purposes of this article, we are dealing with Docker Desktop, rather than working from the command line.
There's nothing stopping you from going down that route, and there's plenty of documentation, but this article is intended as a beginner's guide. There are some elements where you absolutely have to do things in a command line, which will need to be done.
You can do this through the Docker Desktop terminal, but Apple's own Terminal will also work too.
Installation
To start, download the installer for Docker Desktop for Mac from the website. Be mindful of if you select the Apple Silicon or Intel chip version, as you should choose based on your available hardware.
Double-click the Docker DMG file, then drag the Docker icon to the Applications folder. Open Docker, then agree to the Docker Subscription Service Agreement.
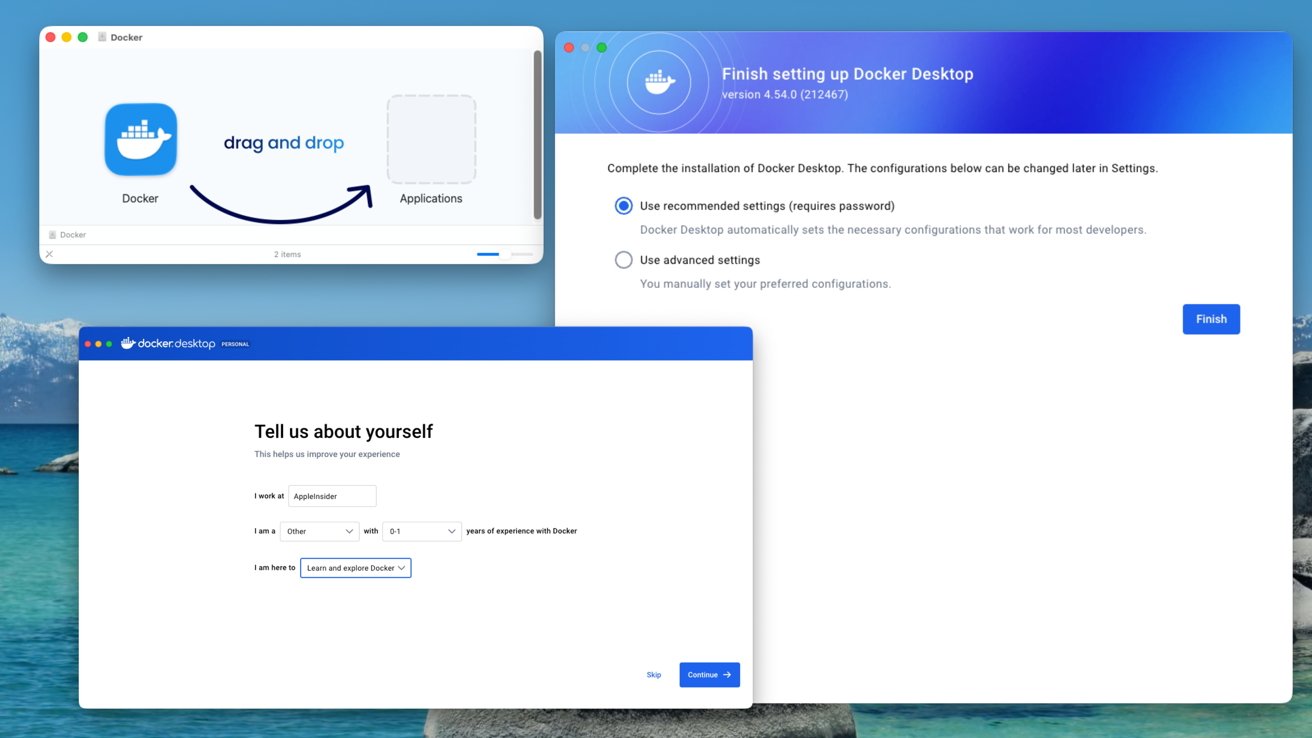
Some windows you'll see when you install Docker Desktop on Mac
It's advised to use the recommended settings for the installation unless you have particular requirements. For example, if you want to set the location of the CLI (command line interface) version manually, to enable the default Docker socket, or to make privileged port mapping changes.
You'll then be asked to sign in, complete with options to use Google Account, GitHub, and Docker account credentials. There's also a handy Skip button on the page, as well as another skippable page when it asks you to "Tell us about yourself."
Eventually, it dumps you into the main Docker Desktop page, where it offers some basic guides.
Running containersThe whole point of Docker is to set up an application to run within a container. To do it manually, you would need an image to build the base default container, which is basically an instance of that image.
While you can create your containers from scratch, which can be handy for developers and administrators, home users may not necessarily need to go that far at all. Instead, they can acquire ready-made containers for their desired applications and get them running reasonably quickly.
To find the Docker container for an application, you can often find it linked through the project or app's documentation. You can also find directories of repositories if you fancy a browse of what you can install onto your Mac.
A good starting point is hub.docker.com, which lets you find containers ranging from web servers and content management systems to web analytics, Internet of Things tools, and even machine learning and AI.
You will often find the commands to install each project alongside the container listing, but they will tend to involve the command line.
There are two phases, with the first being to "Pull the image." This can be done in various ways, such as from GitHub, and won't be the same for every image.
The second part is to actually build the container from the downloaded "pulled" image.
This part involves the command line interface and will usually start "docker run" followed by various parameters and instructions that Docker needs to actually set the container up.
This can vary between applications. For example, to install Apache, you can get it done in one line:
$ docker run -dit --name my-apache-app -p 8080:80 -v "$PWD":/usr/local/apache2/htdocs/ httpd:2.4
But one implementation of Plex in a Docker container is outlined thus:
docker run \
-d \
--name plex \
--network=host \
-e TZ="" \
-e PLEX_CLAIM="" \
-v :/config \
-v :/transcode \
-v :/data \
plexinc/pms-docker
Once running, you can then follow whatever setup process is required for that specific container's application. Often this involves accessing a webpage in the browser on a specific port or performing actions on a remote server, but it's to your Mac's IP instead.
Running containers, but simplerAs usual, there's always an easier way that doesn't need the Terminal. Indeed, you don't necessarily need to hit the Terminal at all.
If you're comfortable using the Docker Hub, you can do the installation without actually needing to paste code. Clicking Docker Hub in Docker Desktop will take you to in-app equivalents of the web page listings, and include handy Pull and Run buttons.
Click Pull to download the latest version, or whatever version is included in the dropdown box. Once downloaded, click Run.
This won't immediately give you a fully-working Plex server on your Mac, for example, as it will still require some more configuration. This includes a Container Name, which you really should set otherwise a random one will be set up for you, and the ports the server will use.
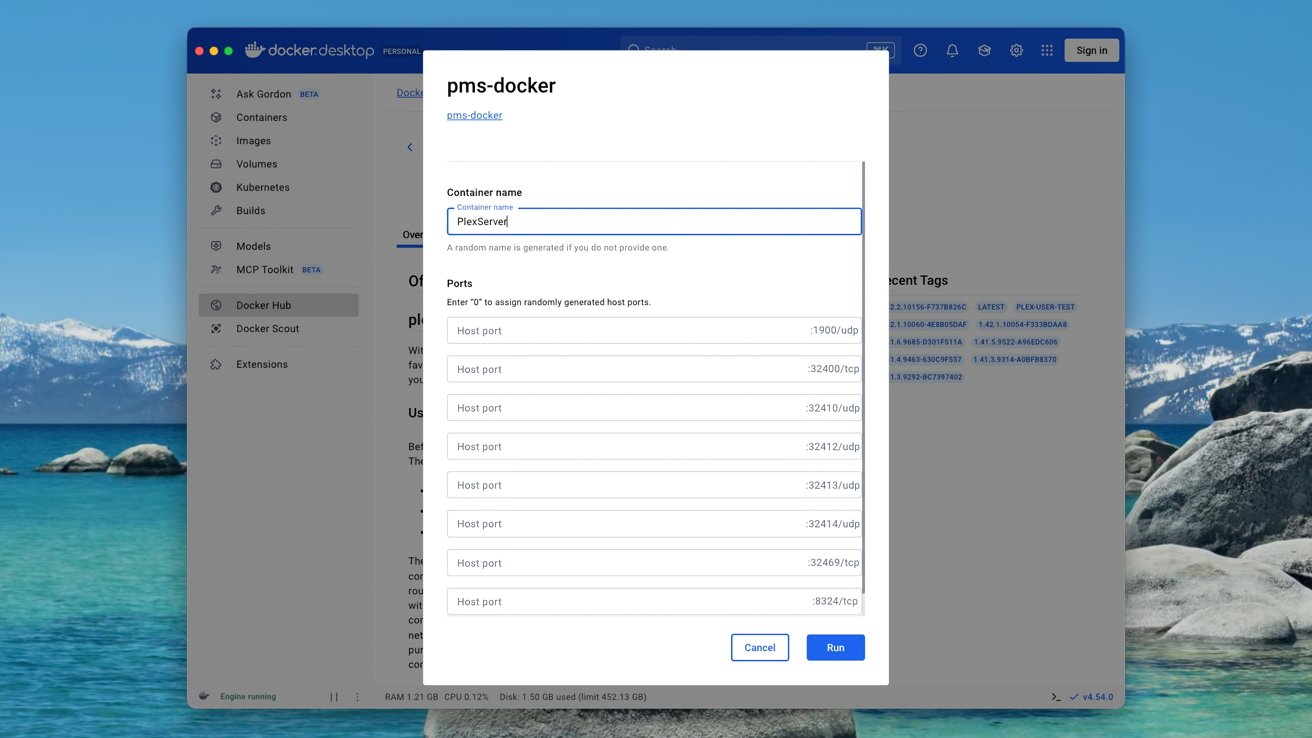
Don't skip setting up ports in Docker Desktop. You want to be specific and not set them to be random.
The ports are important and should be set up manually, since this will determine how ports on the Mac's network connection map to the counterparts used by the container itself. For example, you may want port 32400 to line up with the Plex container's version, if you want to access it.
After hitting Run again, the server will launch.
At this point, you should be able to access whatever the container is running, depending on how it functions. For example, for Plex, you can start setting up the server by opening a browser and heading to http://localhost:32400/web if you had set up port 32400 will take you to the initial setup page for the server.
Be aware that Docker's containers are a means to install containerized applications and manage those containers, not manage the actual application itself. If you have to deal with issues running an app, you're basically going to use some Google-fu to track down fixes.
For example, while you can set up Plex, you will probably see a "Not Authorized" warning requiring you to claim the server with Plex itself before you can properly use it.
Managing the containerThere are obviously many things you can do to make your own and configure containers however you please, as is the case for sophisticated network and server tools. But, as a basic introduction, we will be covering the more general elements in Docker Desktop.
Once you have a container set up, the Containers tab will show what containers are running and essential details about it. This includes the container ID, the image it's using, mapped ports, CPU usage, network usage, and how long it's running.
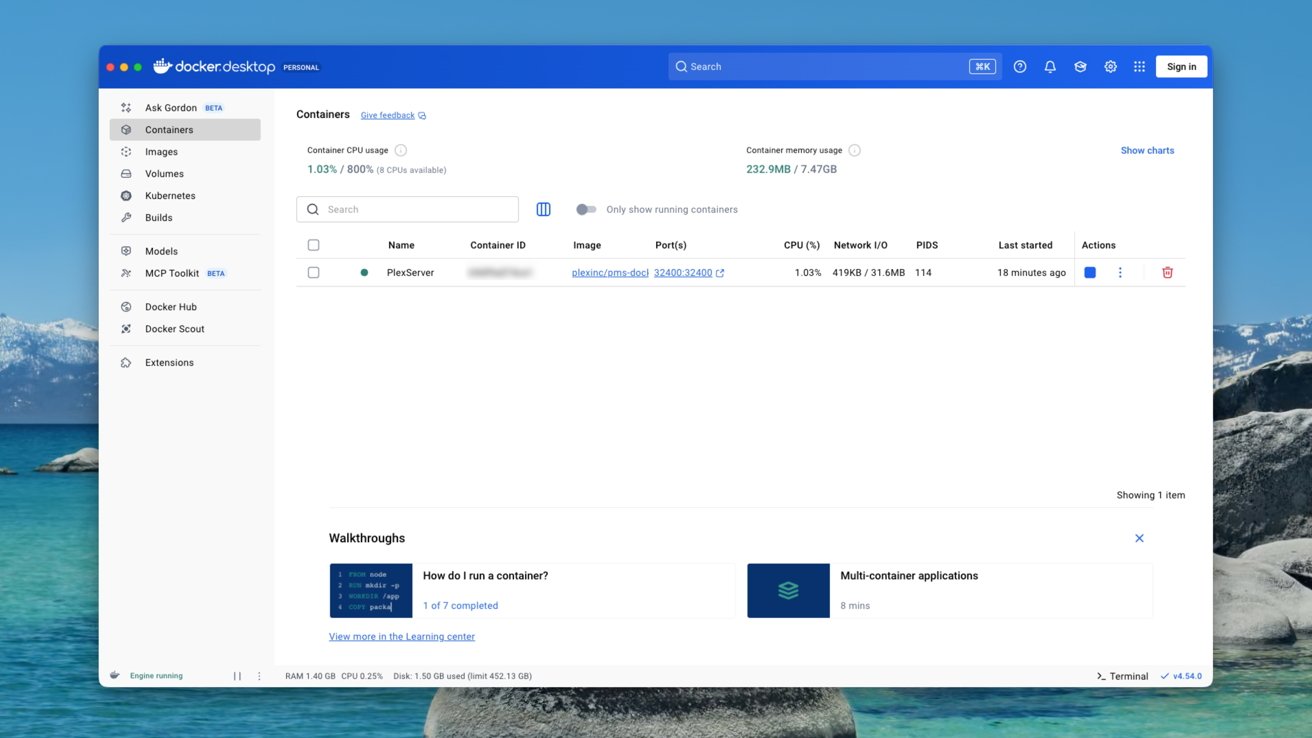
The main Docker Desktop container view
There are also controls for stopping the container, to view more details about it, to see the files of the container, and a trash can to delete it.
Clicking on a container brings up more options. Logs are, obviously, logs, while Inspect lets you see the configuration file for the container, and Stats provides a more detailed view of how the server is running.
The Images section will list your images, which can be used to create more containers. That also means being able to set up multiple containers using the same image, such as more than one web server instance.
Volumes are persistent data stores, namely disk volumes used by the containers. It's where the containers store files, which can also be used across multiple containerized services.
Builds is where you want to go if you want to create container images for your own code or application setups. If there isn't an available container, or one that doesn't meet your specific requirements, you can make your own Dockerfile that can build an image for future use.
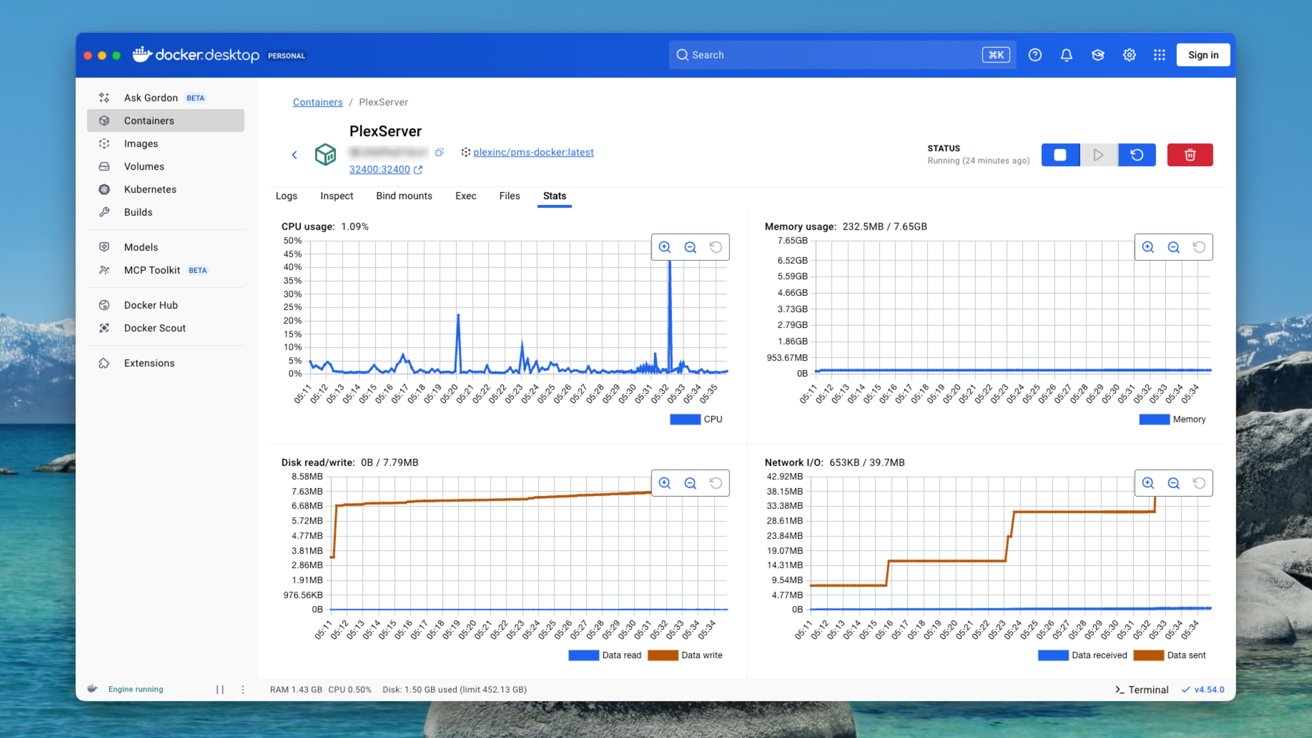
Stats are available, showing how a Docker Desktop instance is running.
Further down the list of tabs is the previously-mentioned Docker Hub. There's also Docker Scout if you want to analyze images you download or create for vulnerabilities, while Extensions add more tools for managing your containers.
Models is an area for running AI models on your Mac in a containerized environment. MCP Toolkit lets you install Model Context Protocol servers, applications that interact with AI large language models.
There are more Docker settings under the cog in the top-right corner, which can manage if Docker Desktop runs on startup. You will probably want this turned on if you set up servers that others on the network rely on, but keep it off if it's only for temporarily active container instances when you want them running.
It also lets you limit resource usage, like memory and storage, so Docker instances are restricted to using so much. If you plan to continue using the Mac as a normal desktop while still running Docker, you really should configure this carefully, or else your Mac may end up being a bit too slow while others use Docker-provided services.
Again, ideally, you should get this all running on a spare Mac, so your primary workstation isn't greatly affected by other users.
Powerful in the right handsThis explainer only scrapes the surface of what you can do with Docker Desktop and Docker in general. It's certainly a tool intended for more advanced users, and is probably overkill for many domestic users.
Yes, you can set up a Plex server on your Mac in a container, but you may have an easier time simply installing the Plex server software directly. Especially if you don't want to deal with any of the benefits of containerization.
For those who are familiar with setting up and running servers, Docker Desktop offers another way to get things done. It has a significant learning curve, certainly, but for those who take a deeper dive, it could be an essential software utility for their computing setup.